
What are roles, and how do I build one with custom permissions?
A role is a bundle of permissions you assign to a group of employees instead of configuring each one separately. "Accountant", "cashier" and "sales manager" are all roles, each with what it opens and what it is barred from.
Steps
- Open General Settings → Roles — image 1 — to see the ready-made roles. Review them before creating a new one; editing an existing one may be enough.
- Press Add Role — image 2.
- Role name: the internal name in the system, letters, digits and underscores only (sales_supervisor for instance).
- Arabic name and English name: what users see in the roles list.
- Under Permissions, move between the module tabs and tick what this role needs. Each screen has separate permissions: view, create, edit and delete.
- Use the search box above the permissions to jump quickly, and select all to tick a whole tab.
- Save, then assign the role to users from the Users screen.
Notes
- Start with the minimum and add on demand. Starting with everything and stripping it back leaves gaps you forget about.
- Always keep view apart from delete; the costliest mistakes are accidental deletions.
- More than one role can be assigned to a single user, and their permissions combine.
- After editing a role, the user must log out and back in to see the effect.
- The role decides which screens they open; which data they see inside them is decided by the branch tied to their account.
Screenshots
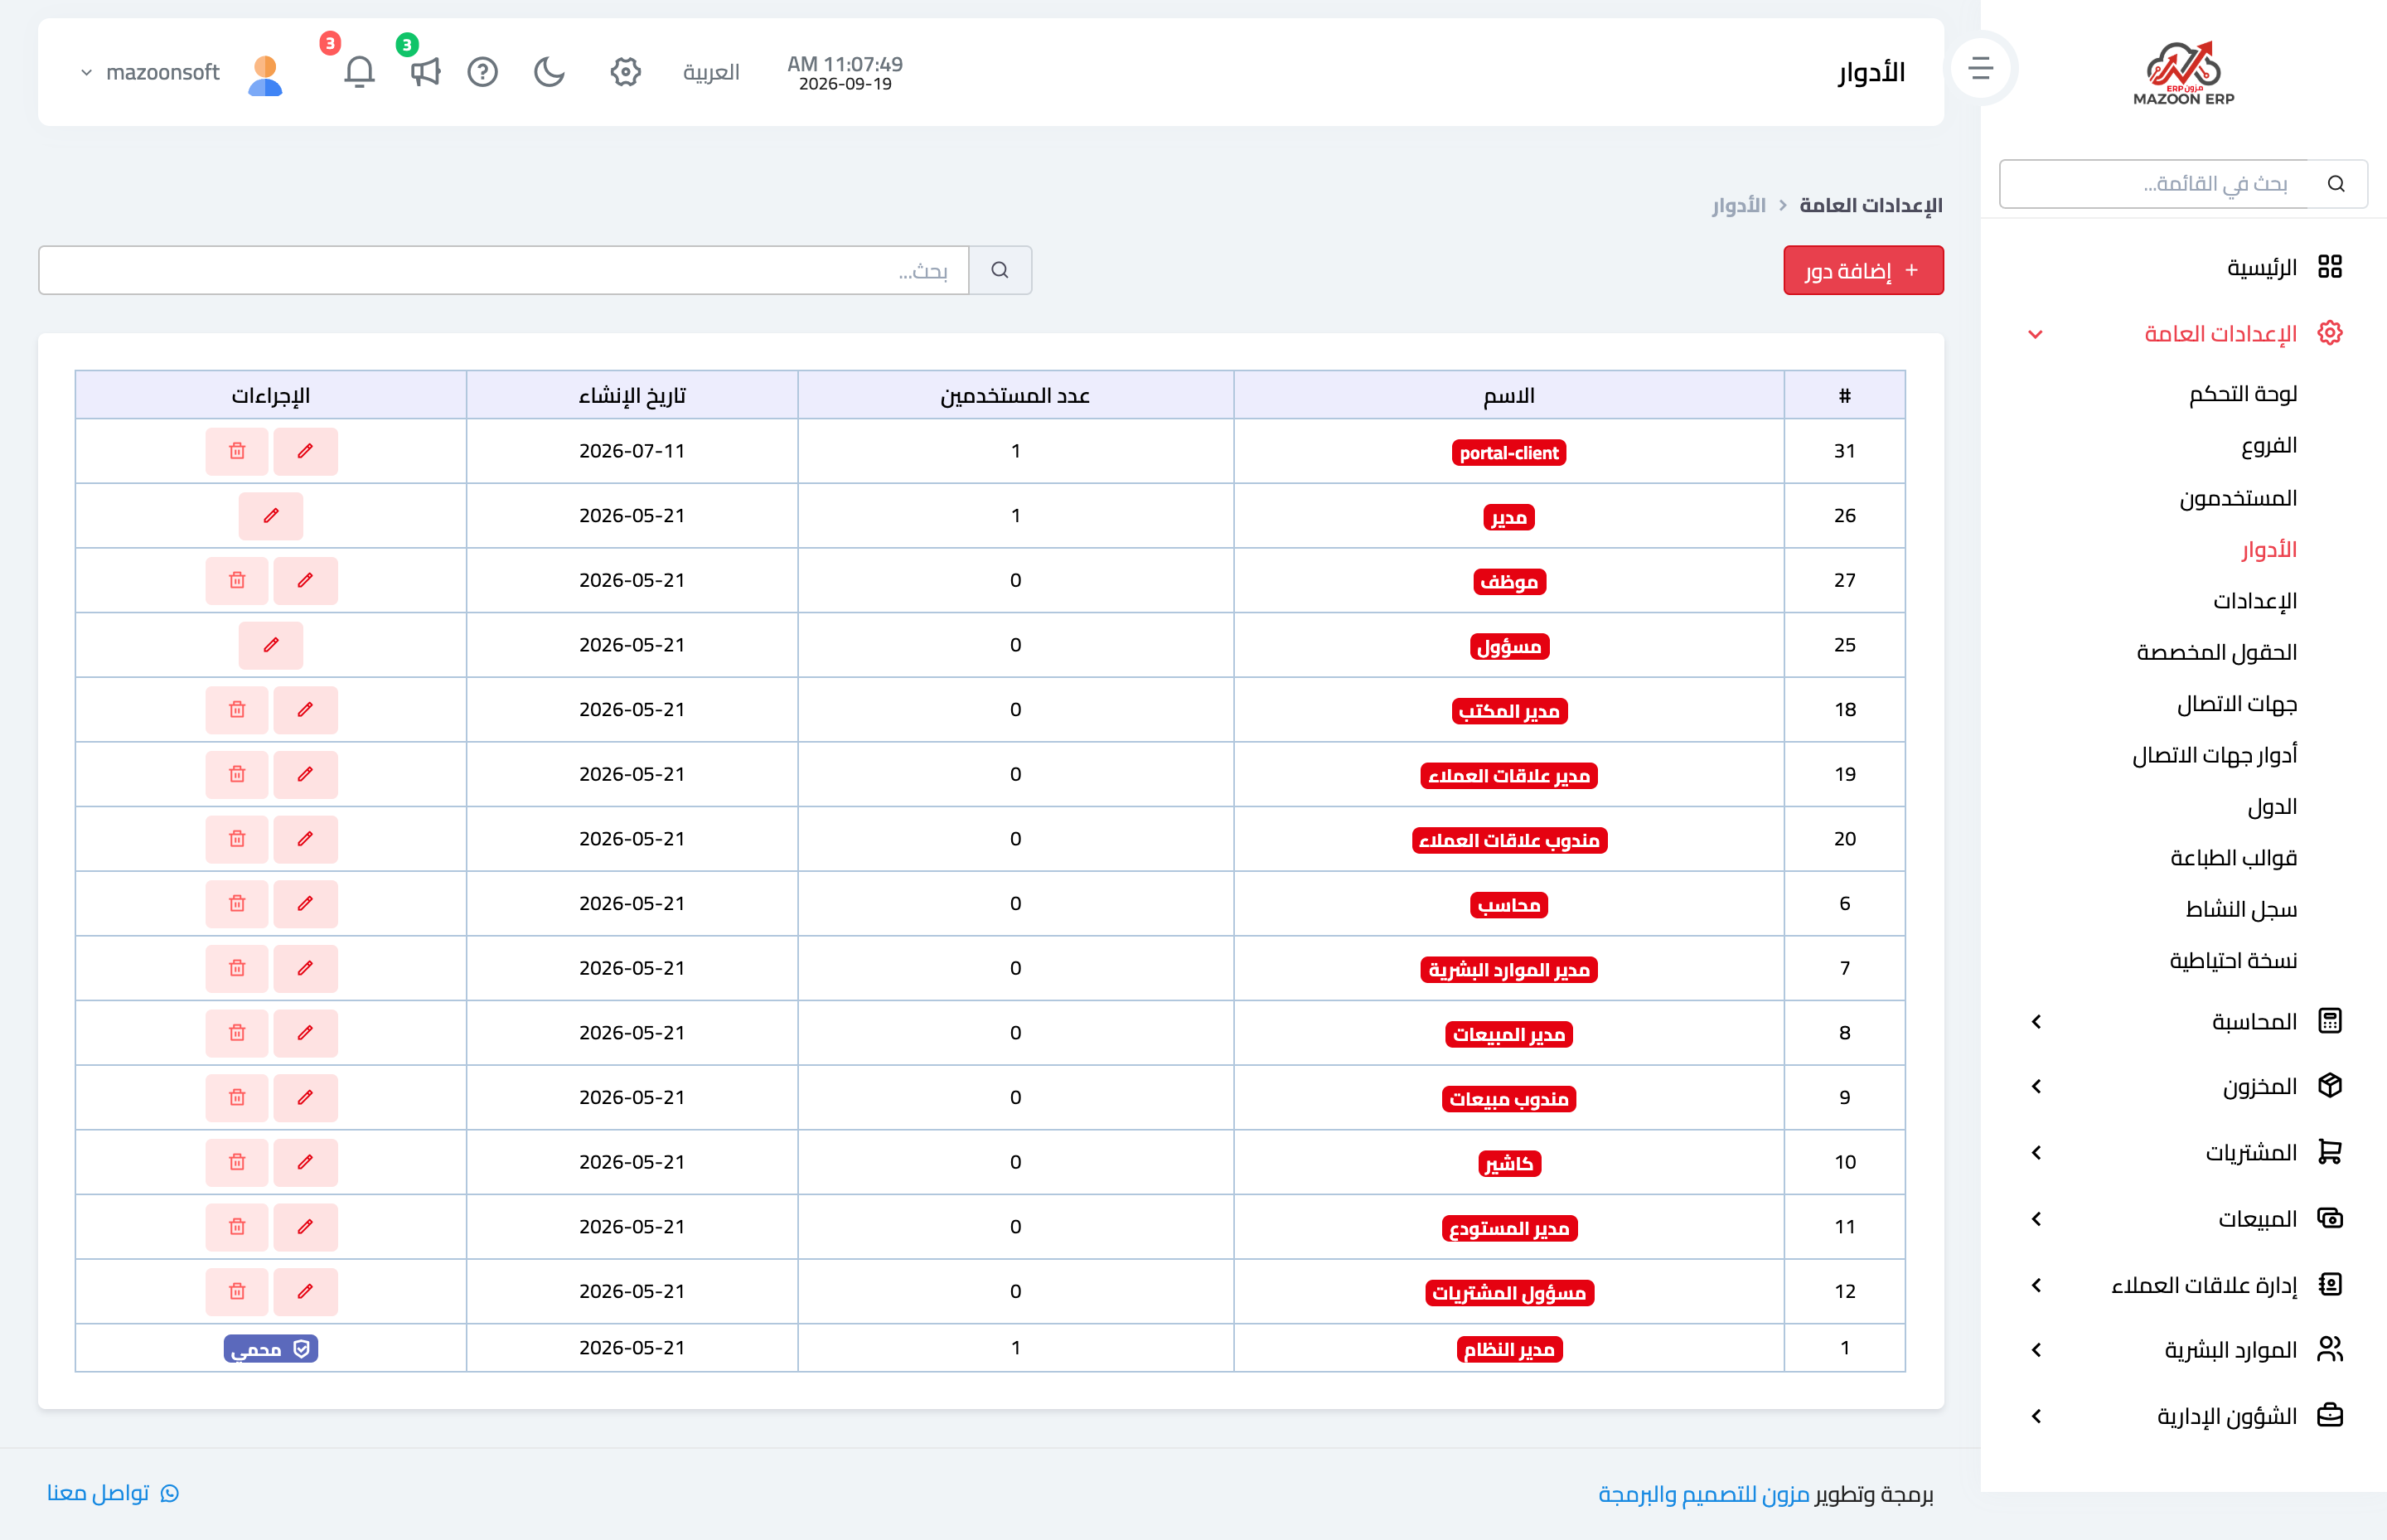
Figure 1
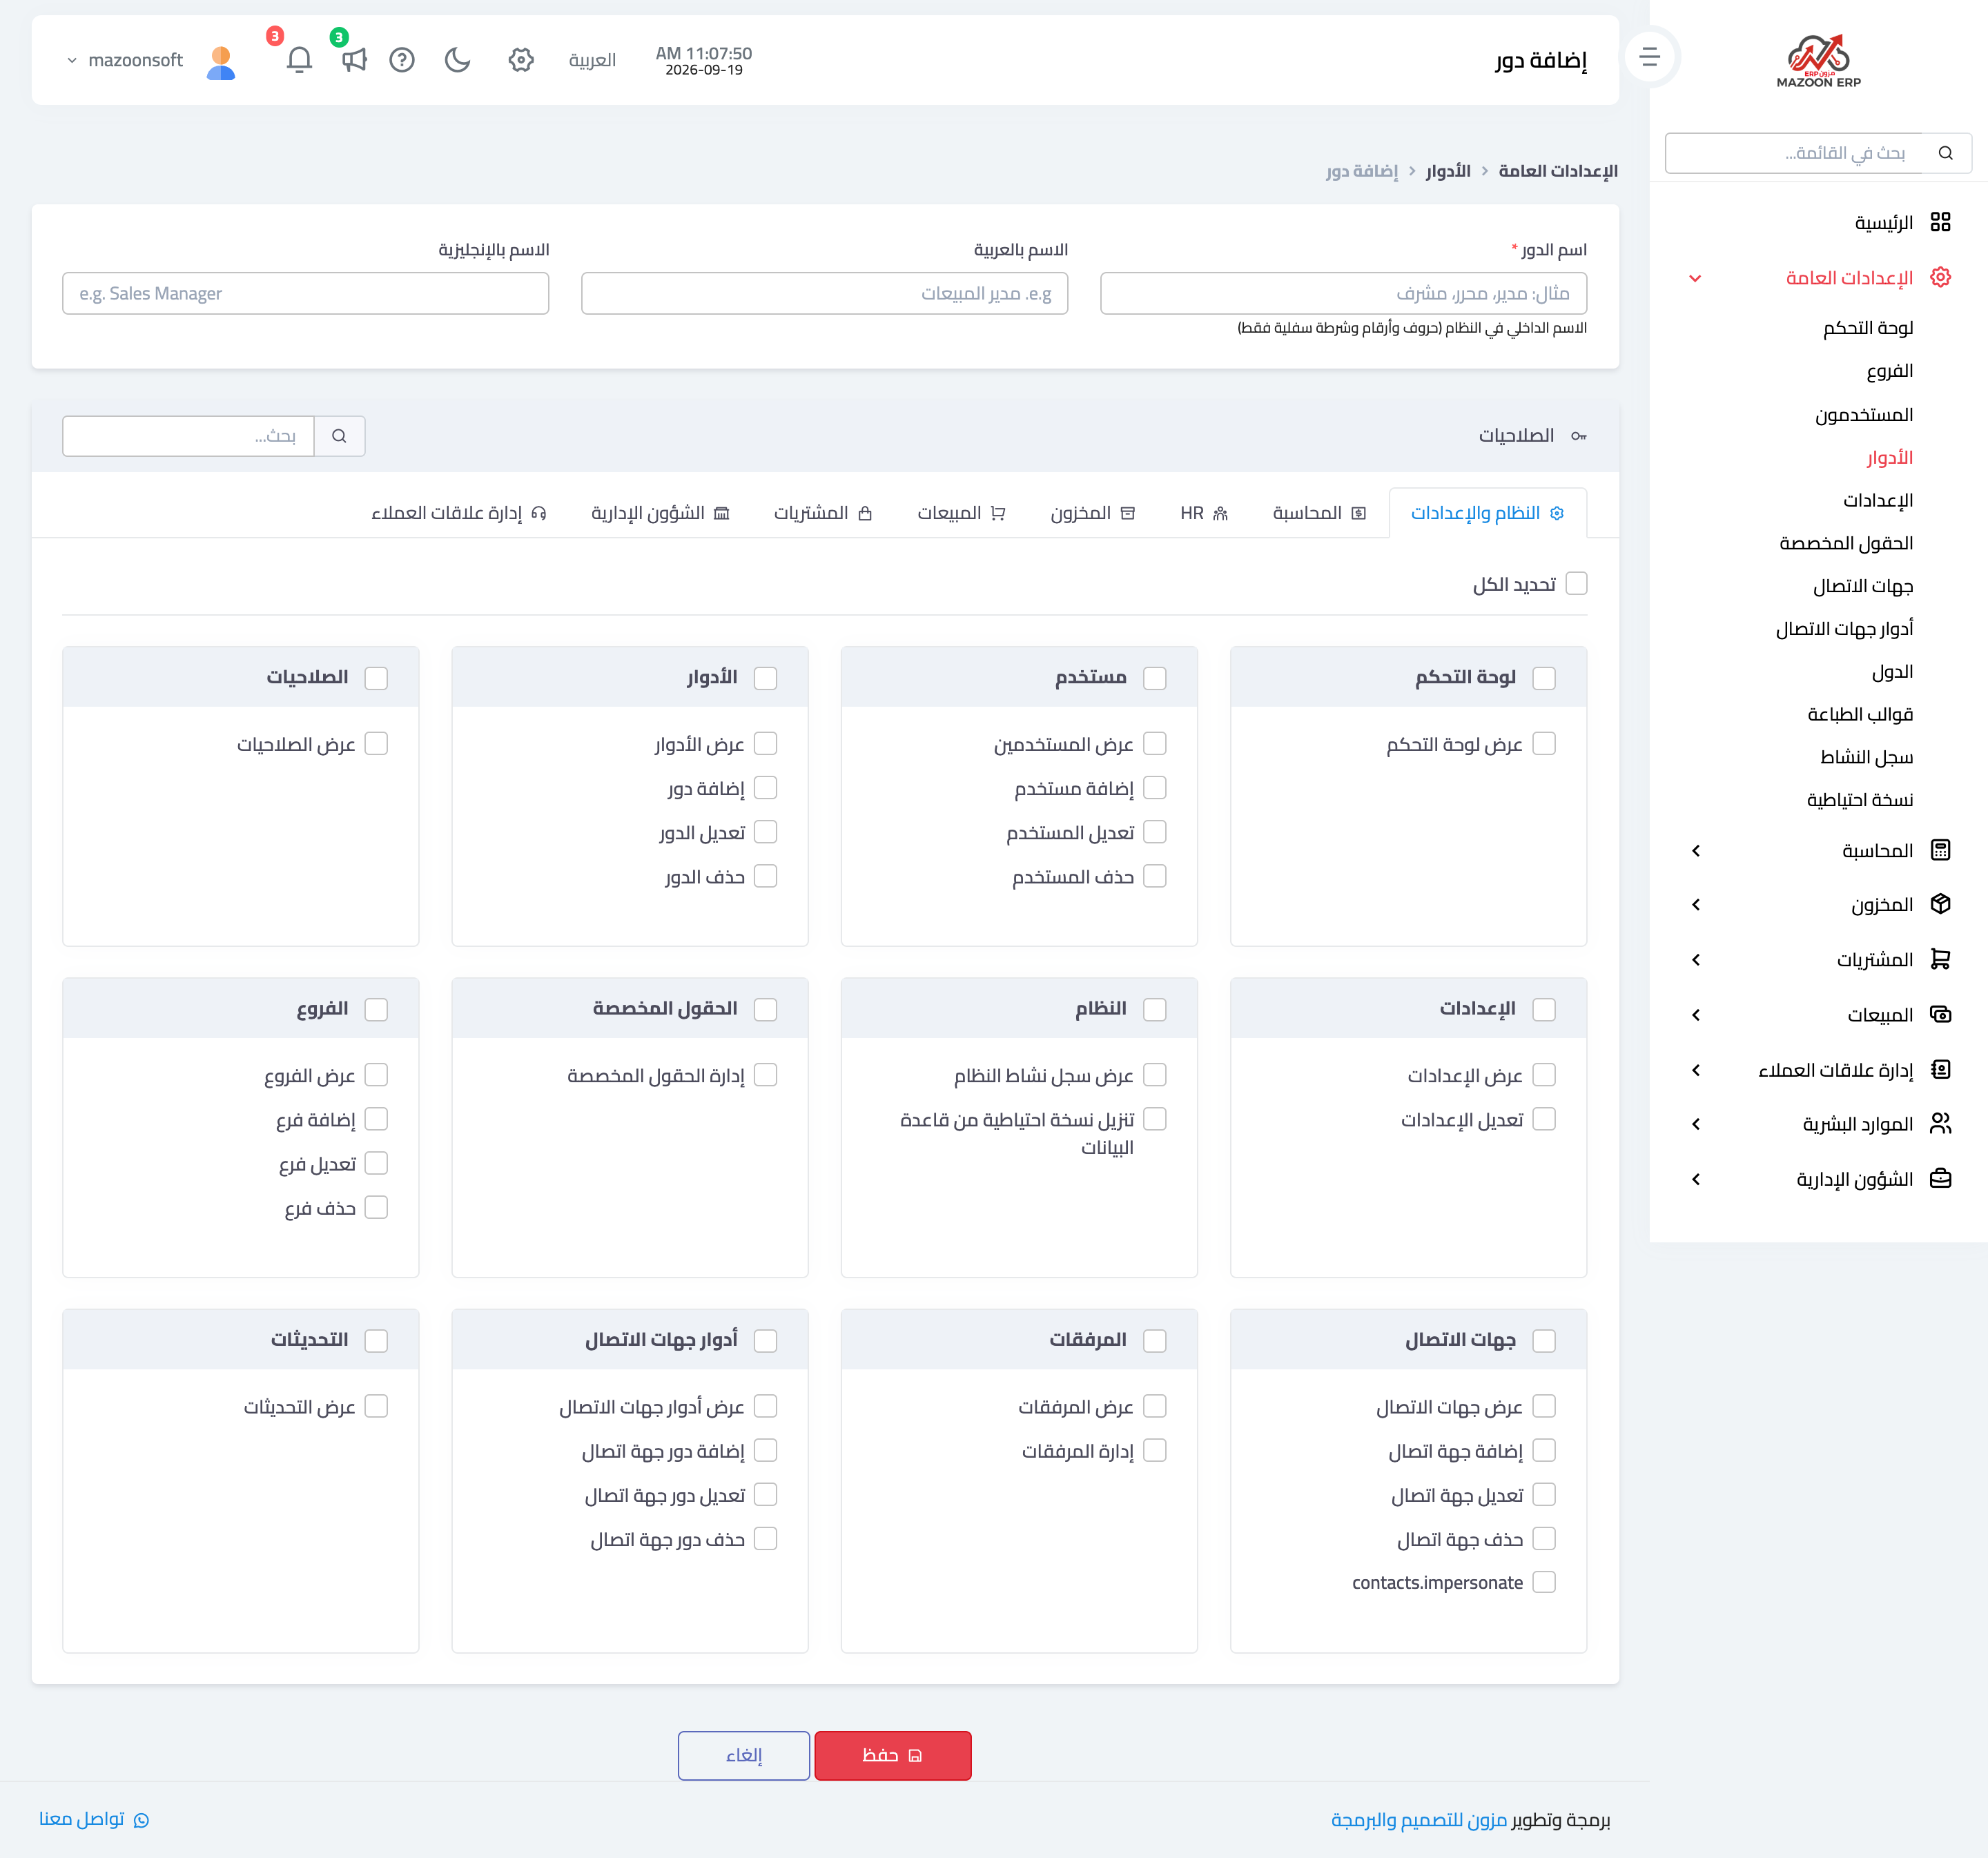
Figure 2
Try what you just read on your own data
Open a free 7-day trial — no credit card, with your own company link in minutes.