
How do I set the organisation details, logo and login background?
This is the first screen you open in a new system: your organisation's name, logo and contact details. What you enter here appears in the system header and on every document you print.
Steps
- Open General Settings → Settings → Company Information — image 1.
- Project / company name: the name shown in the system header and on printed documents. Write it as you want it read on an invoice.
- Phone, e-mail and address: your organisation's contact details, which also appear on printed documents.
- Logo: an optional image up to 2MB in PNG, JPG, GIF or WEBP. Pick one with a transparent background so it looks clean everywhere.
- Login page background: an optional image up to 5MB, changing the page your team sees every morning.
- Commercial register and tax number: these appear on official documents, and the tax number is a precondition for enabling e-invoicing.
- Save. The current logo appears under the upload field so you can confirm the right image was loaded.
Notes
- These details are read at print time, not at save time, so any edit is reflected on every document you print afterwards — old ones included.
- The header and footer of printed documents are configured under Print Templates, a separate screen from this one.
- An oversized logo slows every page; an image 300–600 pixels wide is plenty.
- These settings apply to the whole organisation and everyone sees them, unlike language and dark mode which are per user, per browser.
Screenshots
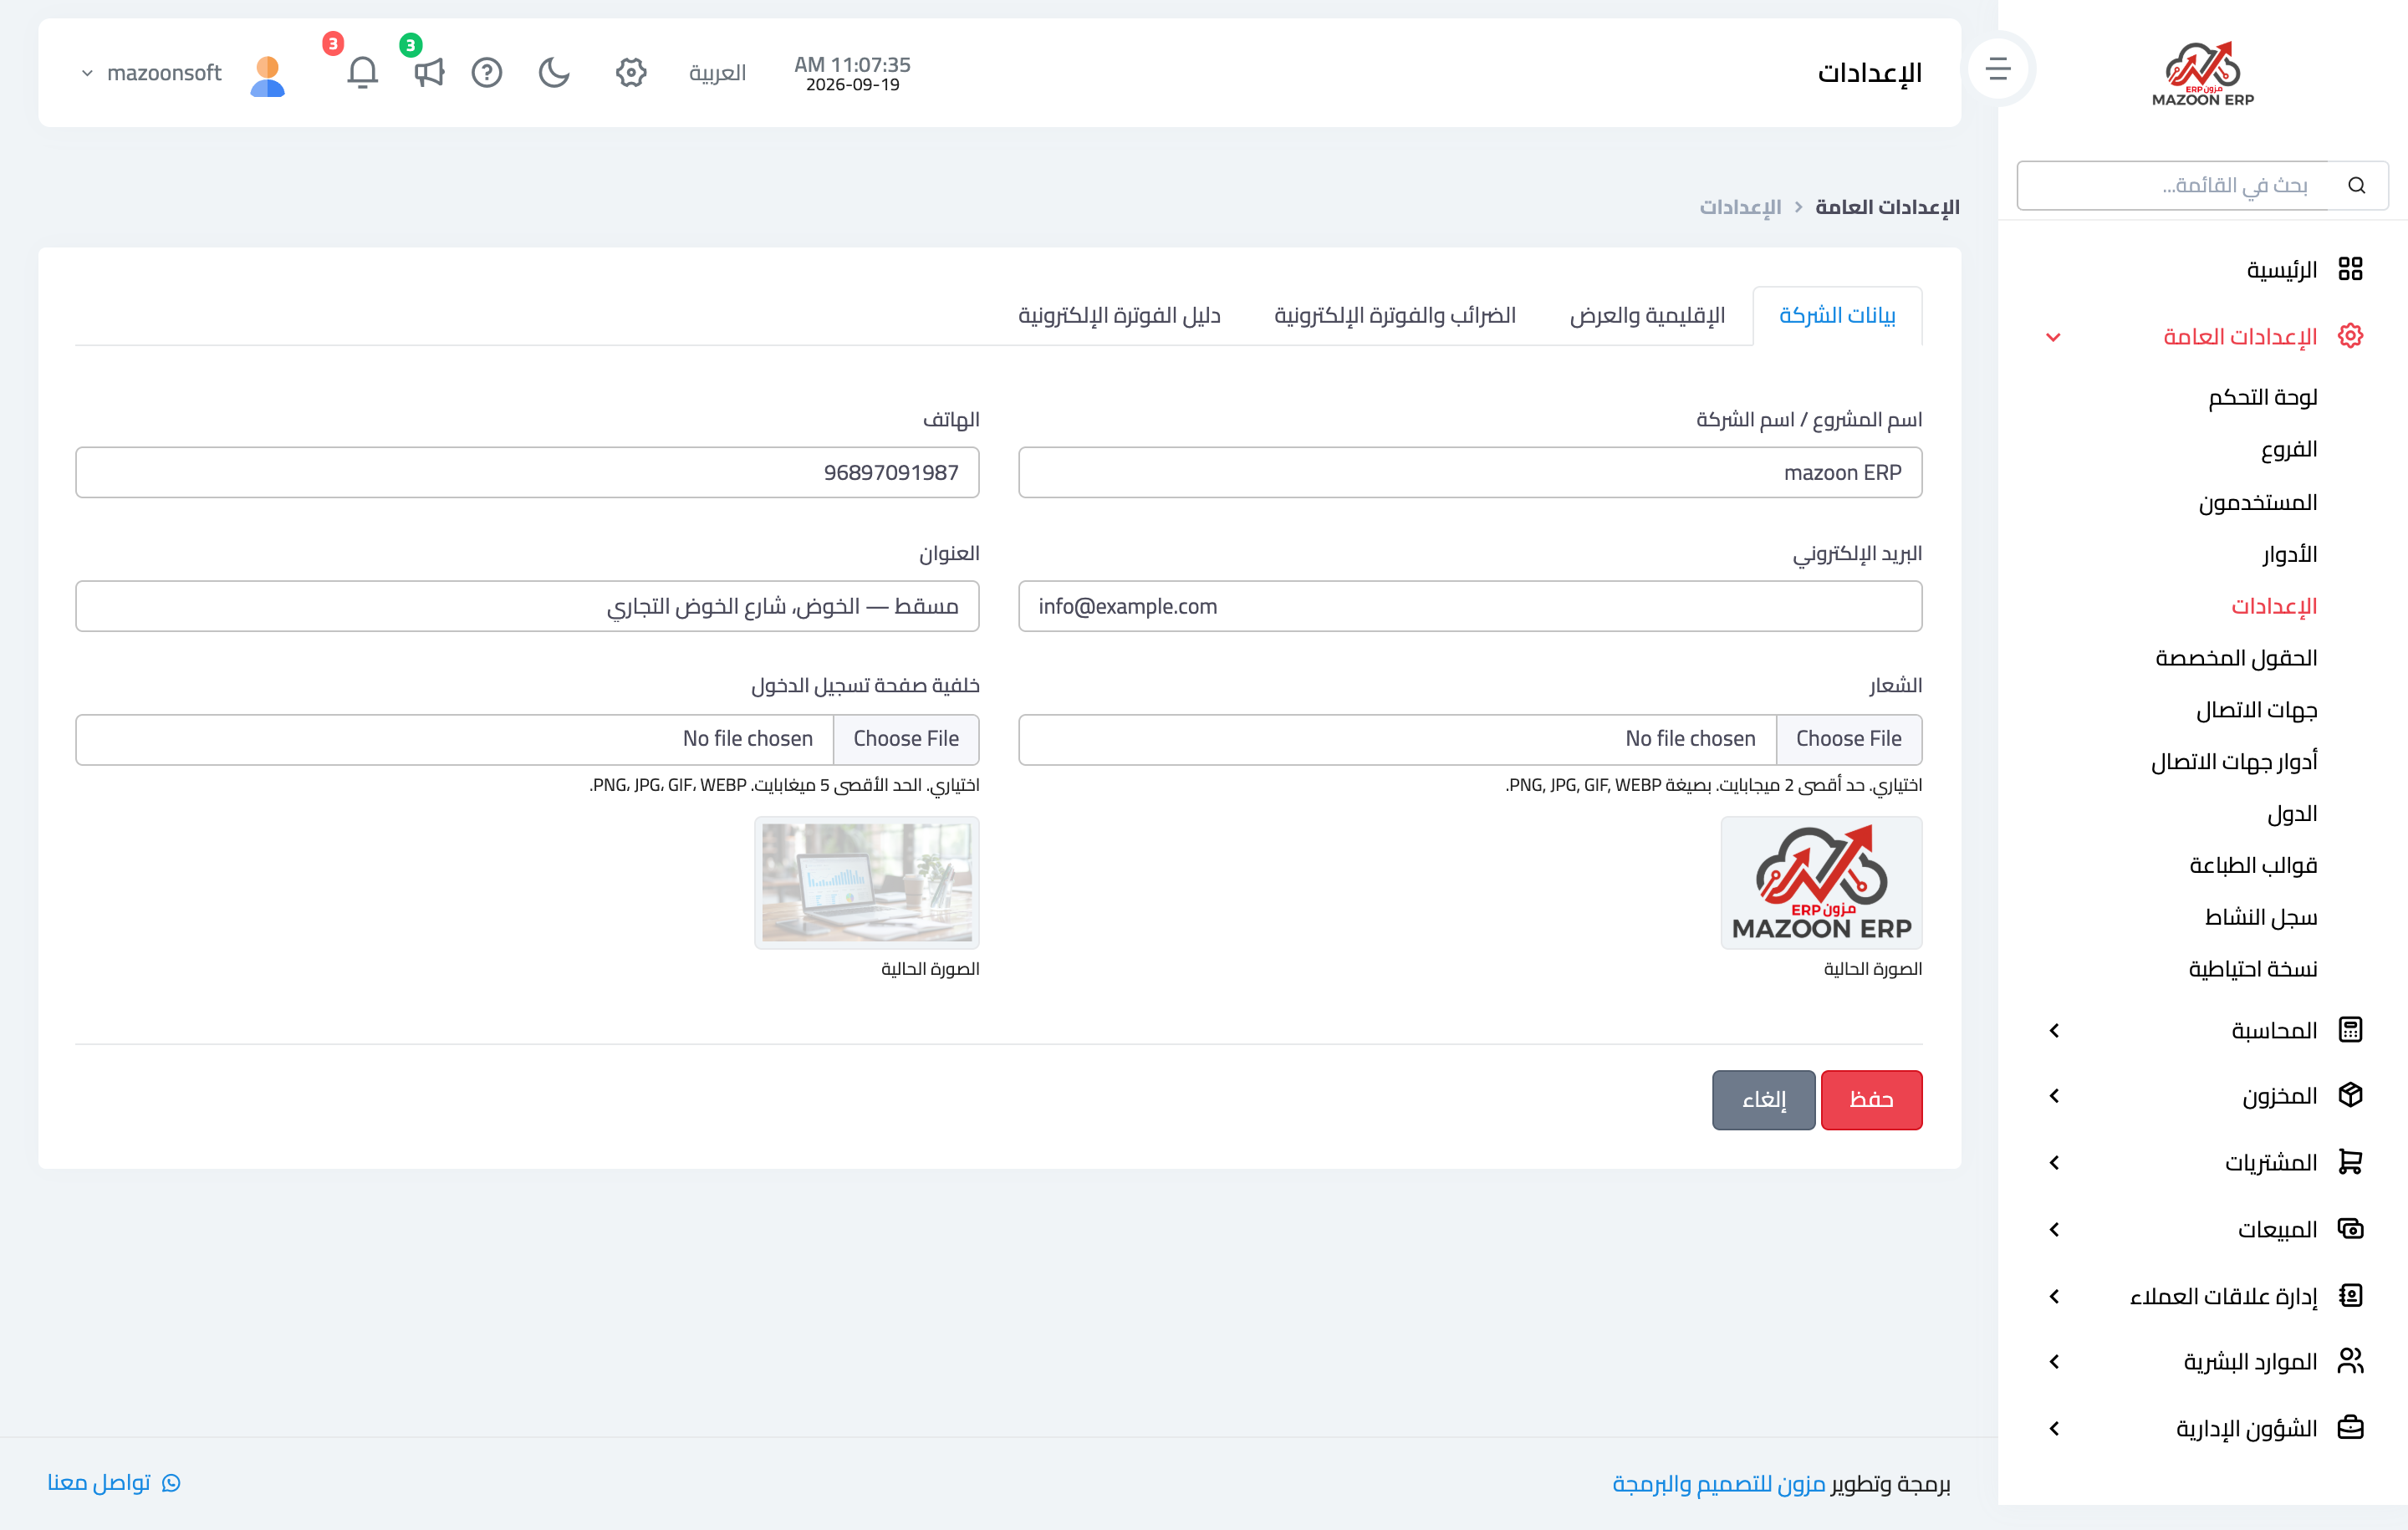
Figure 1
Try what you just read on your own data
Open a free 7-day trial — no credit card, with your own company link in minutes.