
How do I change the print letterhead and stamp on documents?
Everything the system prints — an invoice, a voucher, a quotation, a contract — goes through a single print template that sets the header, the footer and the stamp. Change the template once and every document changes with it.
Steps
- Open General Settings → Print Templates — image 1.
- To change the current template, press the edit icon on its row.
- To create a new one, press + Add Template.
- Fill in the template name and upload the three images:
- Header image — your logo and details at the top of the page.
- Footer image — address, phone and email at the bottom.
- Official stamp image — shown in the signature and stamp box.
- Press Save.
- If you keep more than one template, press Set as default on the one that should be used automatically.
Notes
- Each image may be up to 2 MB, in the usual image formats.
- The header is rendered across the full page width, so use a wide image proportioned for A4 — a tall image will eat a large part of the document.
- The default template is what every document prints with unless you choose otherwise.
- When more than one template exists, a dropdown appears next to the Print button in the preview screen so you can switch before printing — useful when you run more than one brand or a branch with its own letterhead.
- The default template cannot be deleted; make another one default first.
- In Administrative Affairs, outgoing letters have a Print (Blank Template) button that hides the header and footer so you can print onto pre-printed letterhead paper.
Screenshots
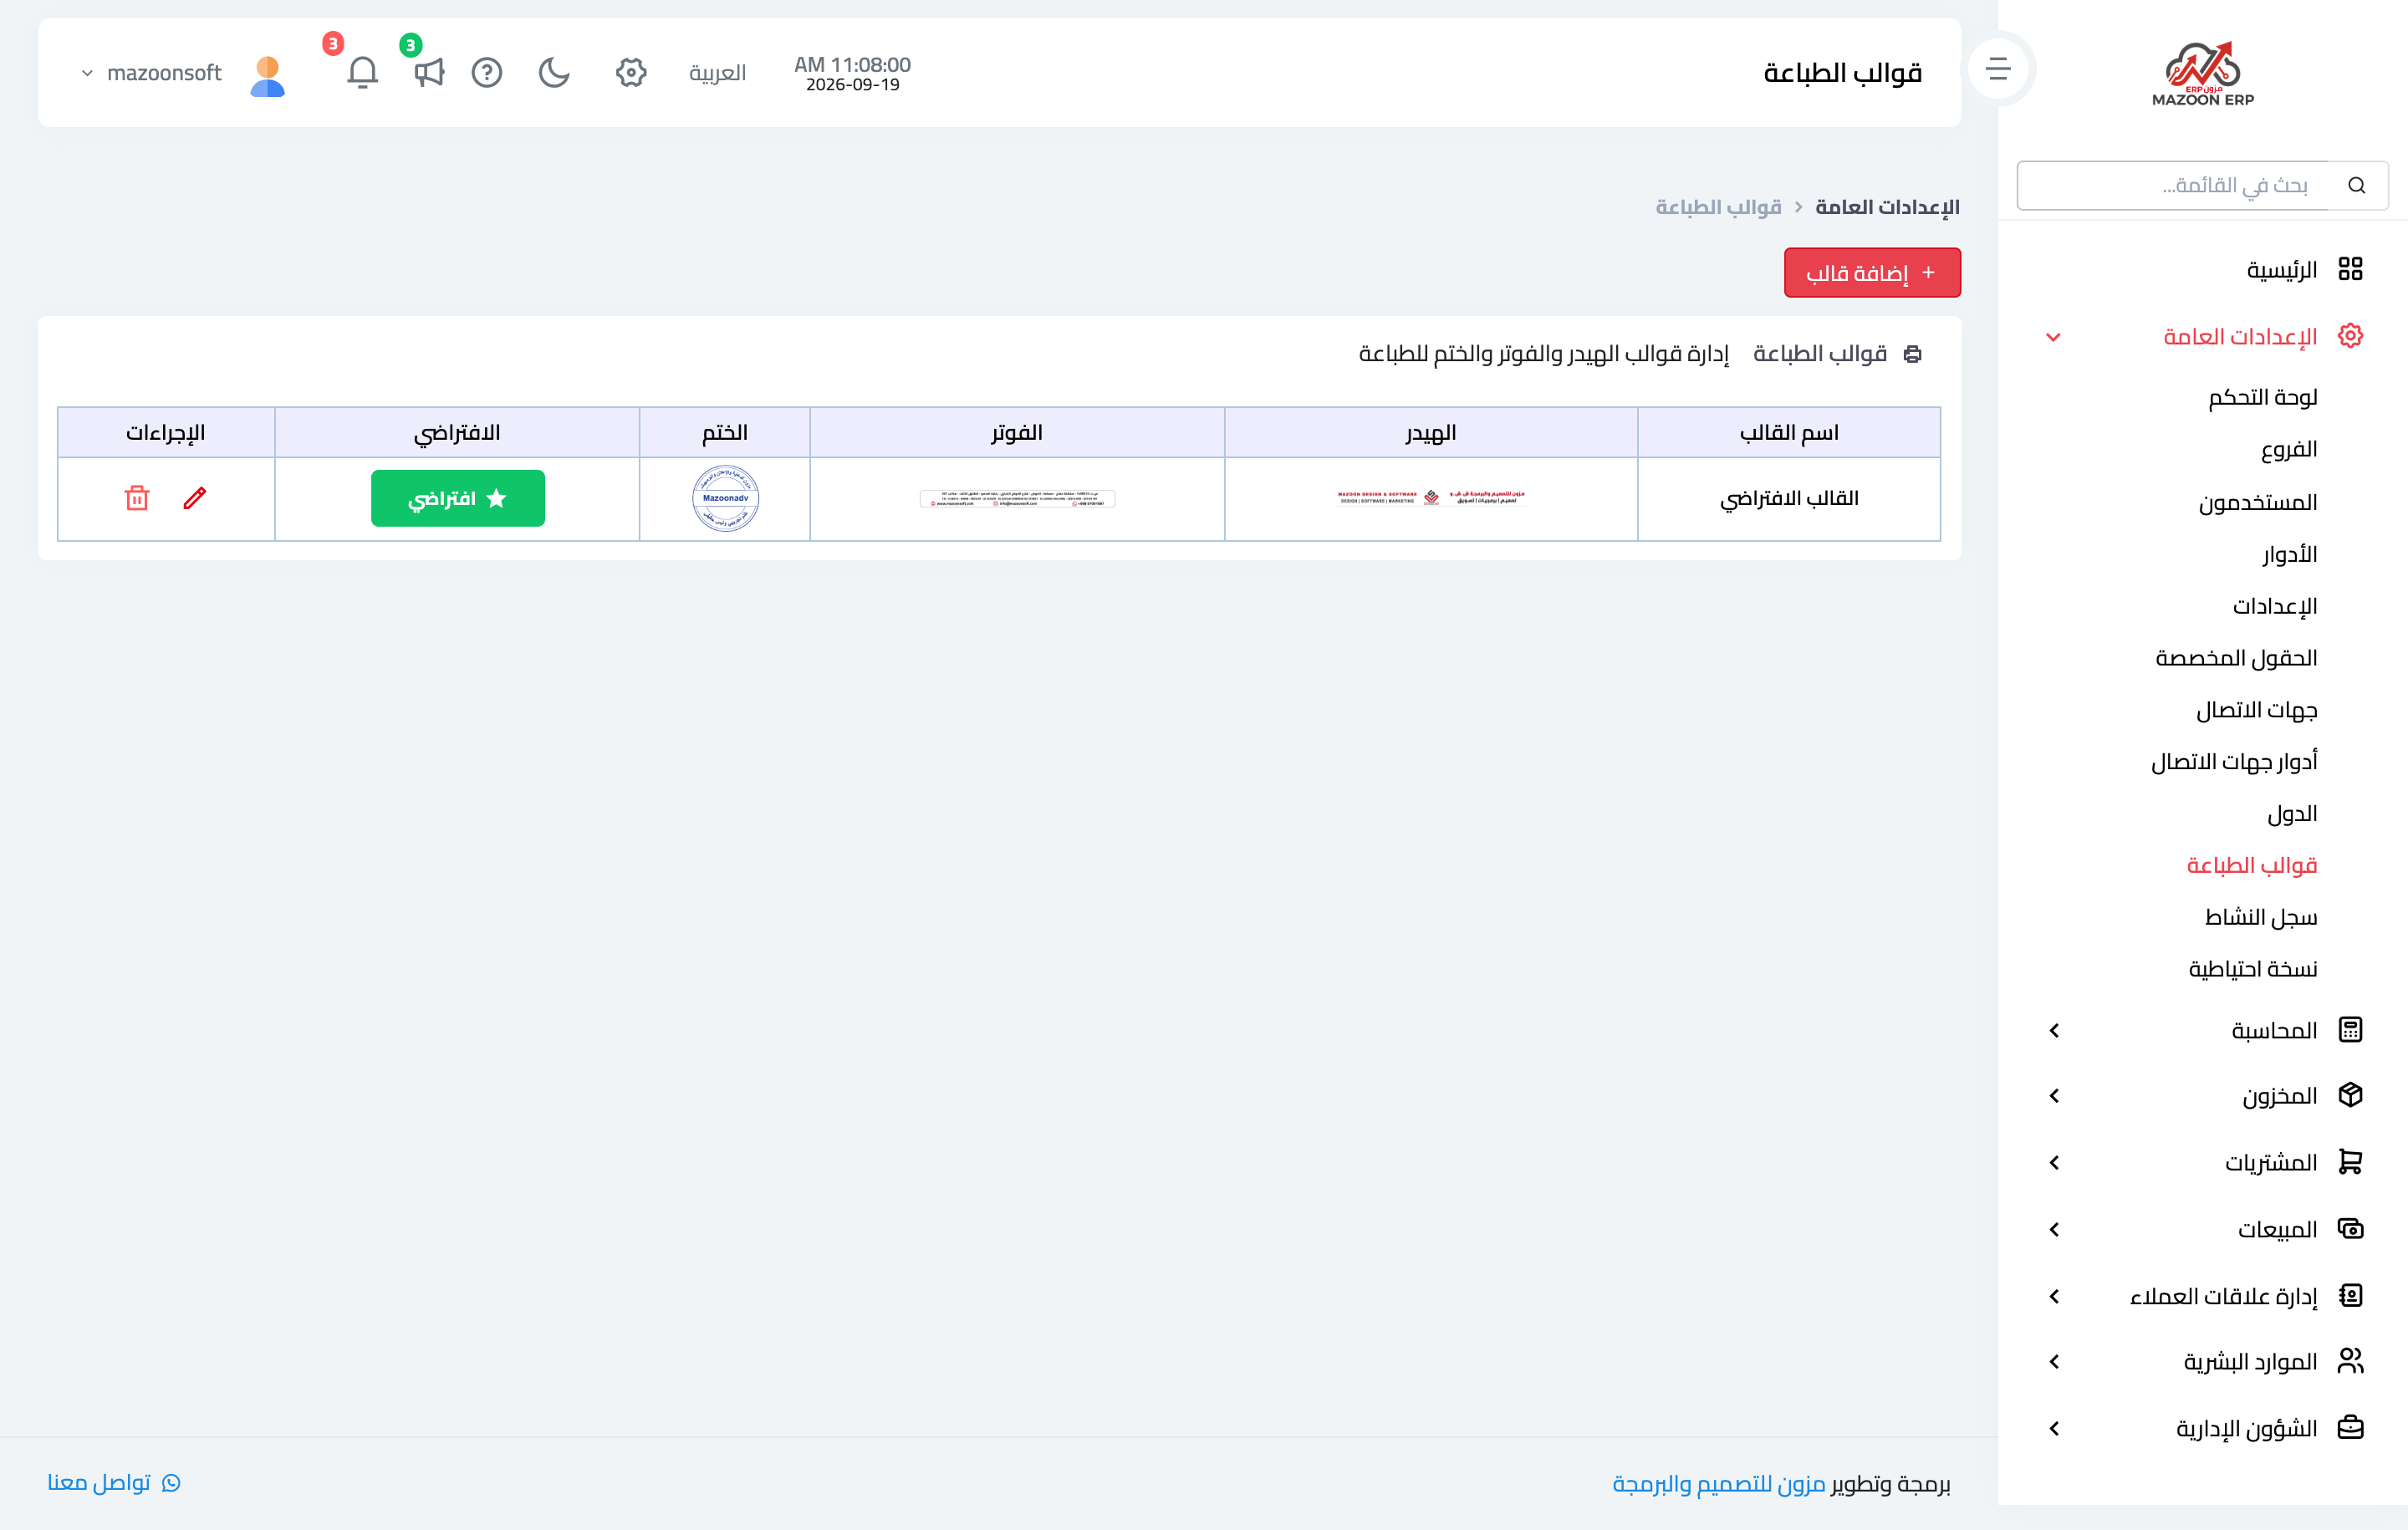
Figure 1
Try what you just read on your own data
Open a free 7-day trial — no credit card, with your own company link in minutes.