
How do I add a new user with permissions?
A user in the system is not given permissions one by one; the user is assigned a role, and the role is what carries the permissions. So the right order is: prepare the role first, then add the user and assign them to it.
First: prepare the role
- Open General settings → Roles — Figure 1 — and review the existing roles before creating a new one.
- If a suitable role exists, press Edit; otherwise press Add role and give it a name that describes the job, not the person (Accountant, Storekeeper, Cashier).
- On the role screen — Figure 2 — the permissions are grouped by module, and each screen has four: view, create, edit, delete.
- Enable only what the job actually needs, then Save.
Second: add the user
- Open General settings → Users — Figure 3 — then press Add user.
- Fill in the form — Figure 4: the name, the email address (which is the login), and the password with its confirmation.
- In the Roles field choose the role you prepared. More than one role can be assigned, and their permissions combine.
- In the Branch field: leave it on “all branches” for someone who works across them all, or tie them to a single branch so they see only its data.
- Leave Account status enabled, then Save.
Notes
- Do not grant the delete permission except to someone who genuinely needs it; most trouble comes from an unintended deletion.
- To stop an employee who has left, switch off Account status rather than deleting the user; deleting severs their link to the documents they recorded.
- Create a role per job, not per employee; five accountants need one role between them.
- After any change to a role’s permissions, the user must sign out and back in for it to take effect.
Screenshots
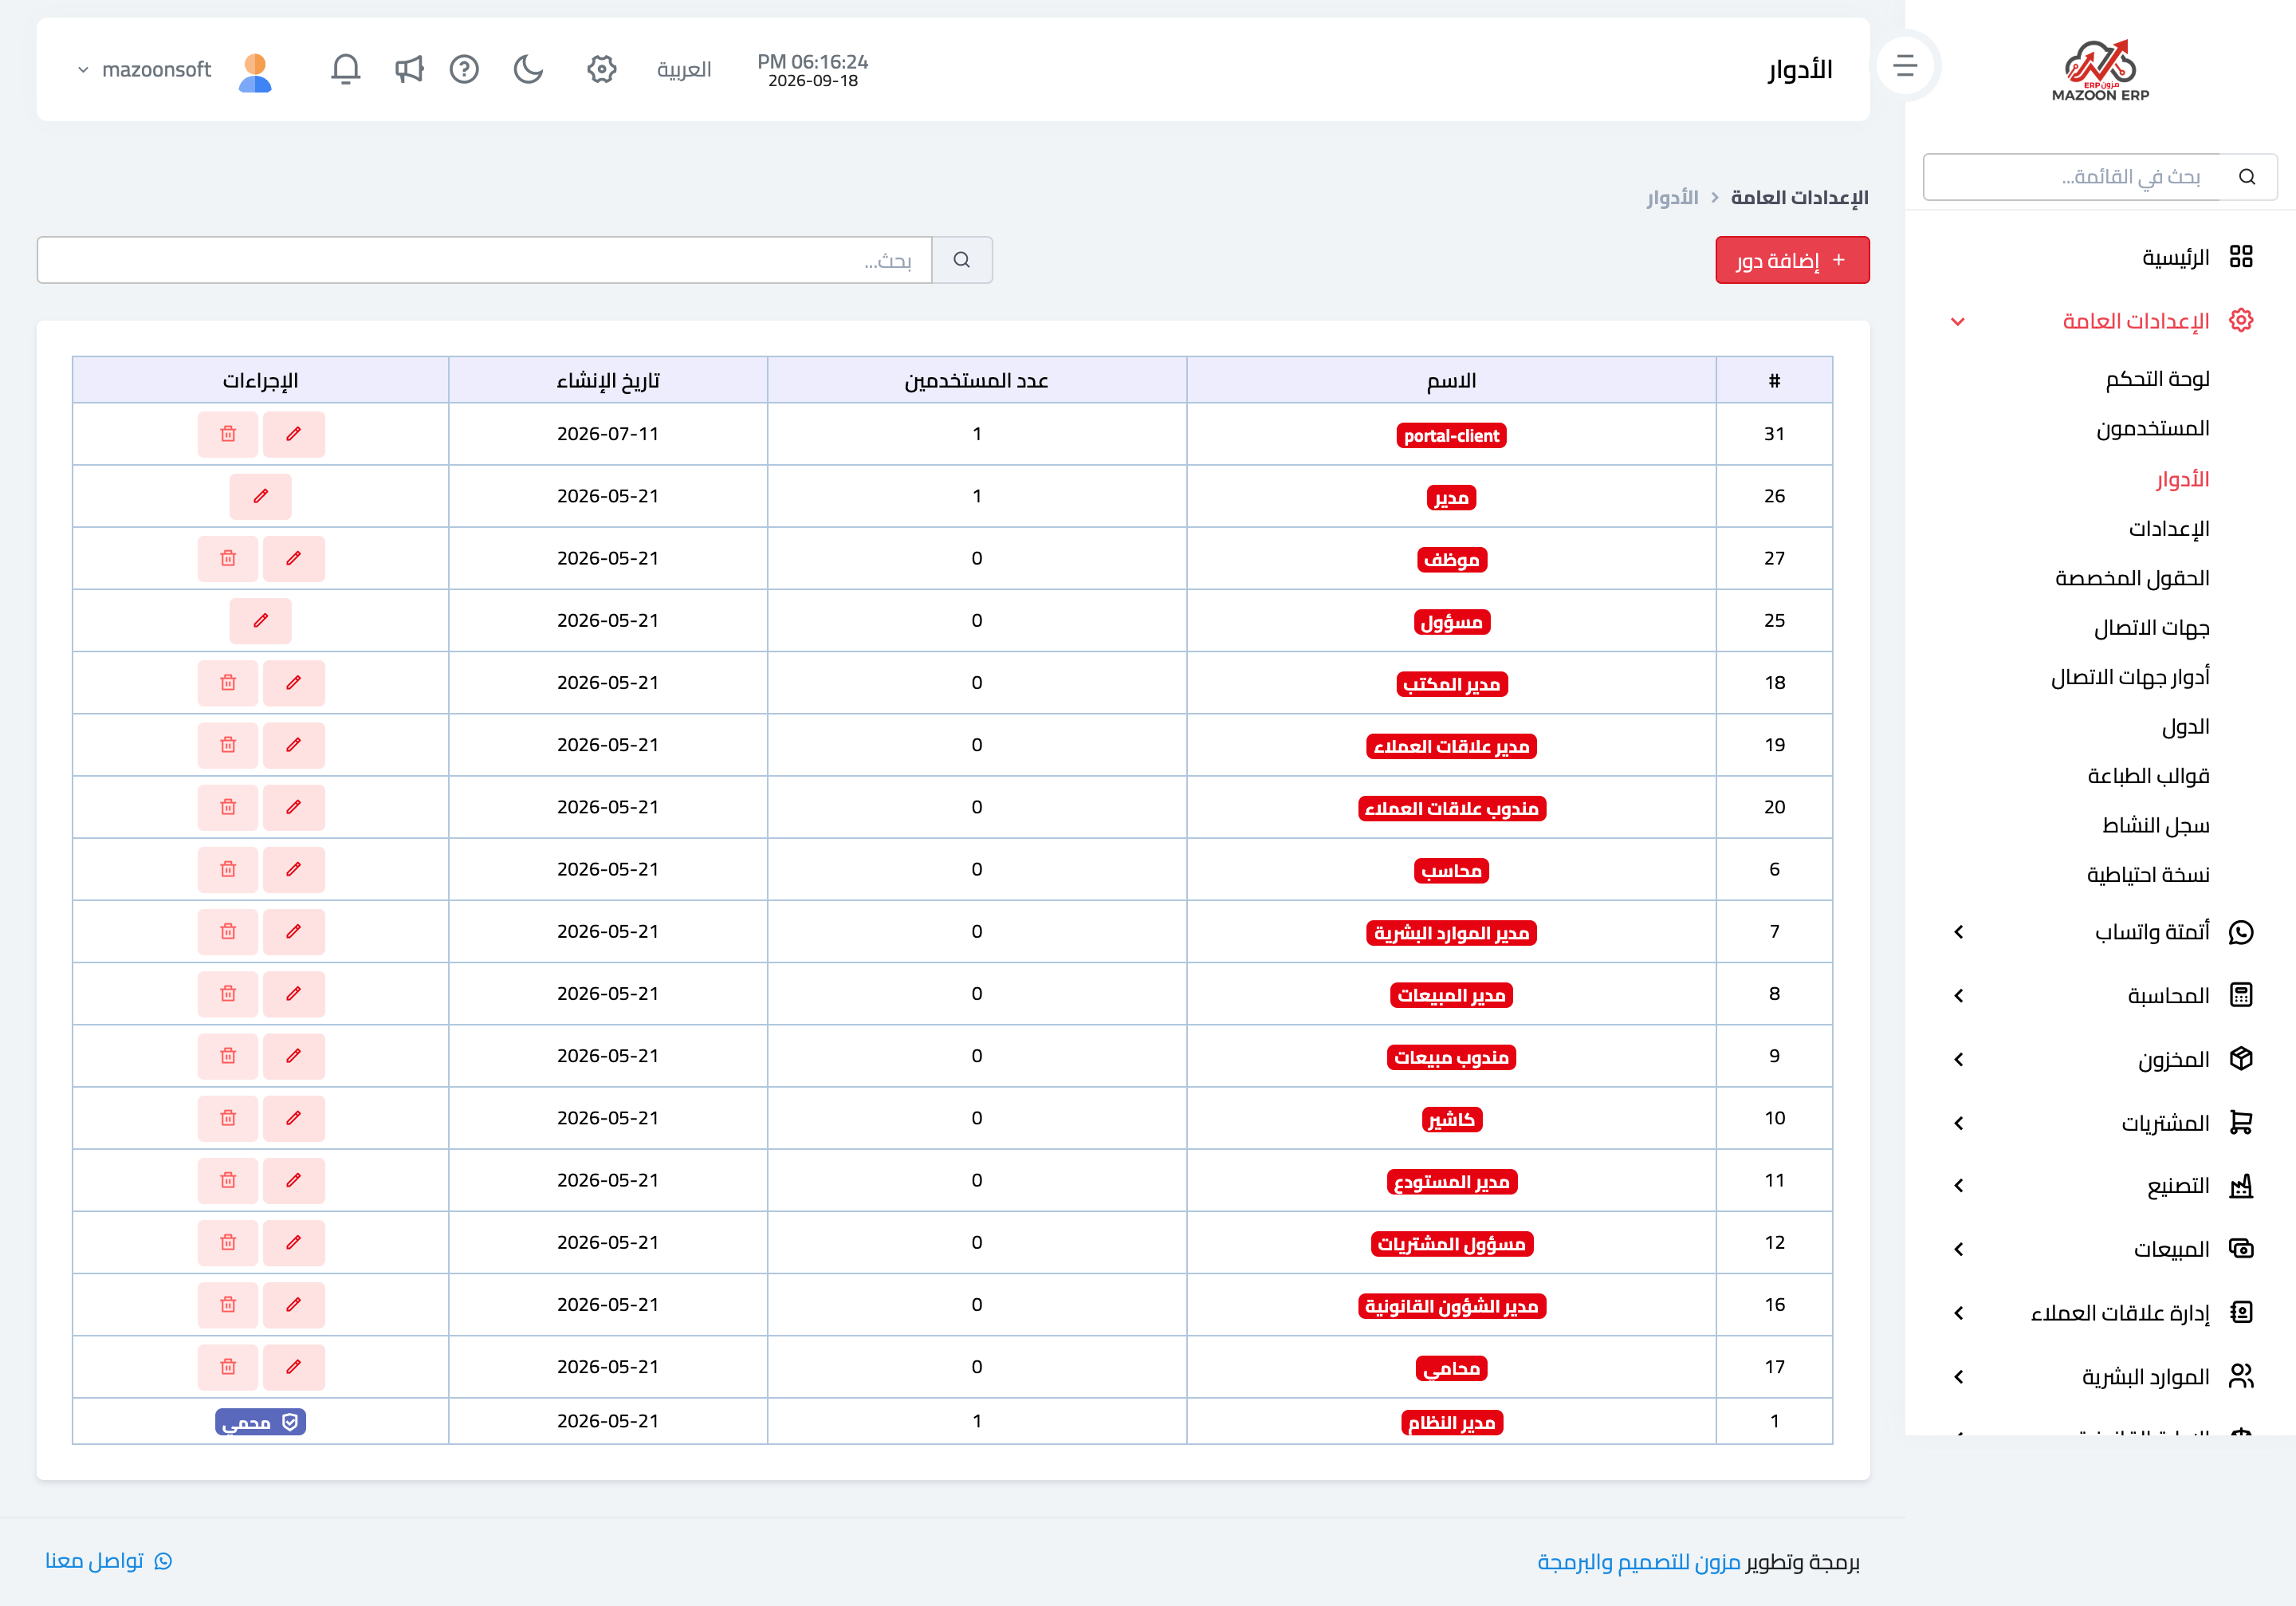
Figure 1
— The list of existing roles
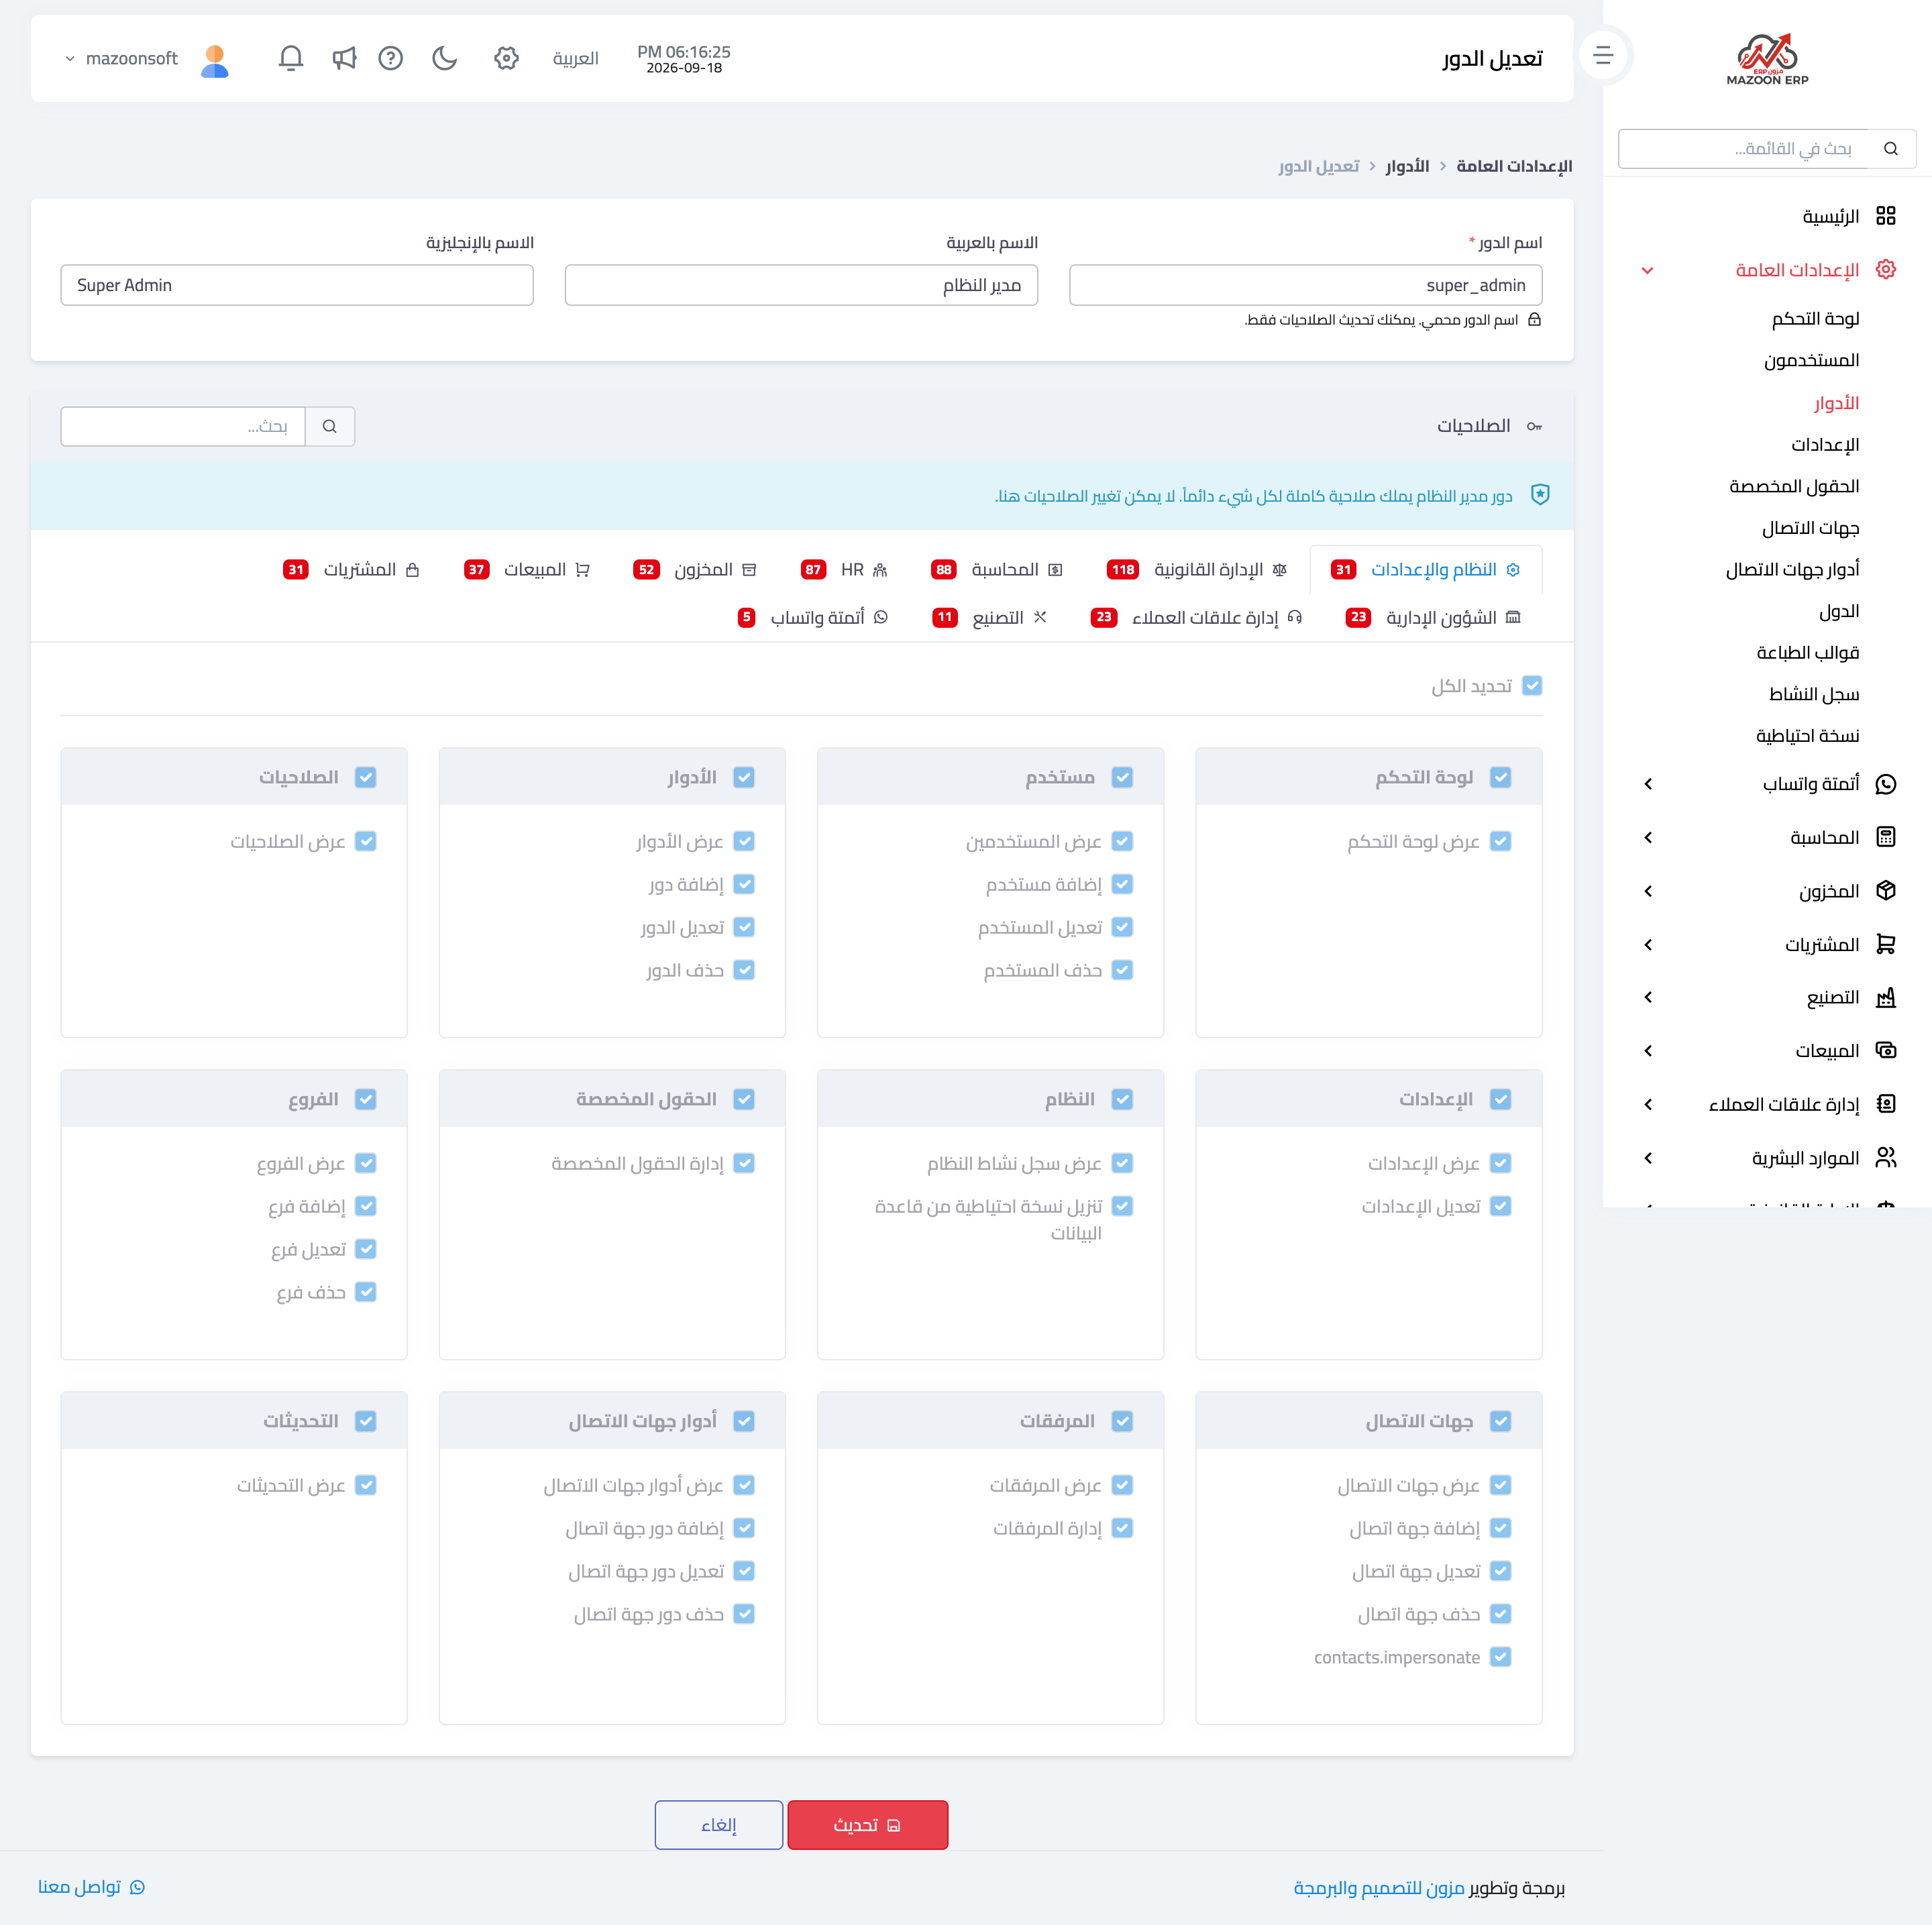
Figure 2
— The role permissions grouped by module
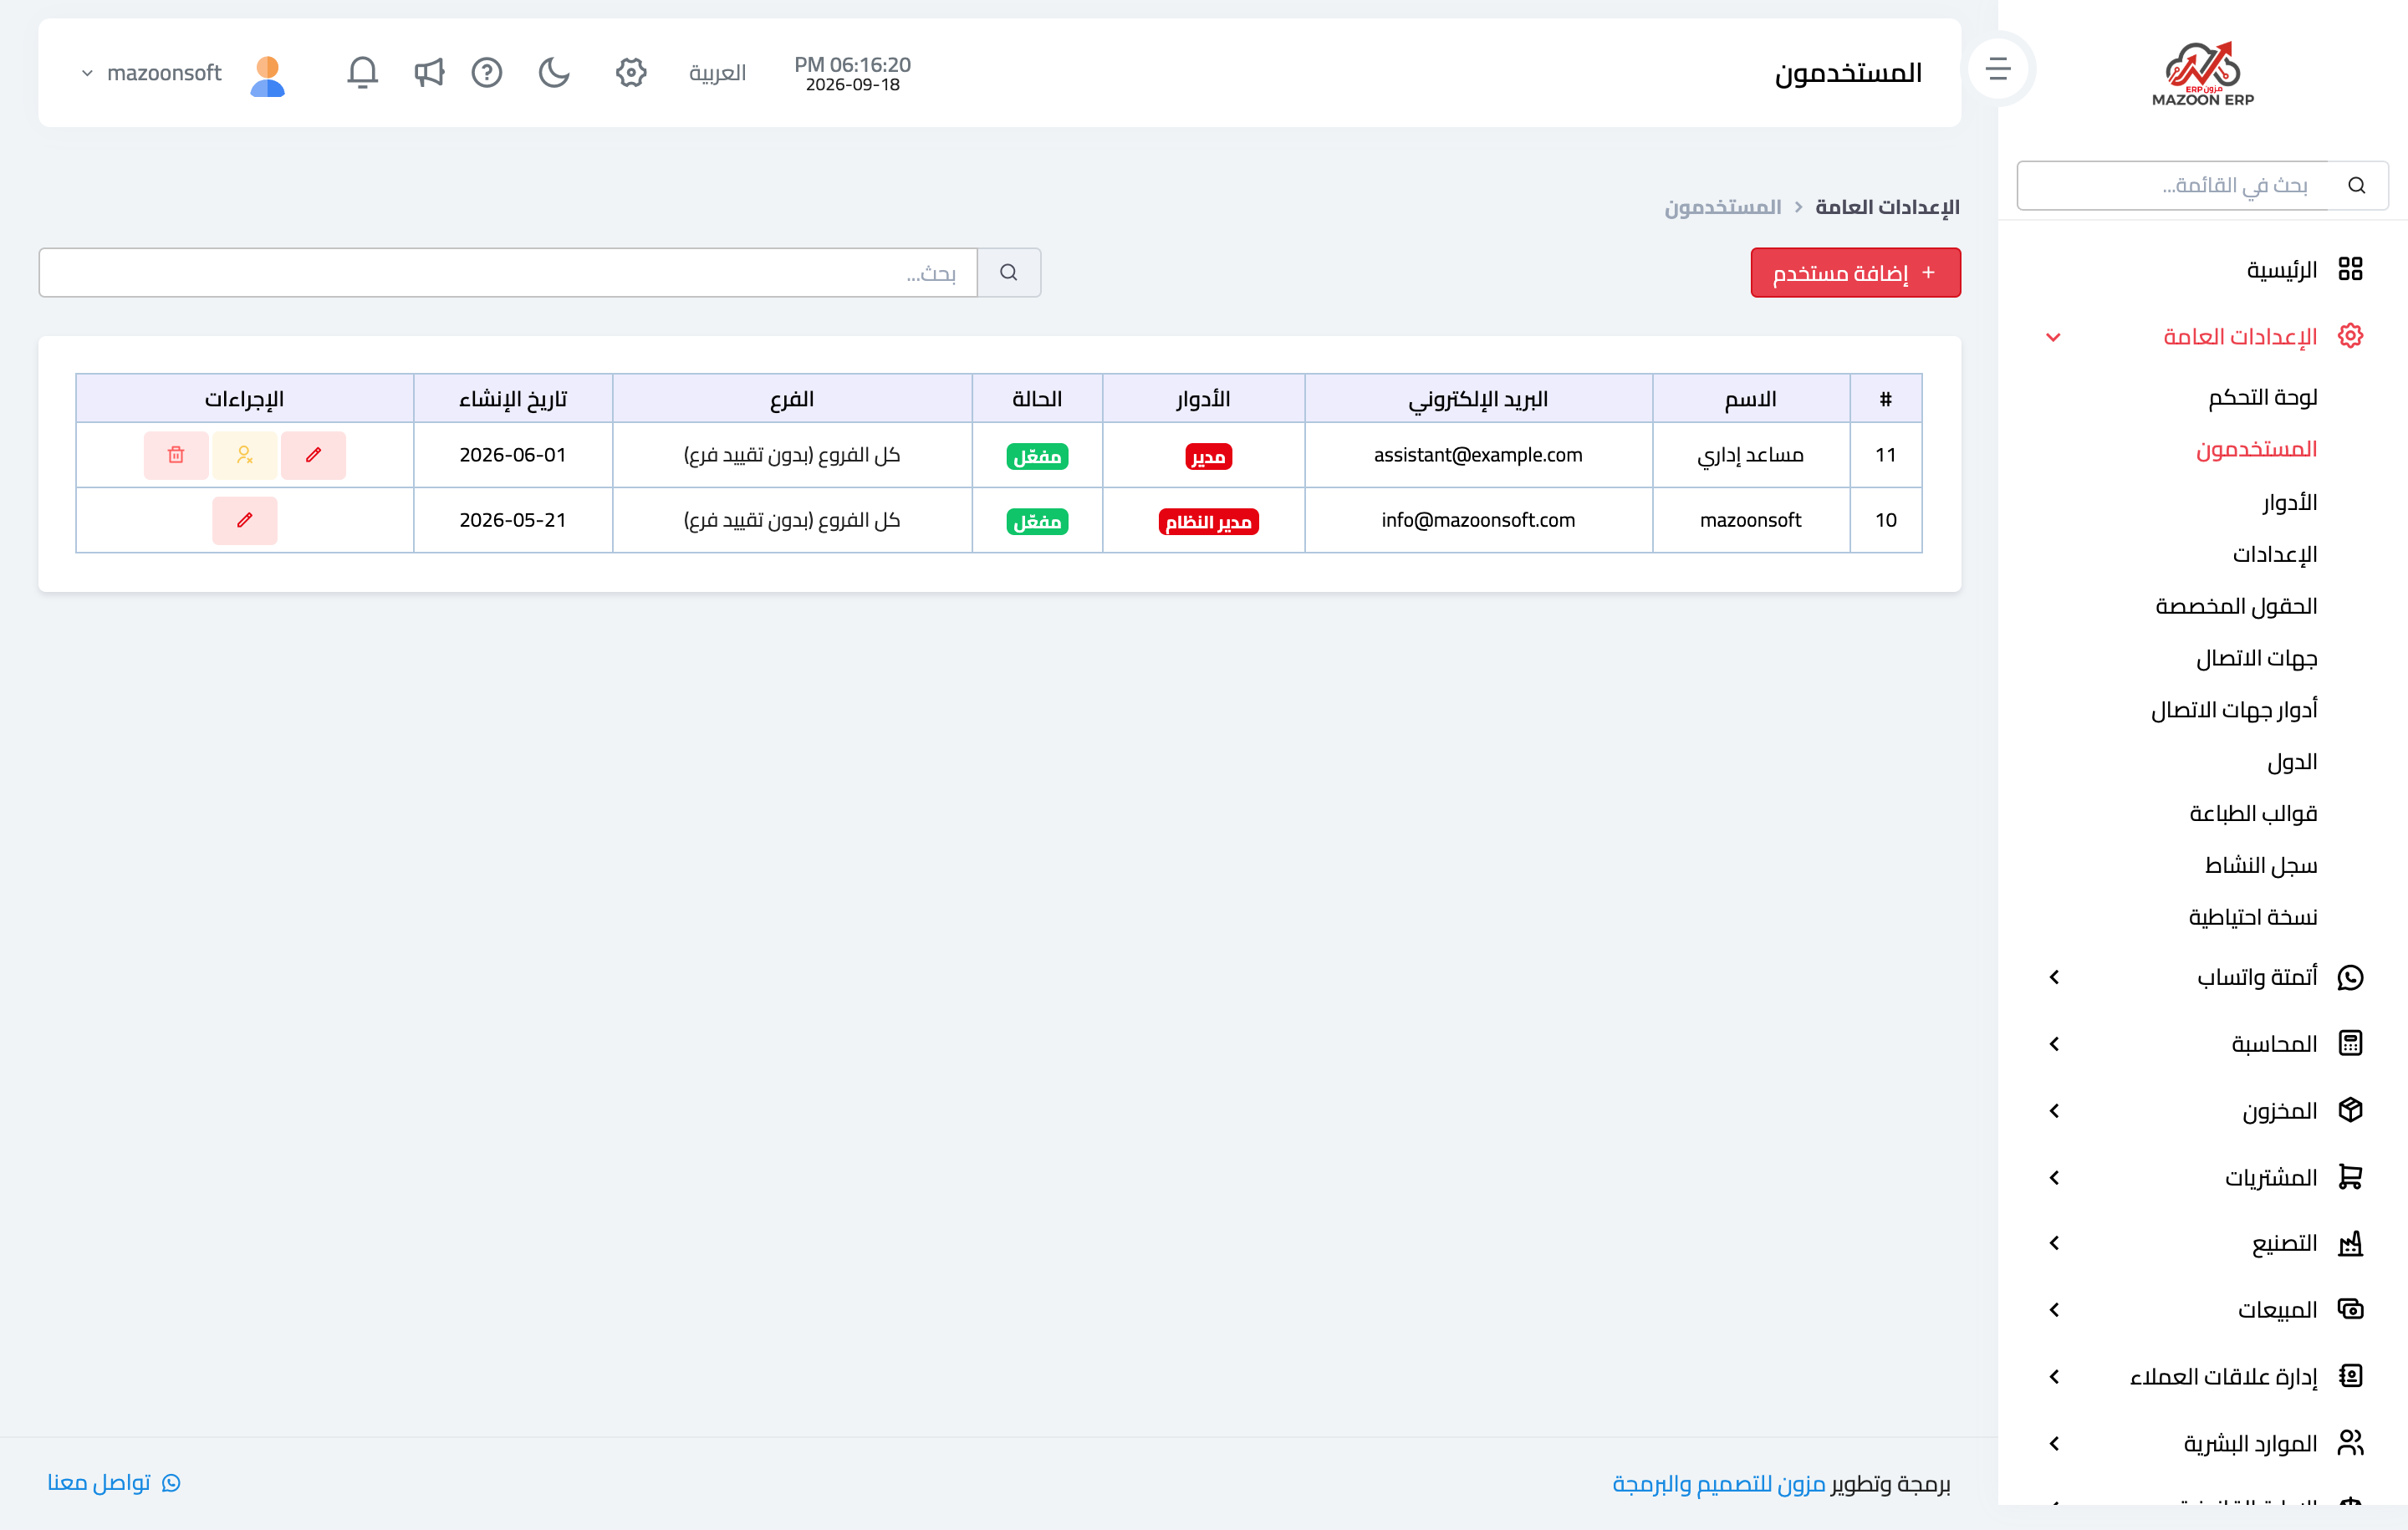
Figure 3
— The users list
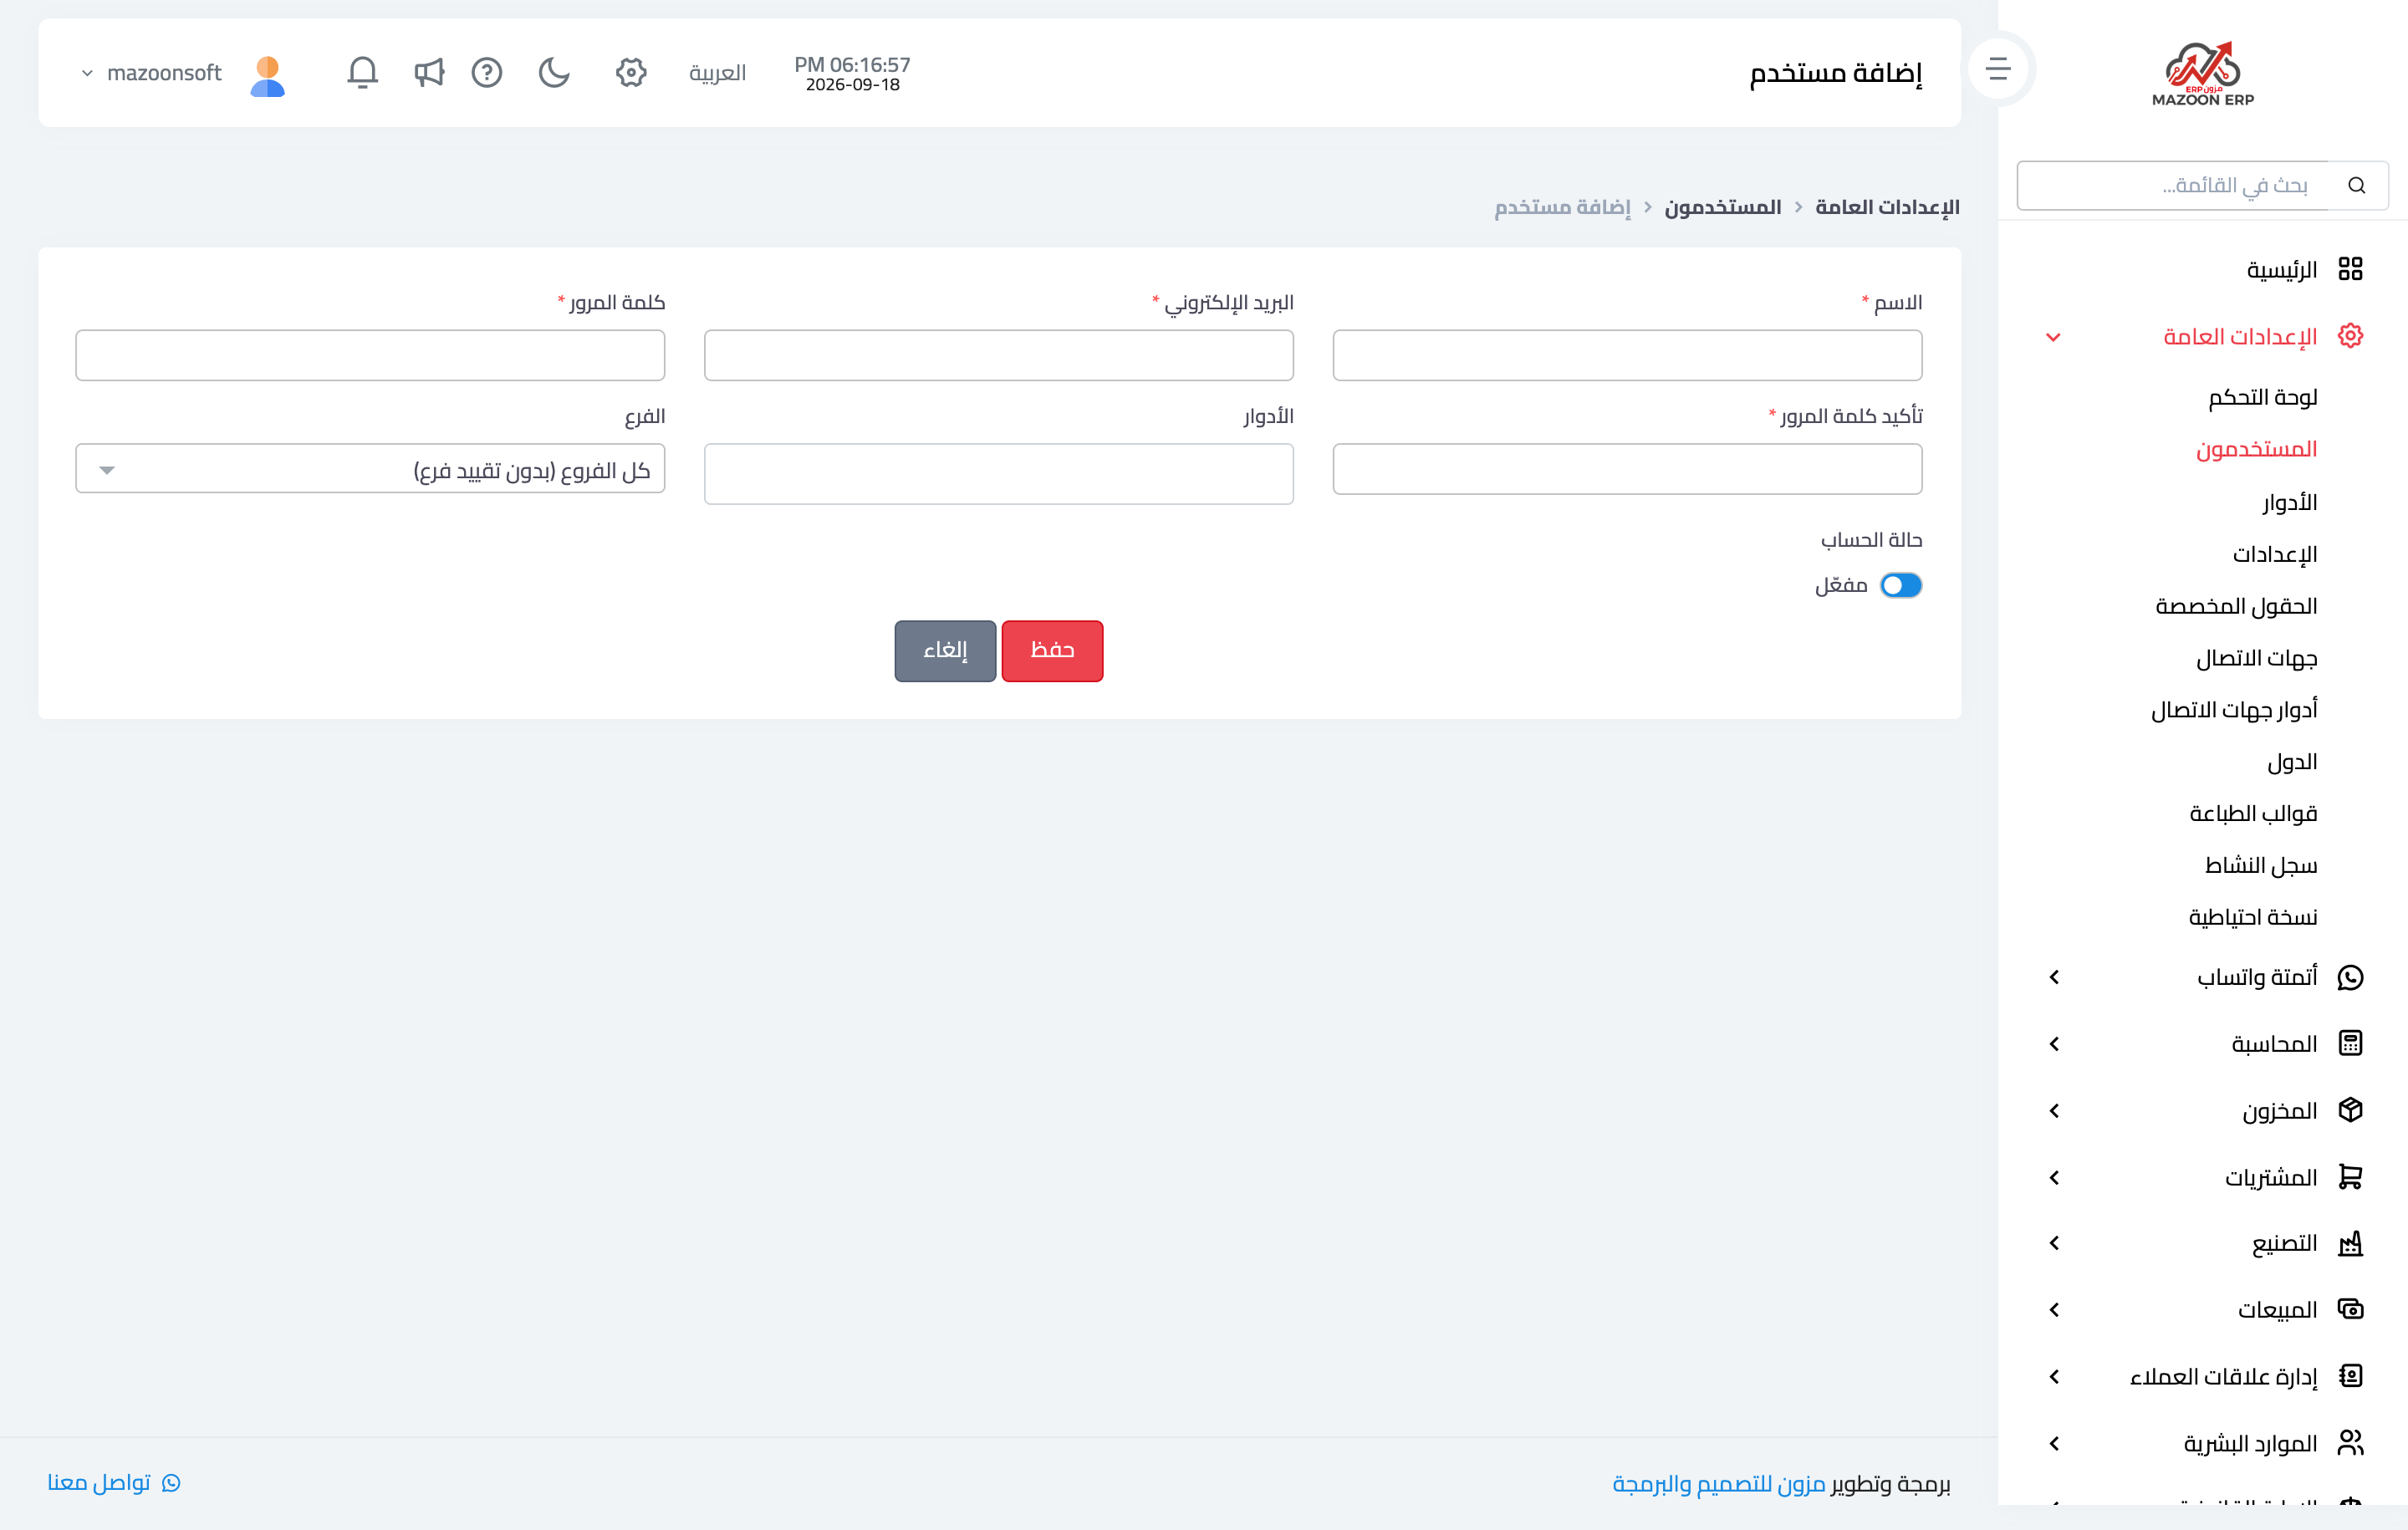
Figure 4
— The add-user form
Try what you just read on your own data
Open a free 7-day trial — no credit card, with your own company link in minutes.