
How do I create a manual journal entry?
Most entries are created by the system automatically alongside invoices and vouchers. A manual entry is for what no ready screen covers: an adjustment, a closing, or the correction of a mistake.
Steps
- Open Accounting → Journal entries — Figure 1 — then press Add manual entry.
- Set the date — Figure 2 — which is the date of the transaction, not the date you keyed it, then write a description in a sentence you will still understand a year from now.
- On the first line choose the account and put the amount in the debit or credit column, then add the opposite line.
- Watch the debit and credit totals under the table; the system will not save an entry that does not balance.
- Press Save, then review the entry and press Approve. Until it is approved it stays a draft with no effect on the accounts.
Common examples
- A cash expense: debit the electricity expense / credit the cash box.
- Monthly depreciation: debit depreciation expense / credit accumulated depreciation.
- A reclassification: debit the correct account / credit the account it was wrongly posted to.
Notes
- Do not use a manual entry to record a sale or a purchase; the invoice screens create the entry and tie it to the document and the stock together.
- Check that the accounting period for the entry date is still open; a closed period refuses the save.
- An approved entry cannot be edited; the correct route is a reversing entry followed by the right one, so the trail stays visible in the books.
Screenshots
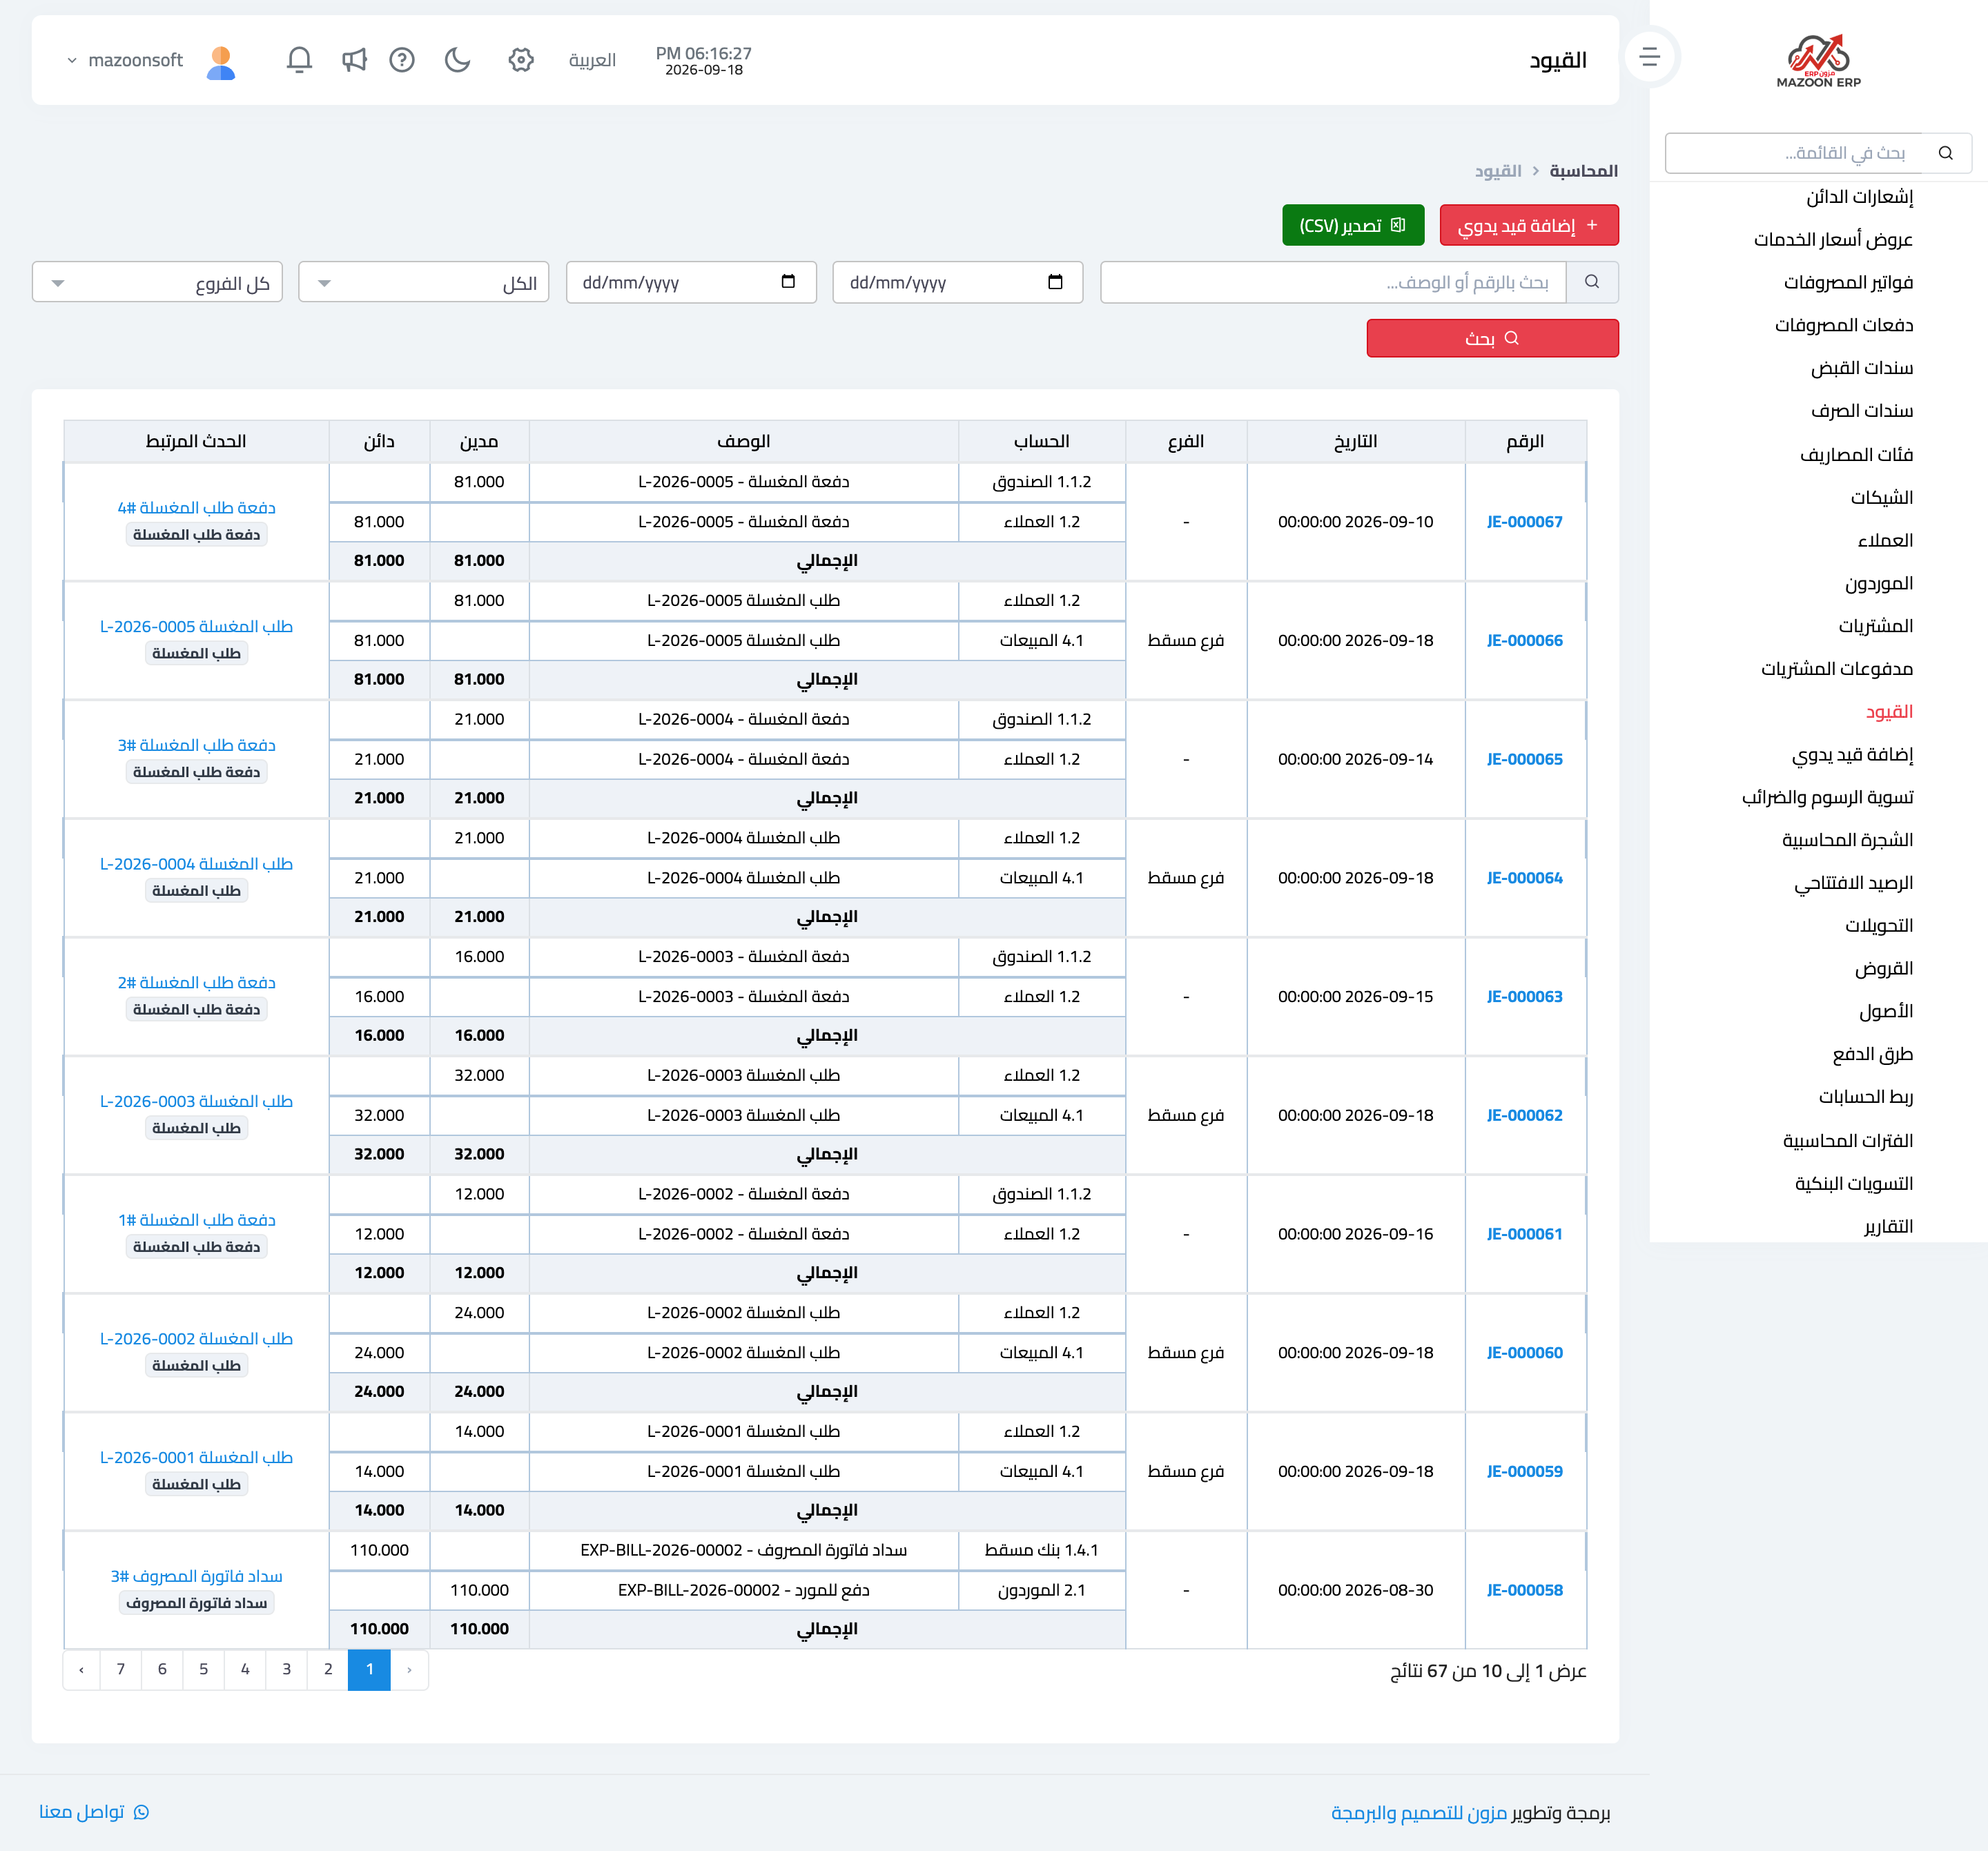
Figure 1
— The journal entries list
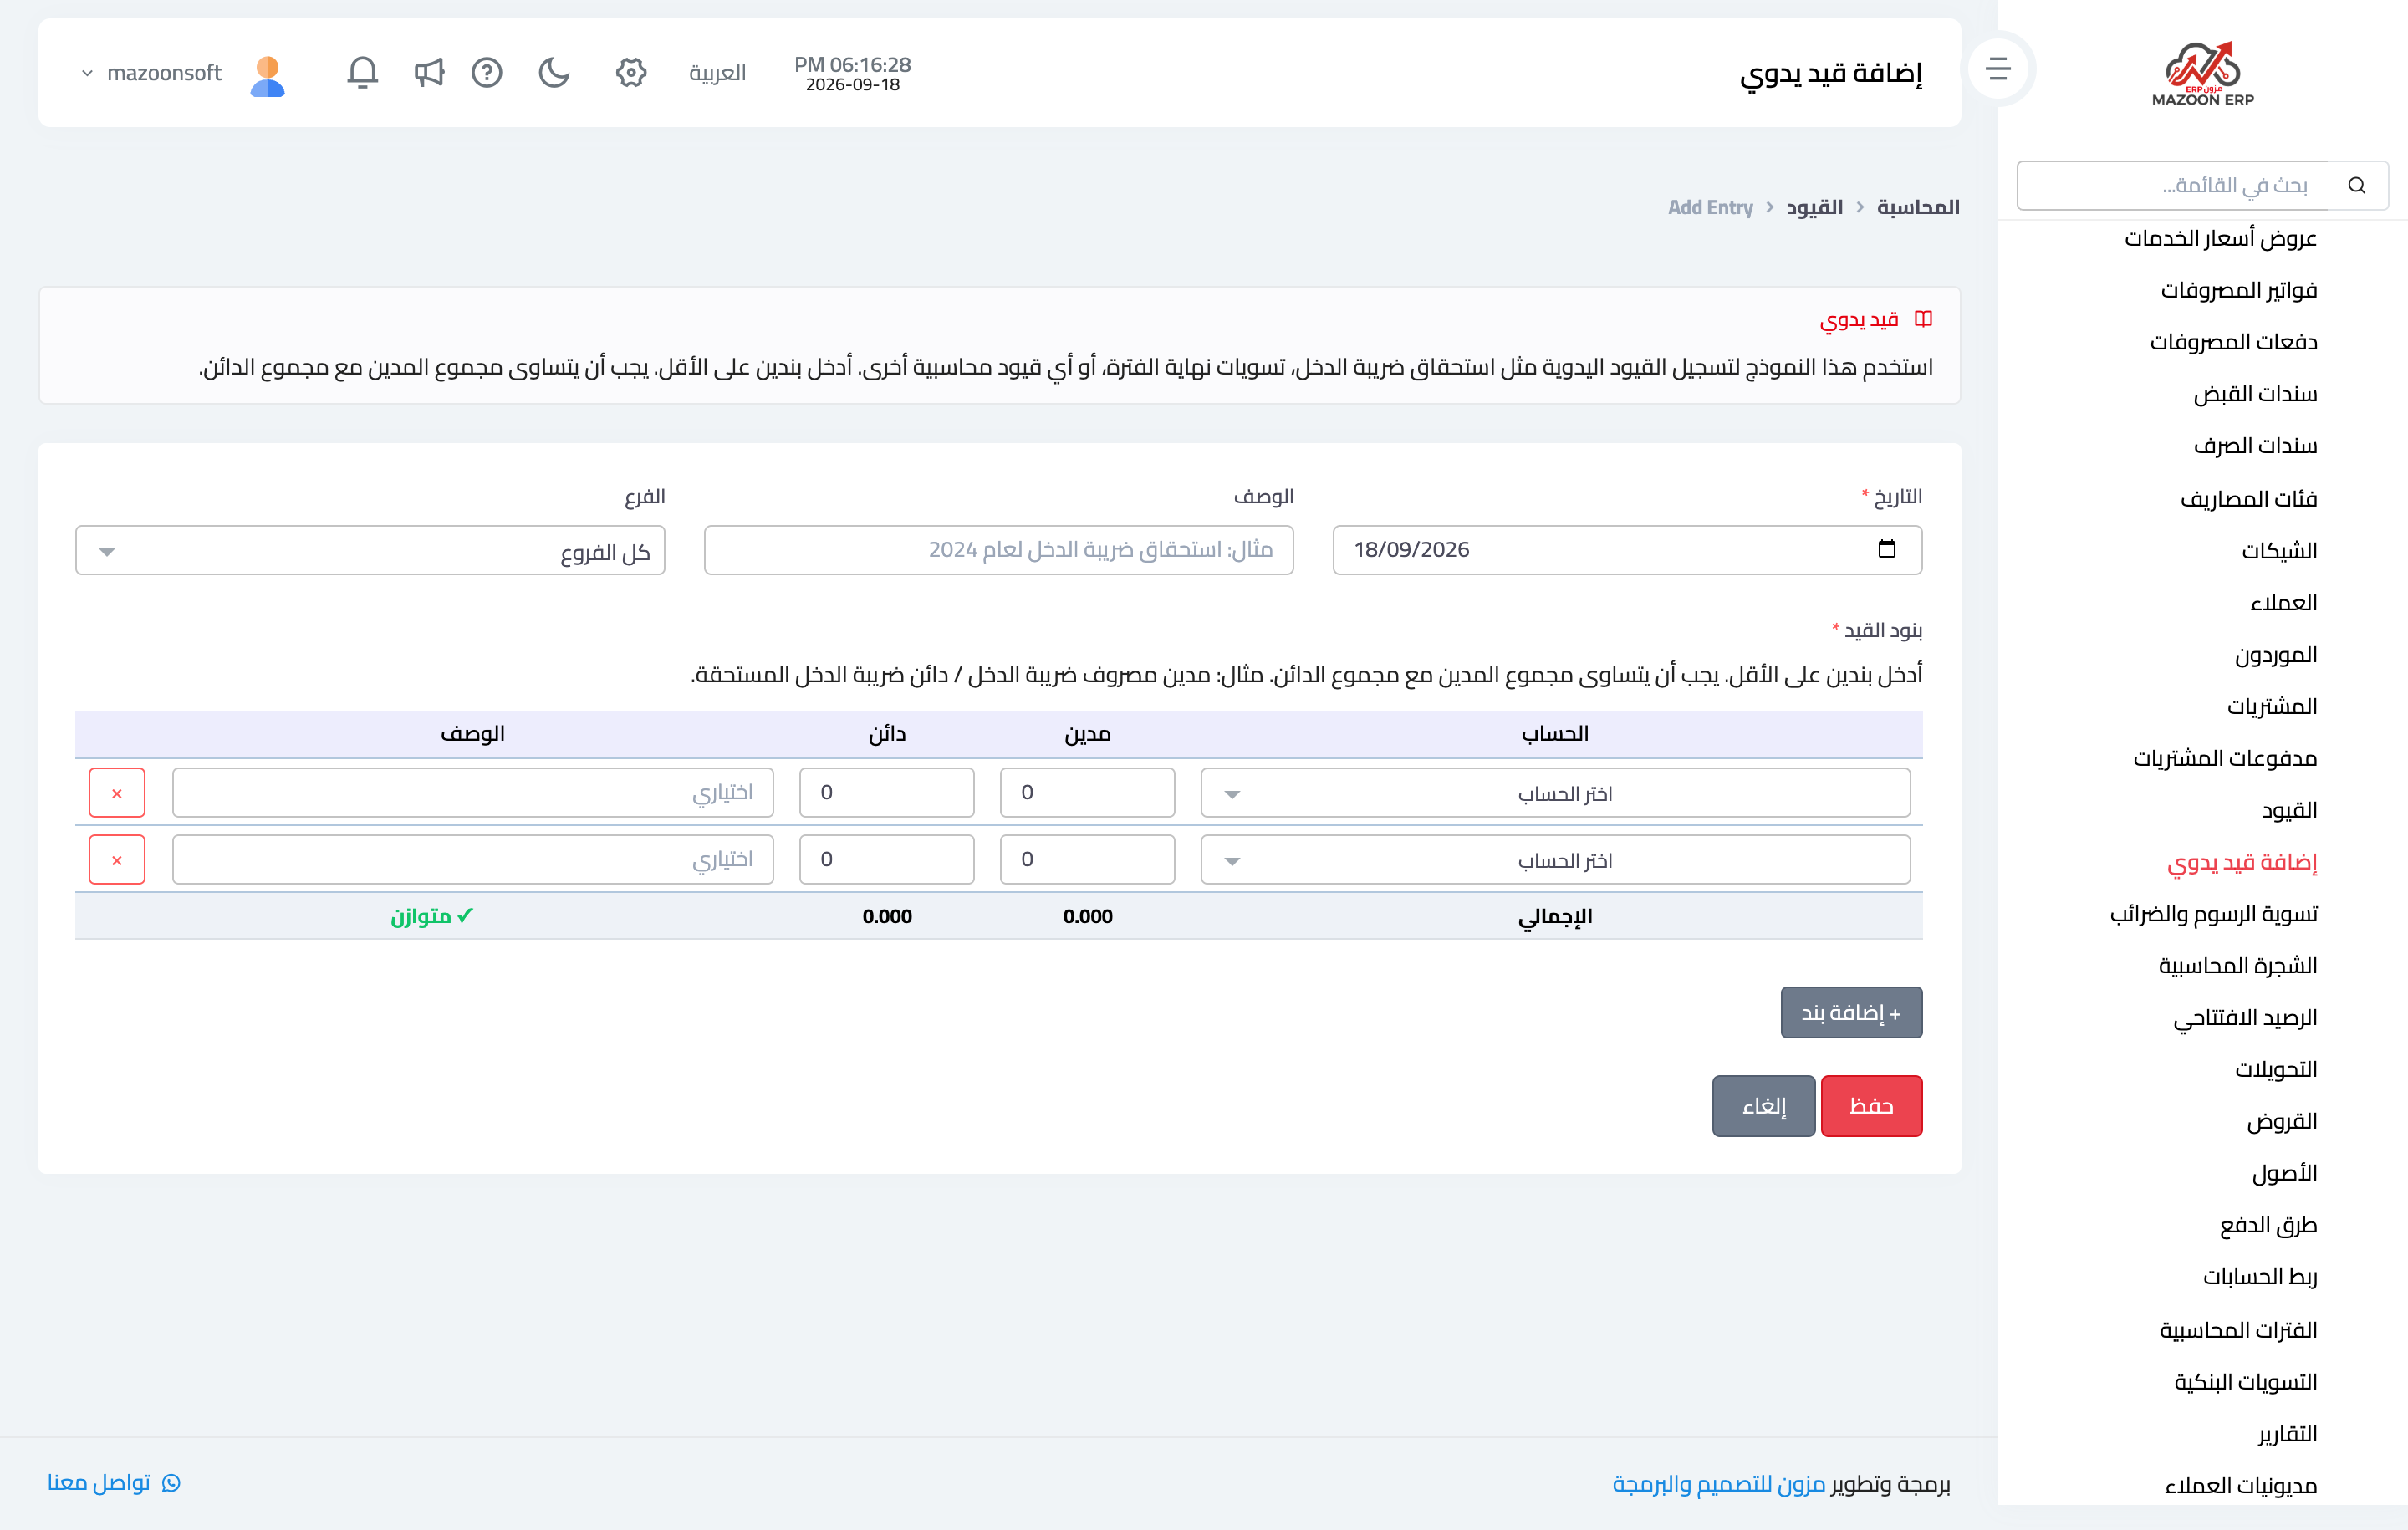
Figure 2
— The manual journal entry form
Try what you just read on your own data
Open a free 7-day trial — no credit card, with your own company link in minutes.