
Customer vehicles and the job card
A vehicle is recorded once and stays; a job card is opened on every visit. That separation is what builds the vehicle’s history: how often it came in, with what complaint, and what was done to it.
Customer vehicles
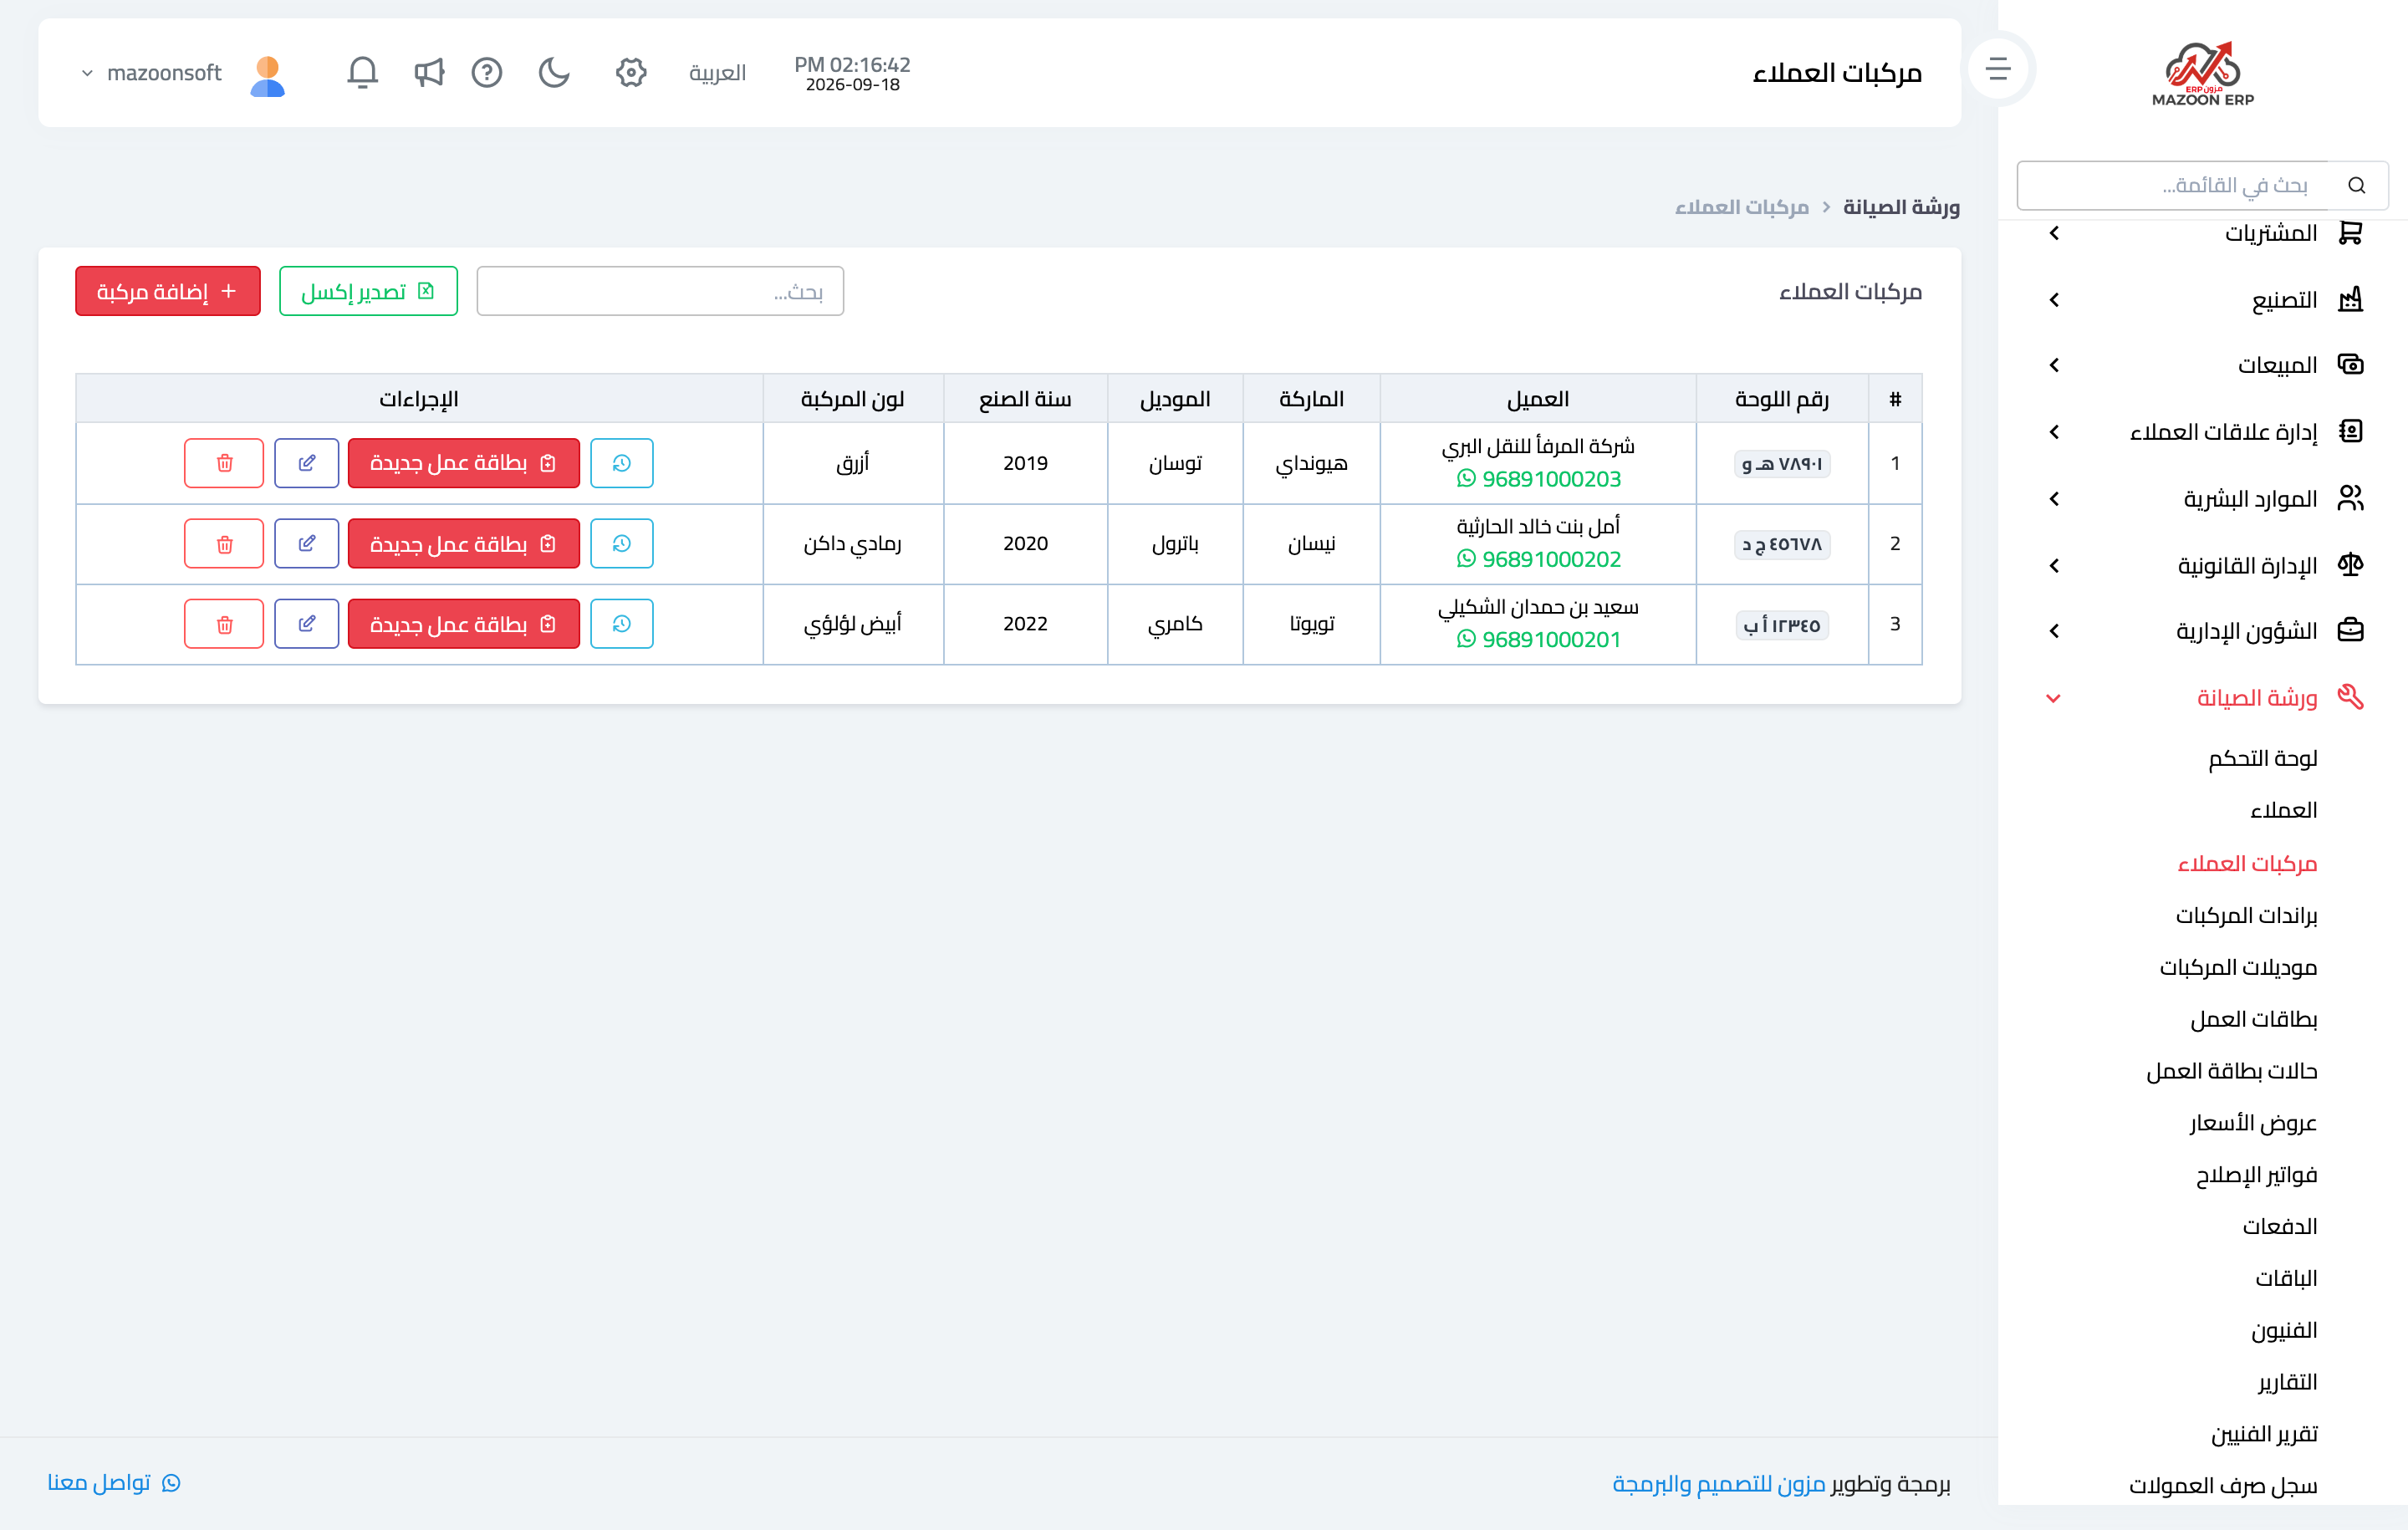
Open Workshop → Customer vehicles, as in Figure 1. The table shows the plate number, brand and model, year, colour, the owning customer with their phone, the next service date, and the active flag.
When adding a vehicle you enter:
- Customer — picked from contacts, which is what ties the vehicle to their account and invoices.
- Brand and model — from the predefined lists.
- Plate, chassis, and serial numbers — the plate number is usually what reception searches by.
- Colour, year, cylinders, and engine size.
- Registered owner and ID number — for when the licence holder differs from the customer dealing with the workshop.
- Service interval in months — the system computes the next service date from it, and the reminders screen runs on that.
- Vehicle photo and registration copy — optional attachments.
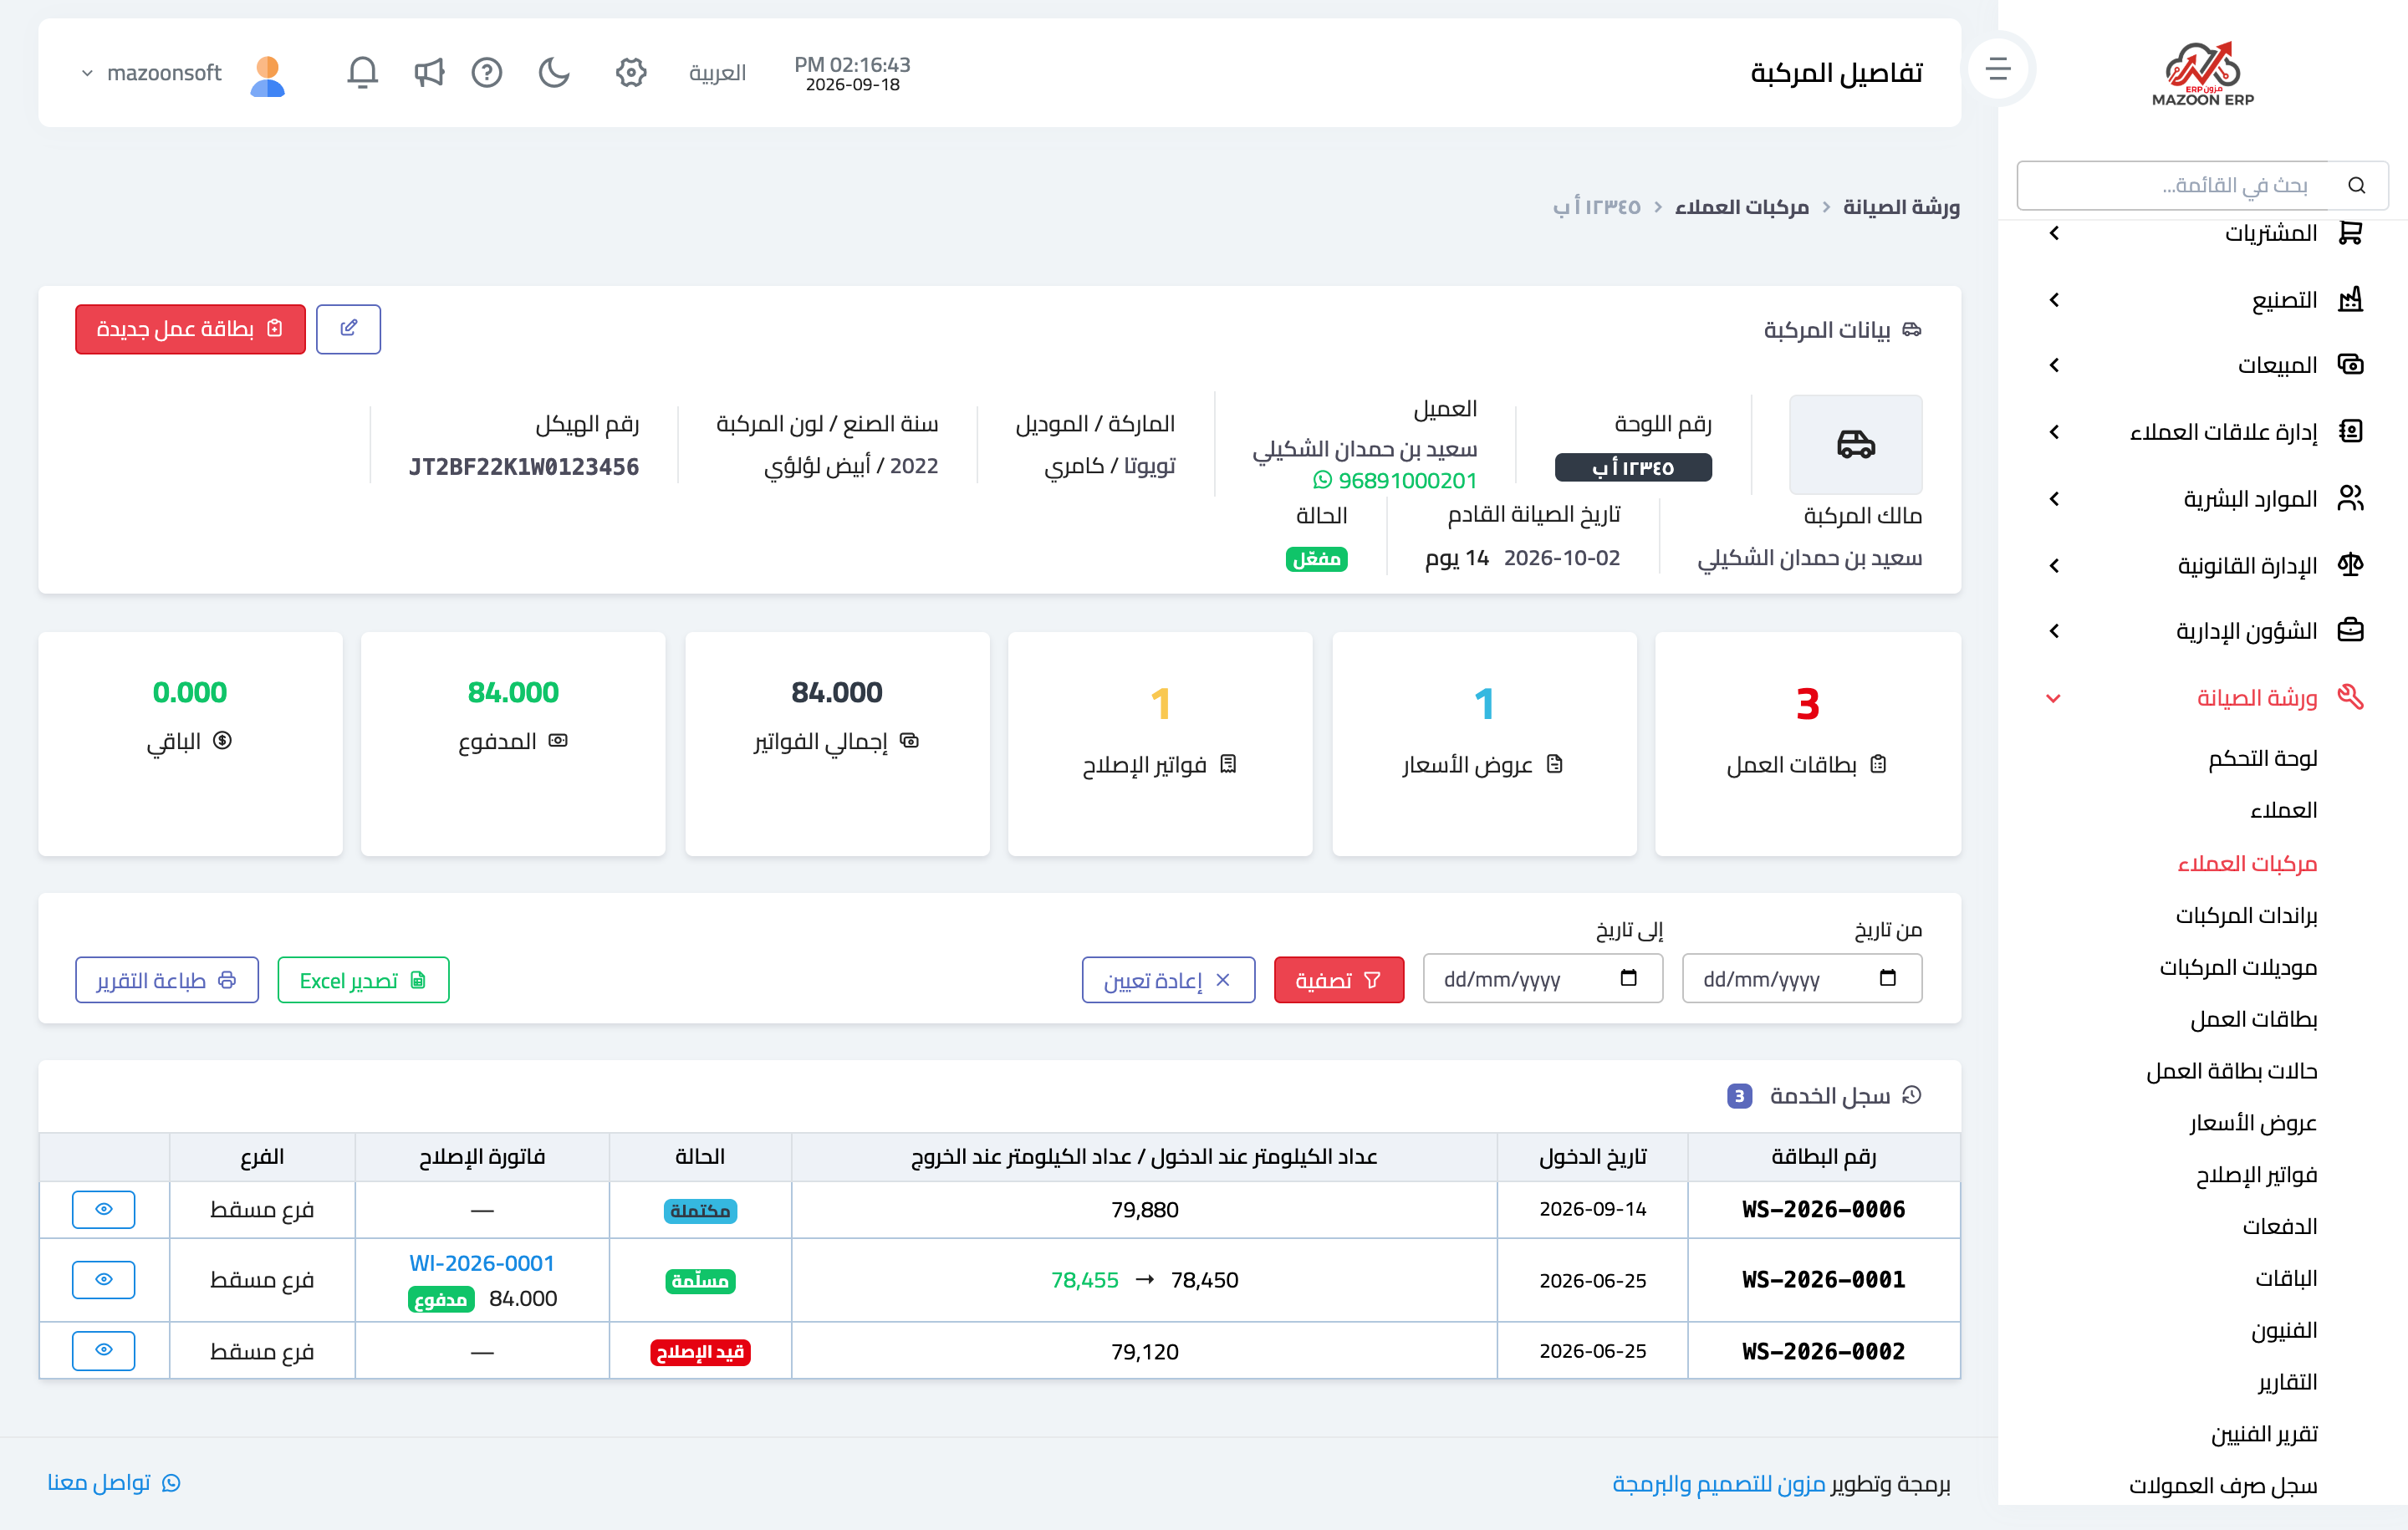
The vehicle page — Figure 2 — shows the full details plus its visit history: every past job card with dates, odometer readings, and what came out of it. That history can be exported or printed and handed to the customer when the vehicle is sold.
The job card
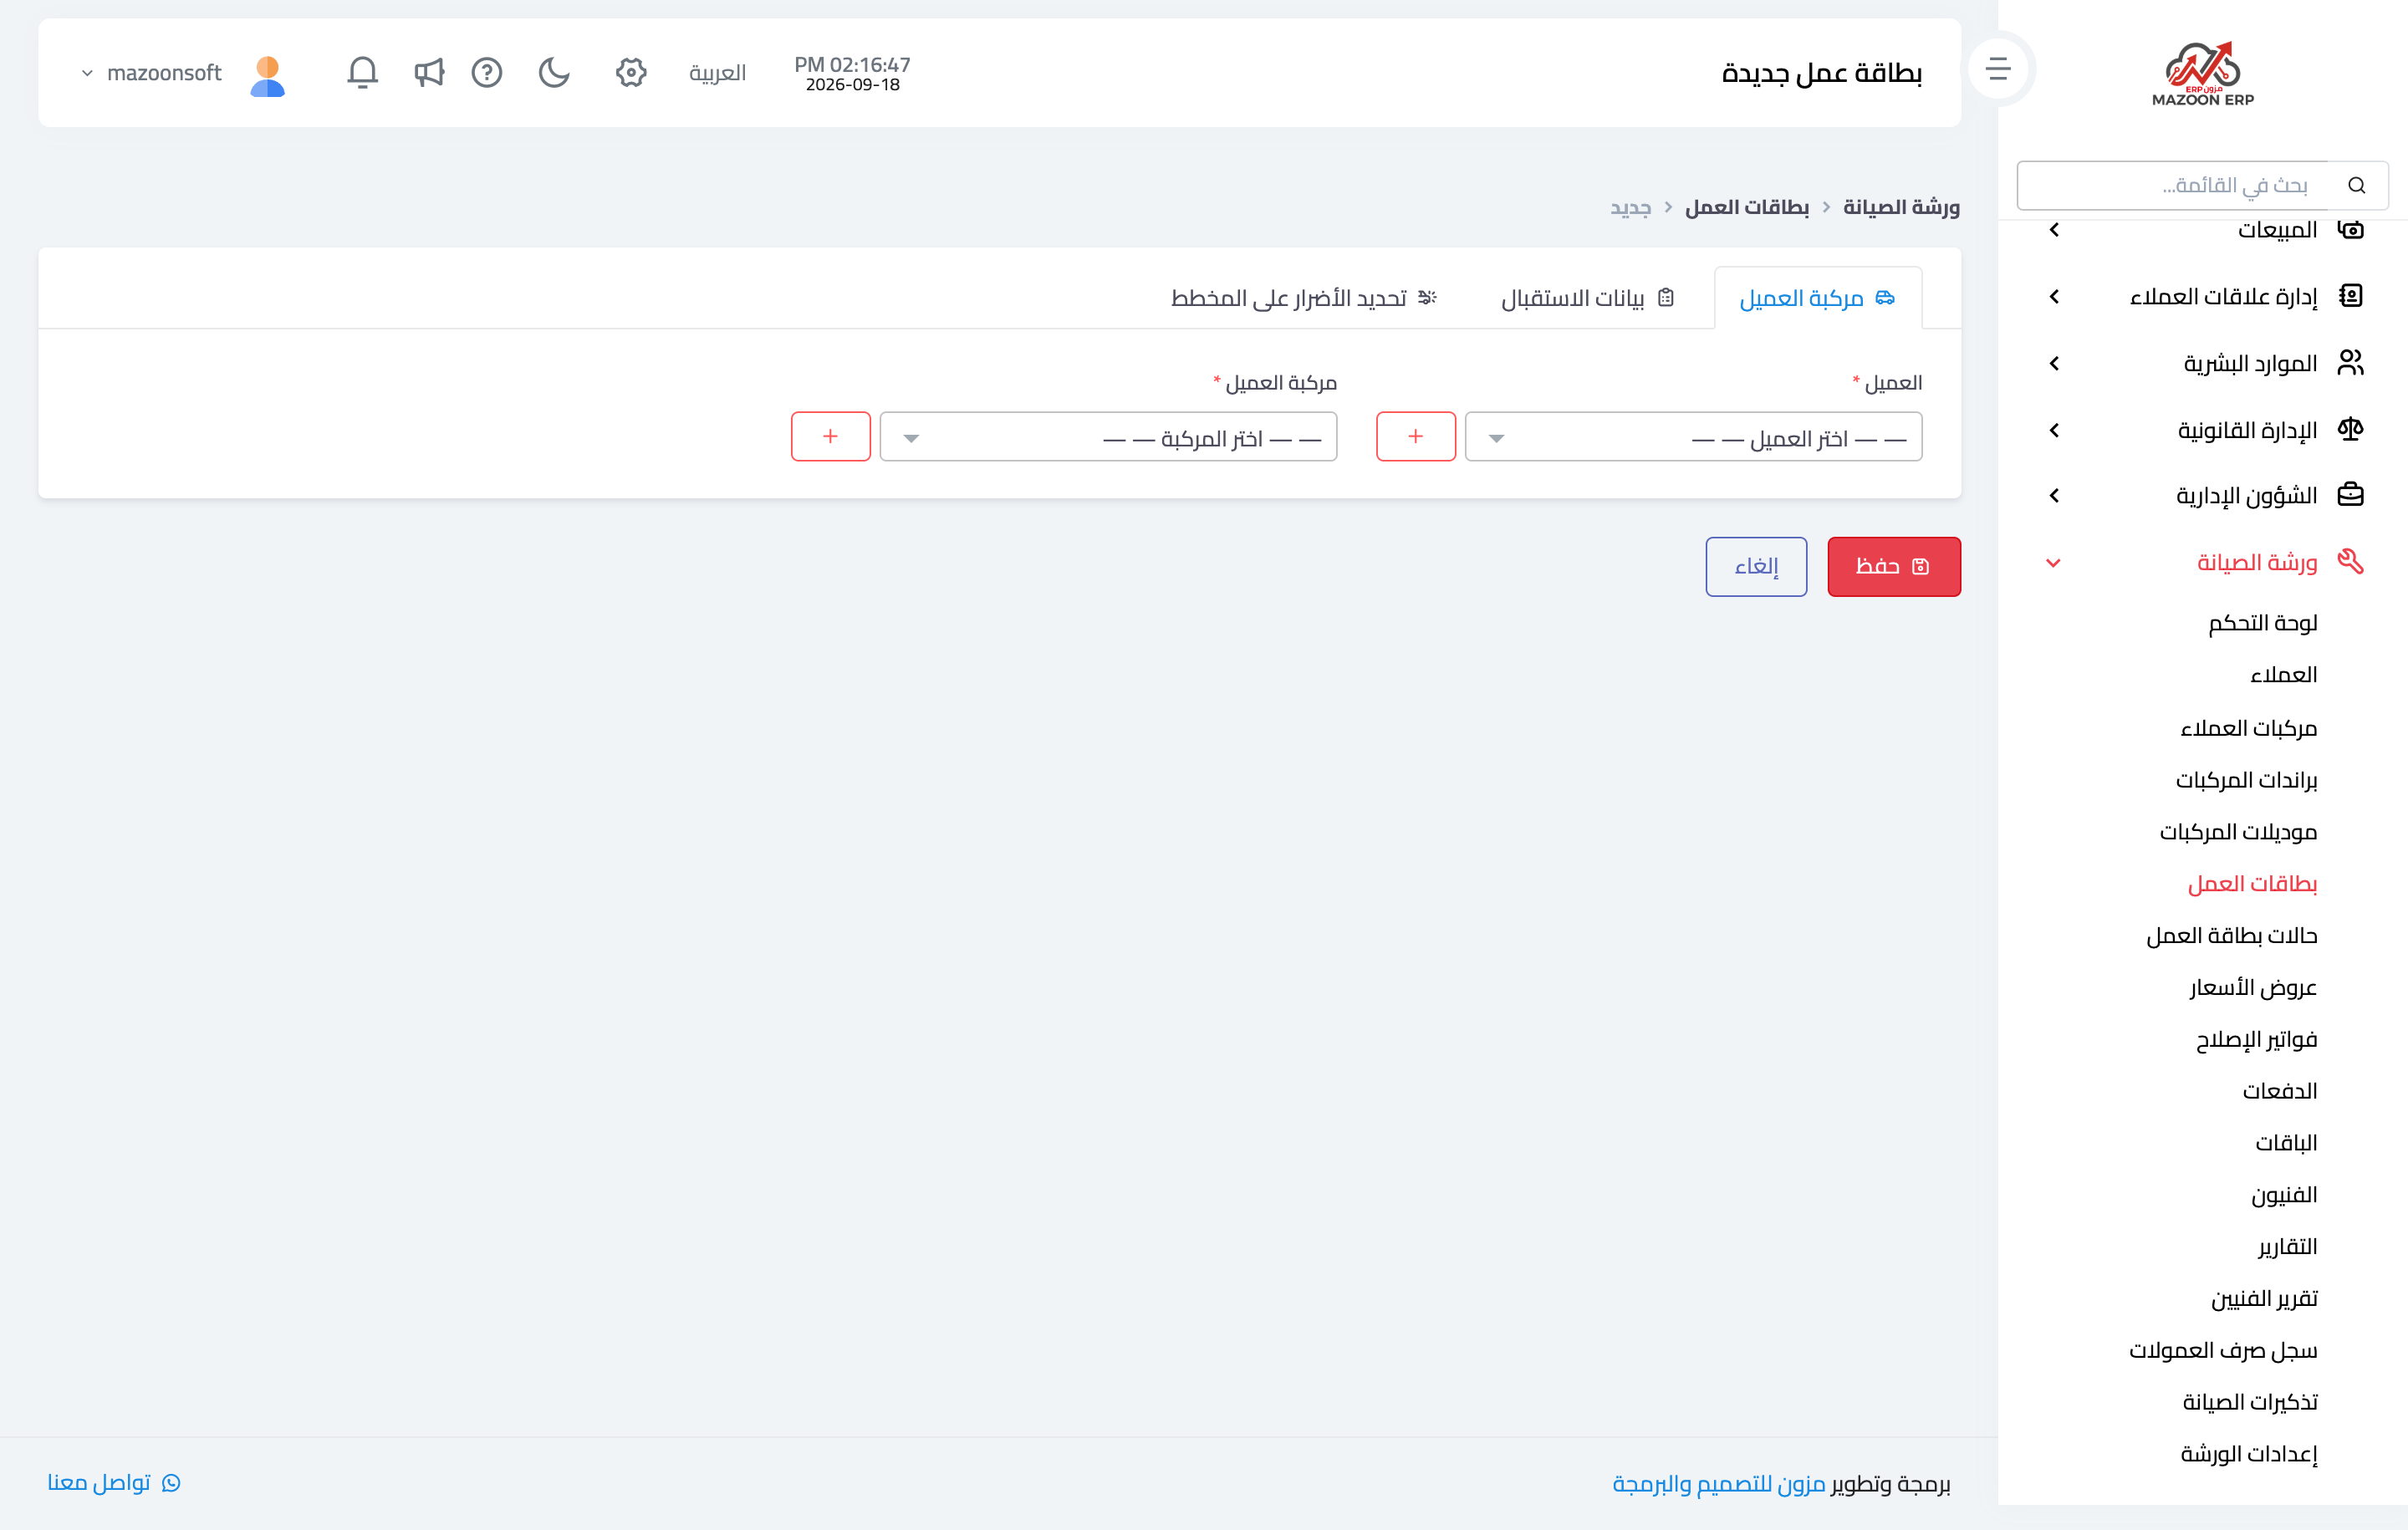
The job card is the vehicle intake document. Open it from Job cards → Add, as in Figure 3, and fill it in at the moment of intake with the customer standing in front of you:
- Vehicle and customer — picking the vehicle fills the customer details automatically.
- Entry date and time and the odometer reading, which is the basis of kilometre-based servicing.
- Source and driver name — useful for company and fleet vehicles.
- Vehicle condition on arrival and the customer complaint — the difference matters: the first is your description of the car, the second is the owner’s account of the fault.
- Repair permit — an attachment where one is required.
Marking damage on the diagram
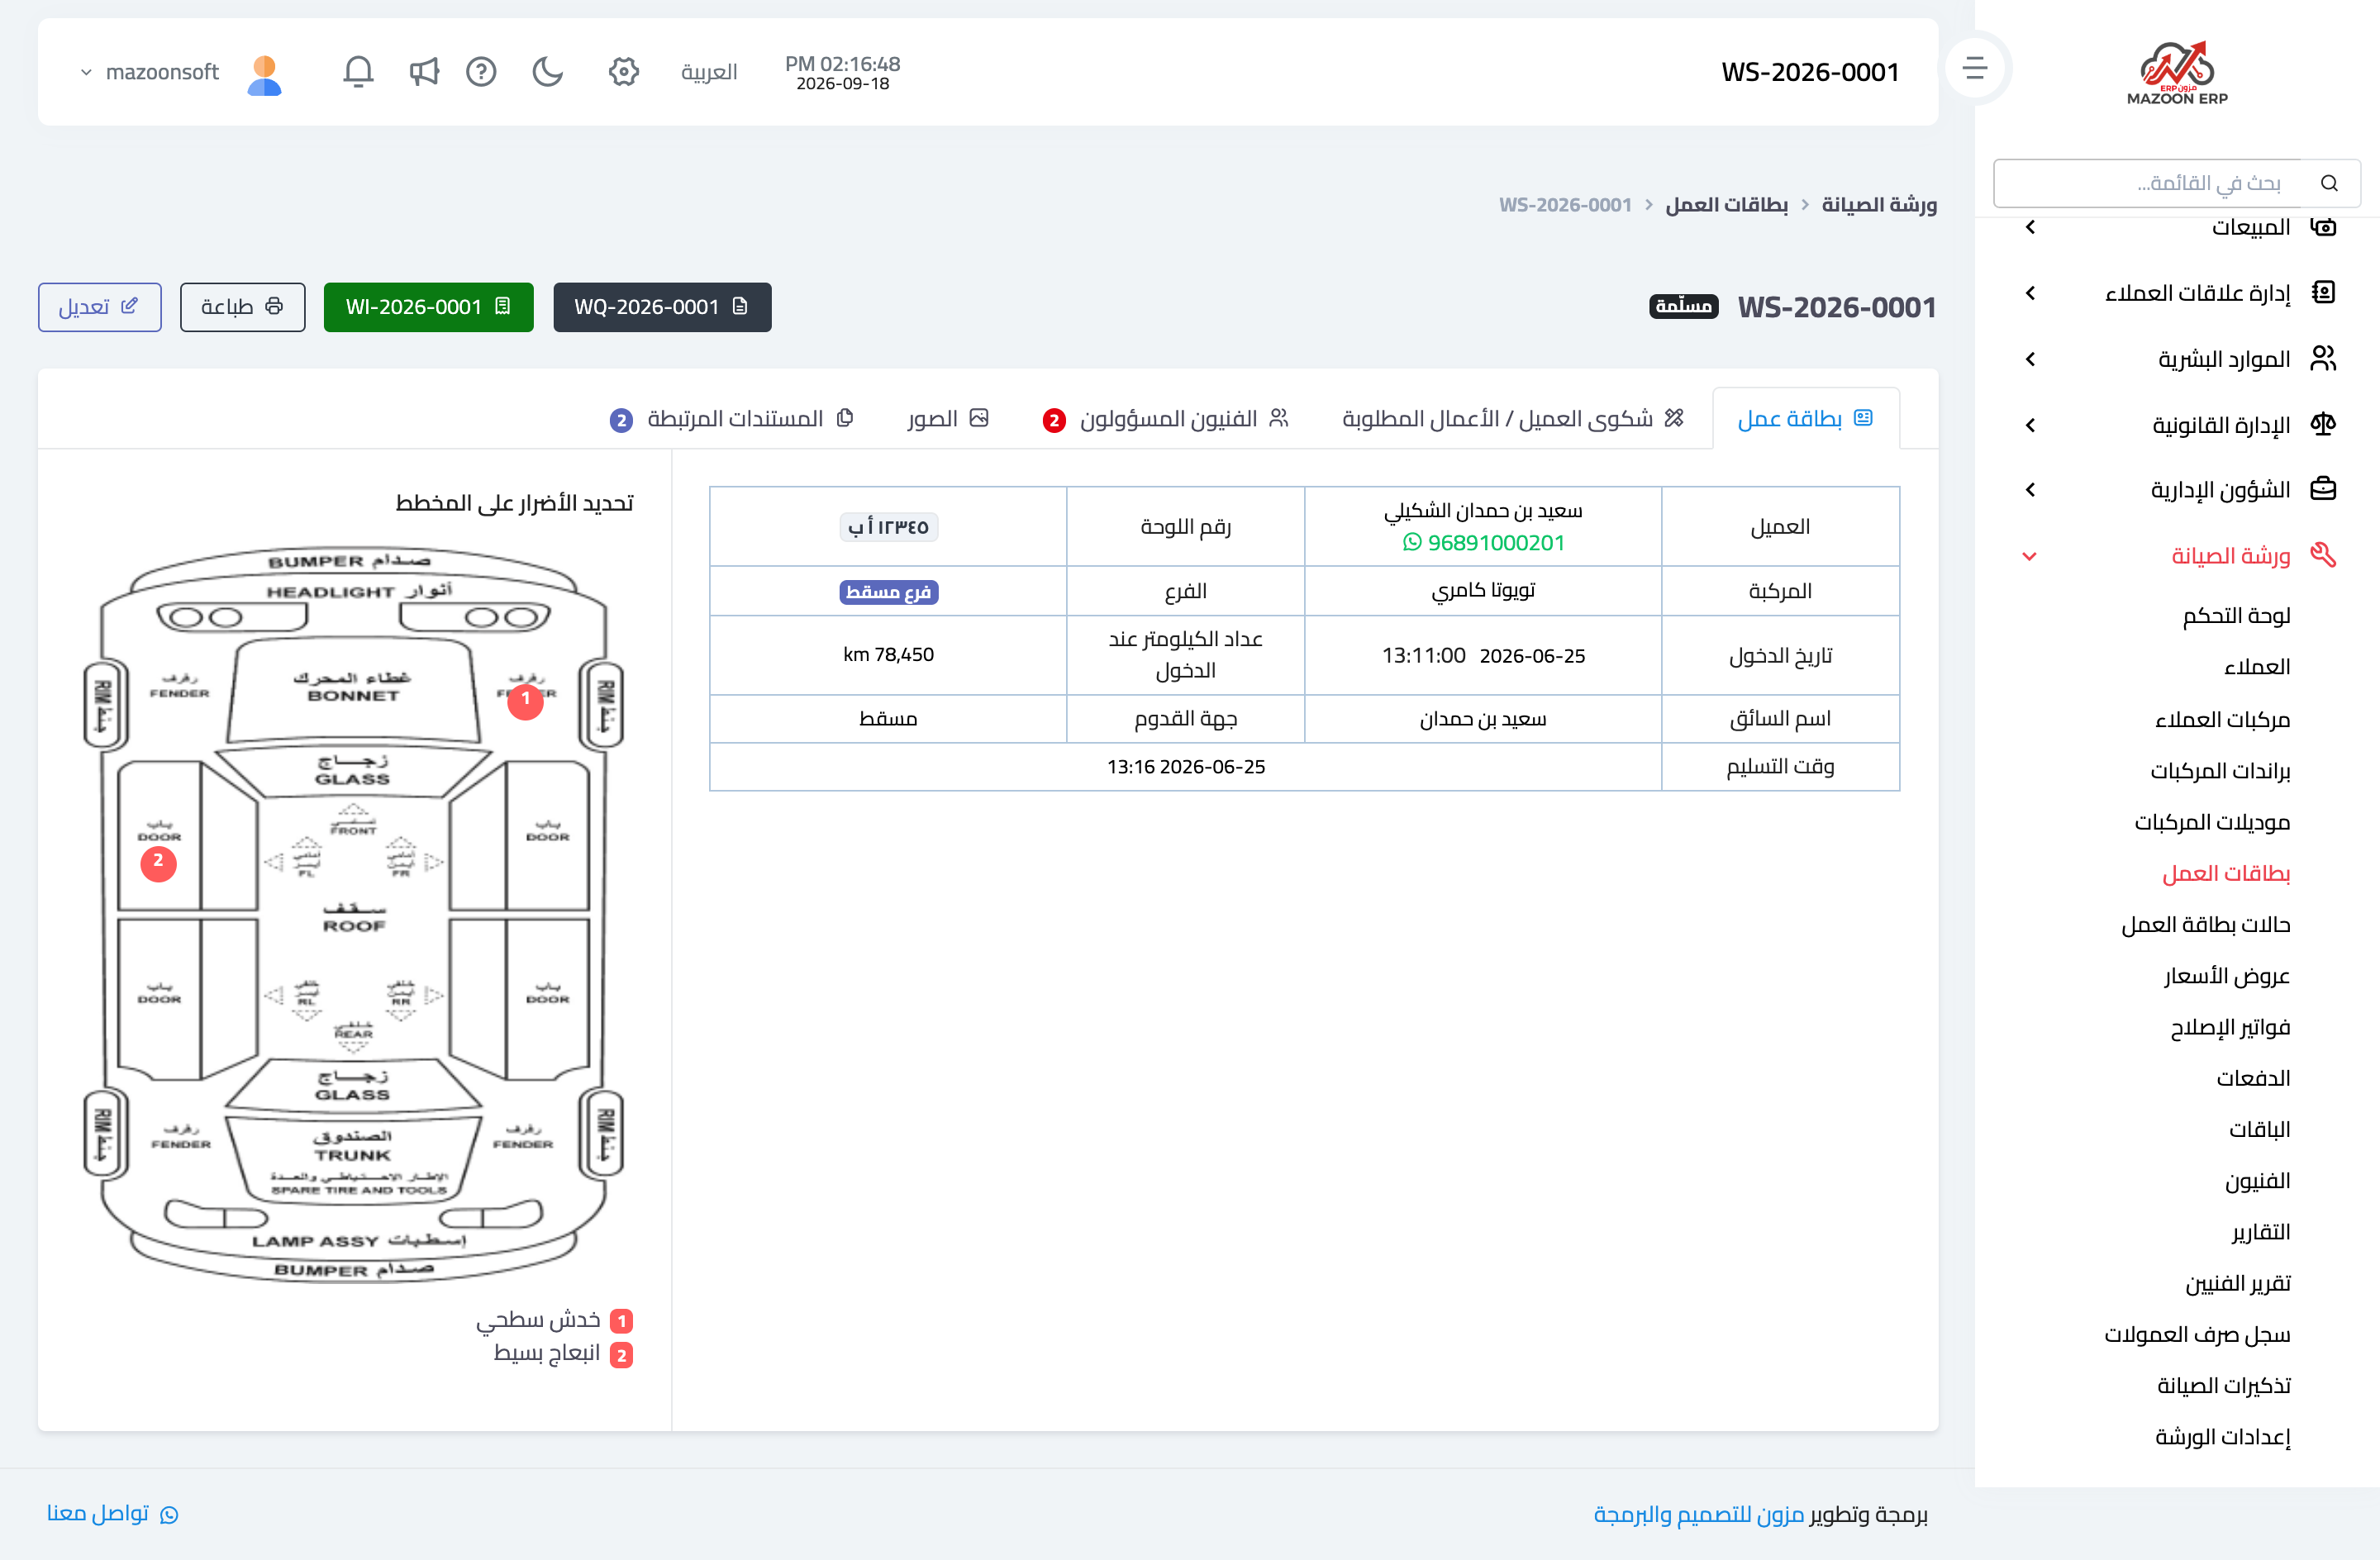
The most important part of the job card is the vehicle diagram, as in Figure 4: click the spot of the damage on the drawing and a numbered marker is added, then write its description beside it — surface scratch, small dent, rust. The markers appear numbered on the drawing with their descriptions listed underneath.
This record is what settles any later dispute over damage the customer says happened in the workshop. Two minutes at intake spare a long argument at handover.
The card tabs
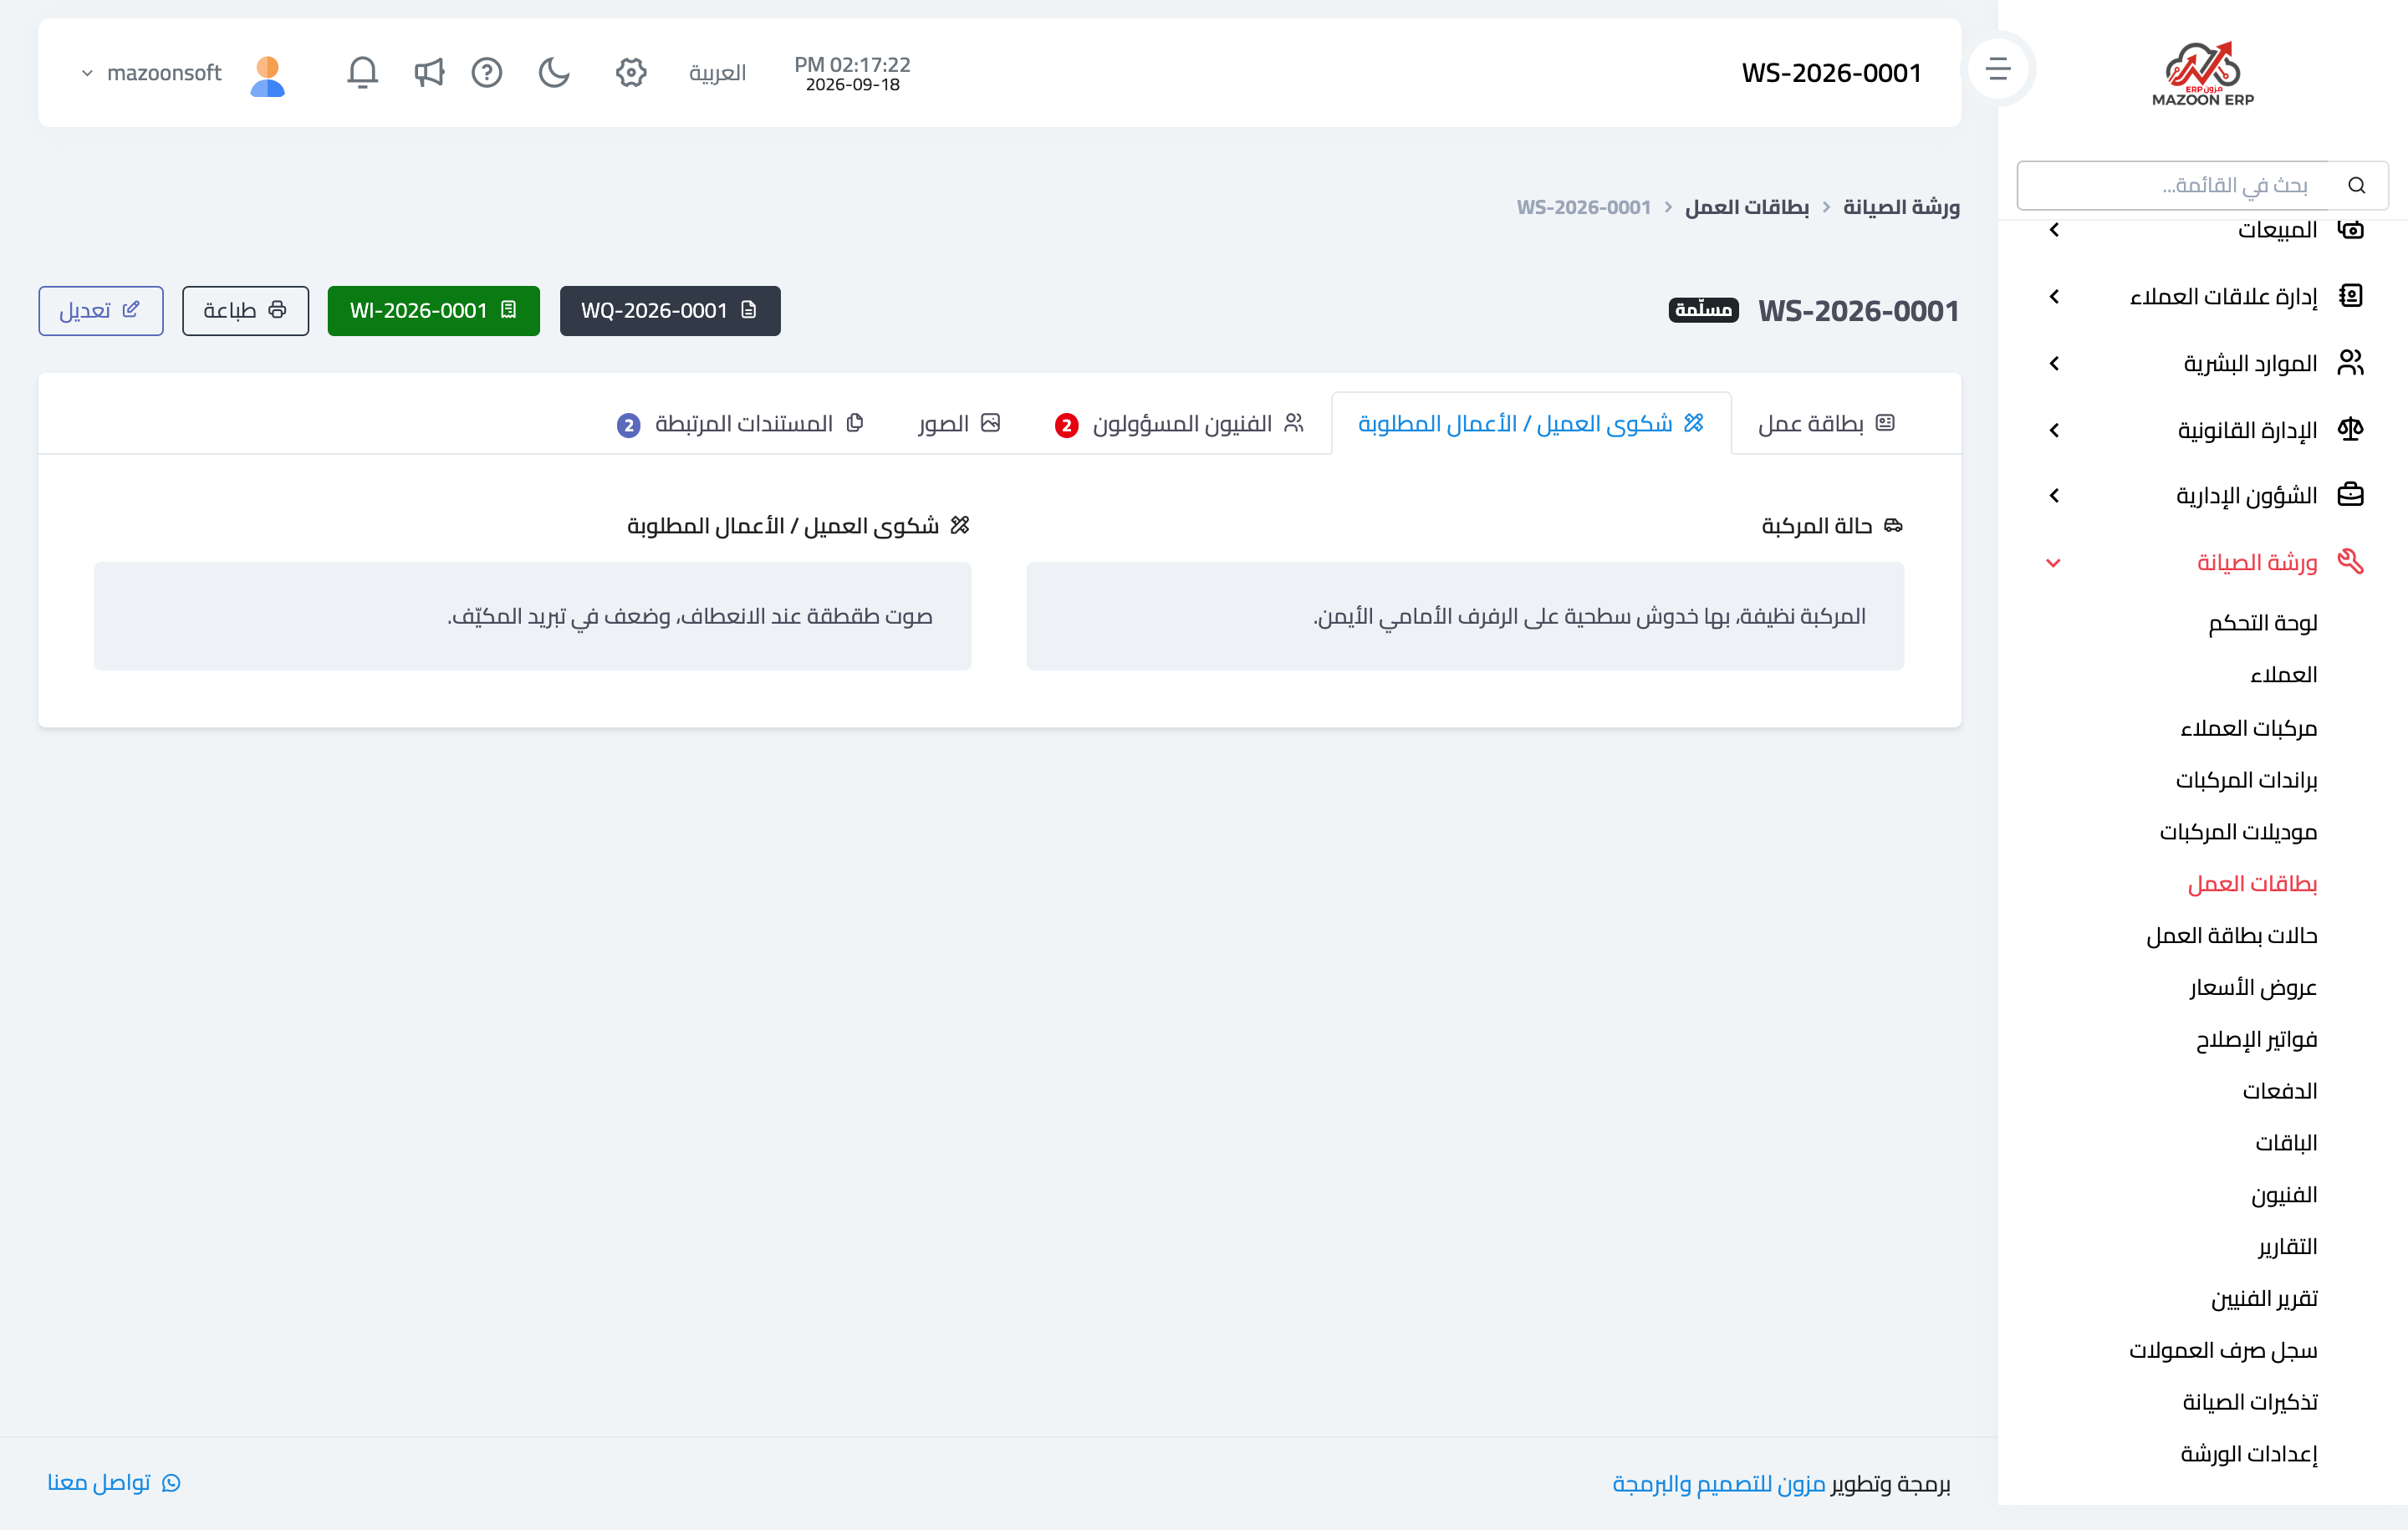
The card has five tabs: Job card with the details and the diagram, Customer complaint / requested work as in Figure 5, Assigned technicians, Photos for documenting the car with a camera, and Linked documents, which shows the quotation and invoice issued from this card.
Tracking the cards
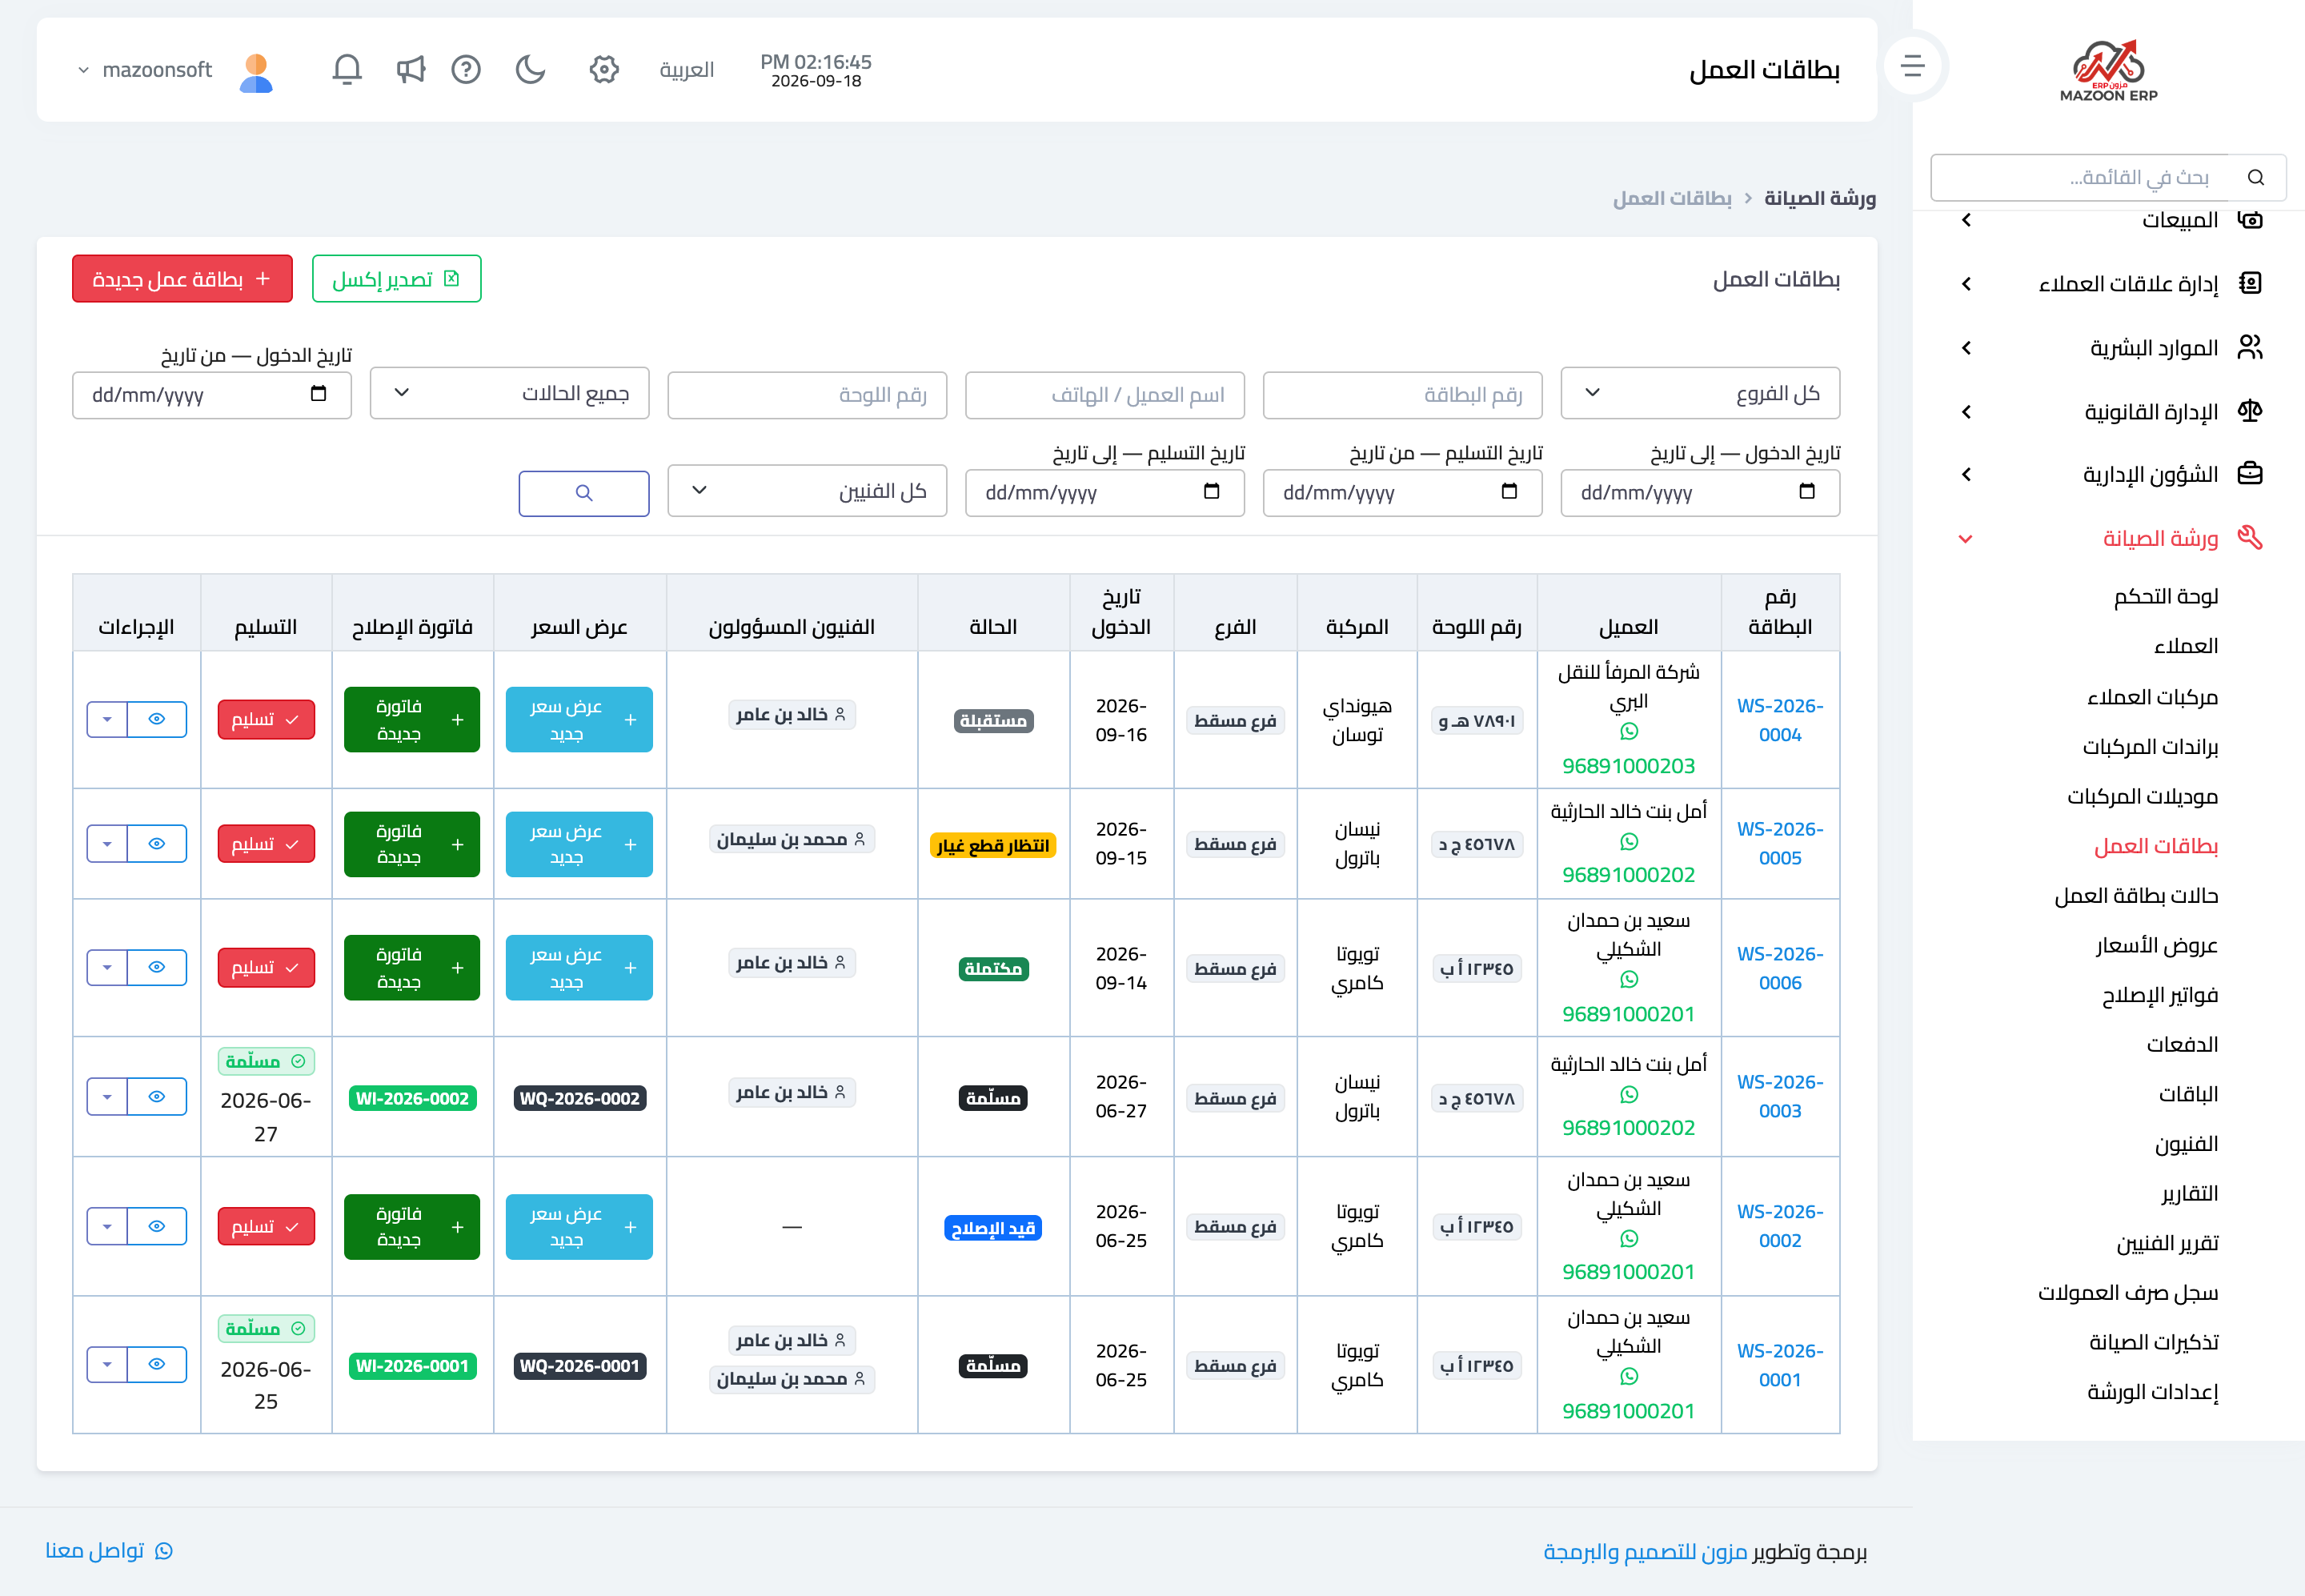
The Job cards screen — Figure 6 — lists every card with its colour-coded status, filters by status, branch, technician, and date, a search by card number, plate, or customer name, and Excel export.
The status is moved by hand as the work progresses: from received to in progress, then waiting for parts or waiting for approval where needed, then completed, and finally delivered through the deliver button, which records the handover time, who handed it over, and the exit odometer reading.
Notes
- Never open a job card without an odometer reading; it is what makes the vehicle history readable and keeps service intervals honest.
- Mark the damage before the car enters the workshop, not after.
- The Print button produces the card with its diagram and markers; the customer signs it, one copy for you and one for them.
Screenshots
Try what you just read on your own data
Open a free 7-day trial — no credit card, with your own company link in minutes.