
How do I upload vehicle photos and change the main image?
The vehicle photo is the first thing a customer sees on the website, and it is the most common question: where do I change it? It is not on a separate page — it lives inside the vehicle edit form.
Steps
- Open Vehicle Rental → Vehicles and press Edit on the vehicle.
- Go to the Vehicle images tab — the last one on the tab strip — Figure 1.
- To change the main image: press Choose File in the top field and pick the new photo; it replaces the old one on save.
- To add more photos: use the Add additional images section, fill in the side (front, rear, interior) and a caption, then press + Add another for a new row.
- To remove an existing photo: press Delete under it in the Current images section.
- Press Update vehicle. The result shows immediately on the vehicle page — Figure 2 — and on the public website if the vehicle is published.
Notes
- There is only one main image, and it is the one used on the card in the fleet page, so choose a clear side view rather than a close-up.
- A vehicle with no main image shows on the website as an empty grey box, which is worse than not publishing it at all.
- Use compressed images at a sensible width; a page loaded with huge photos loses the visitor before it opens.
- Condition photos taken at handover and return belong inside the contract, not here; these are the vehicle’s permanent marketing photos.
Screenshots
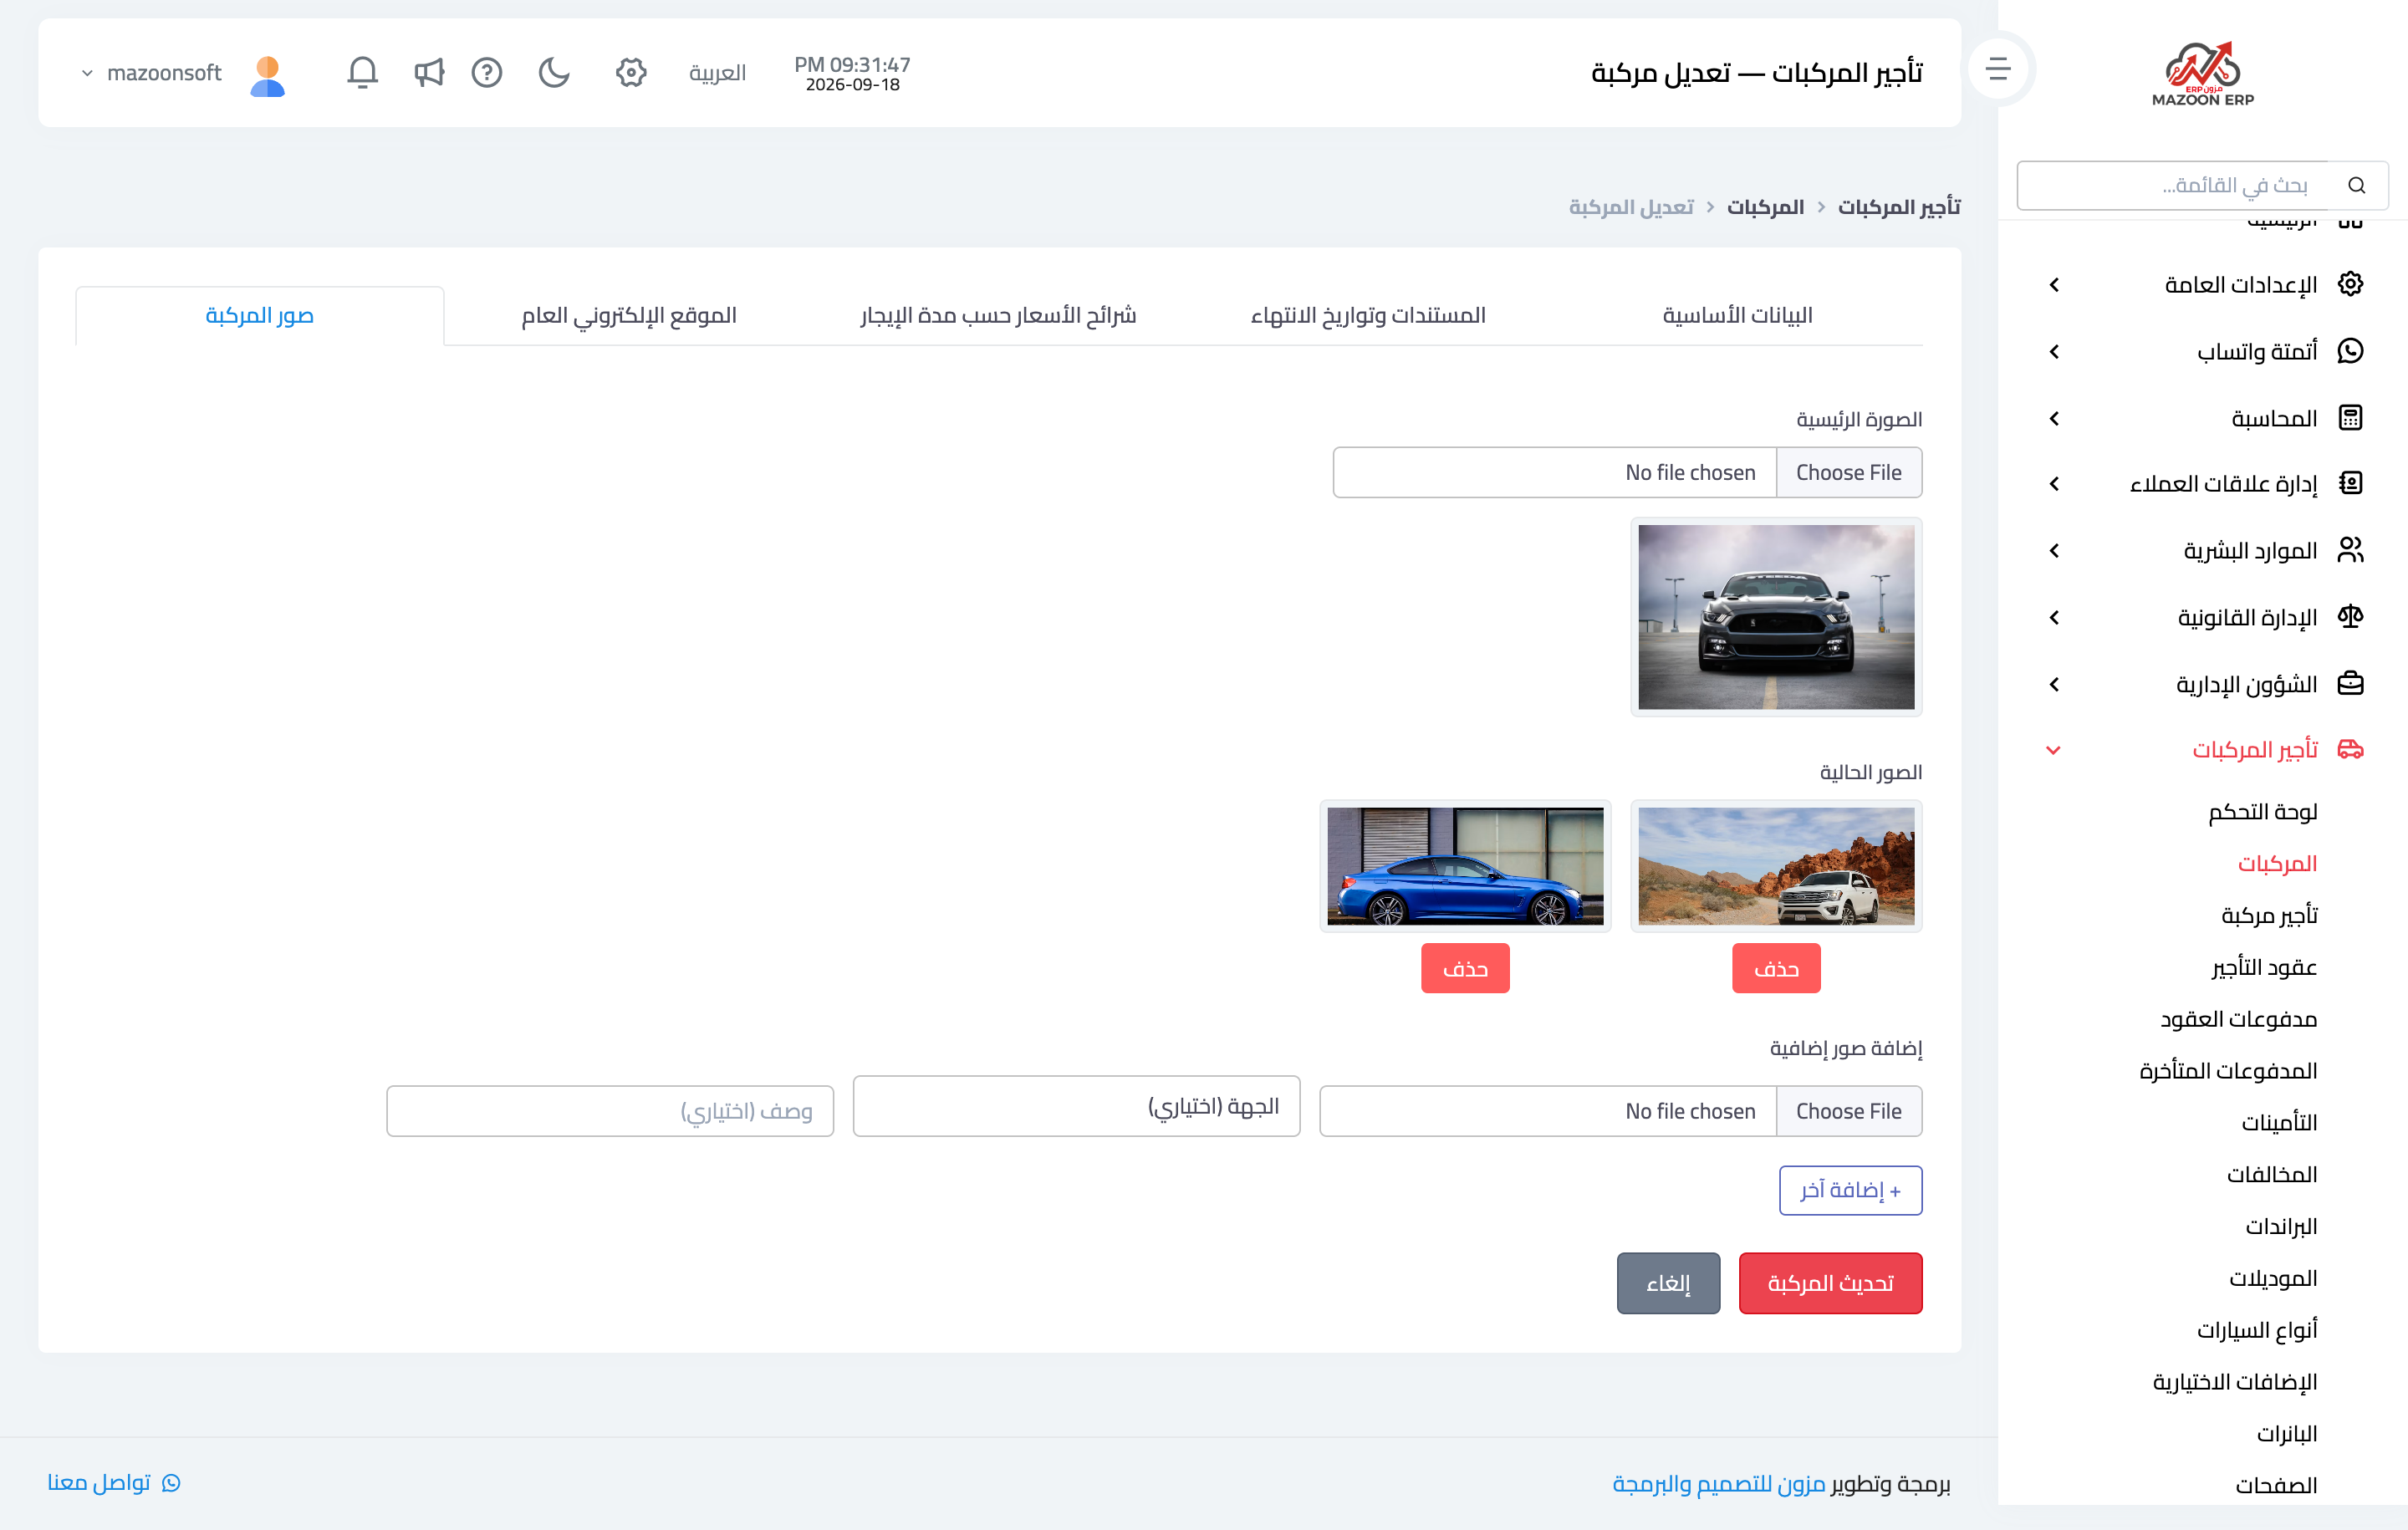
Figure 1
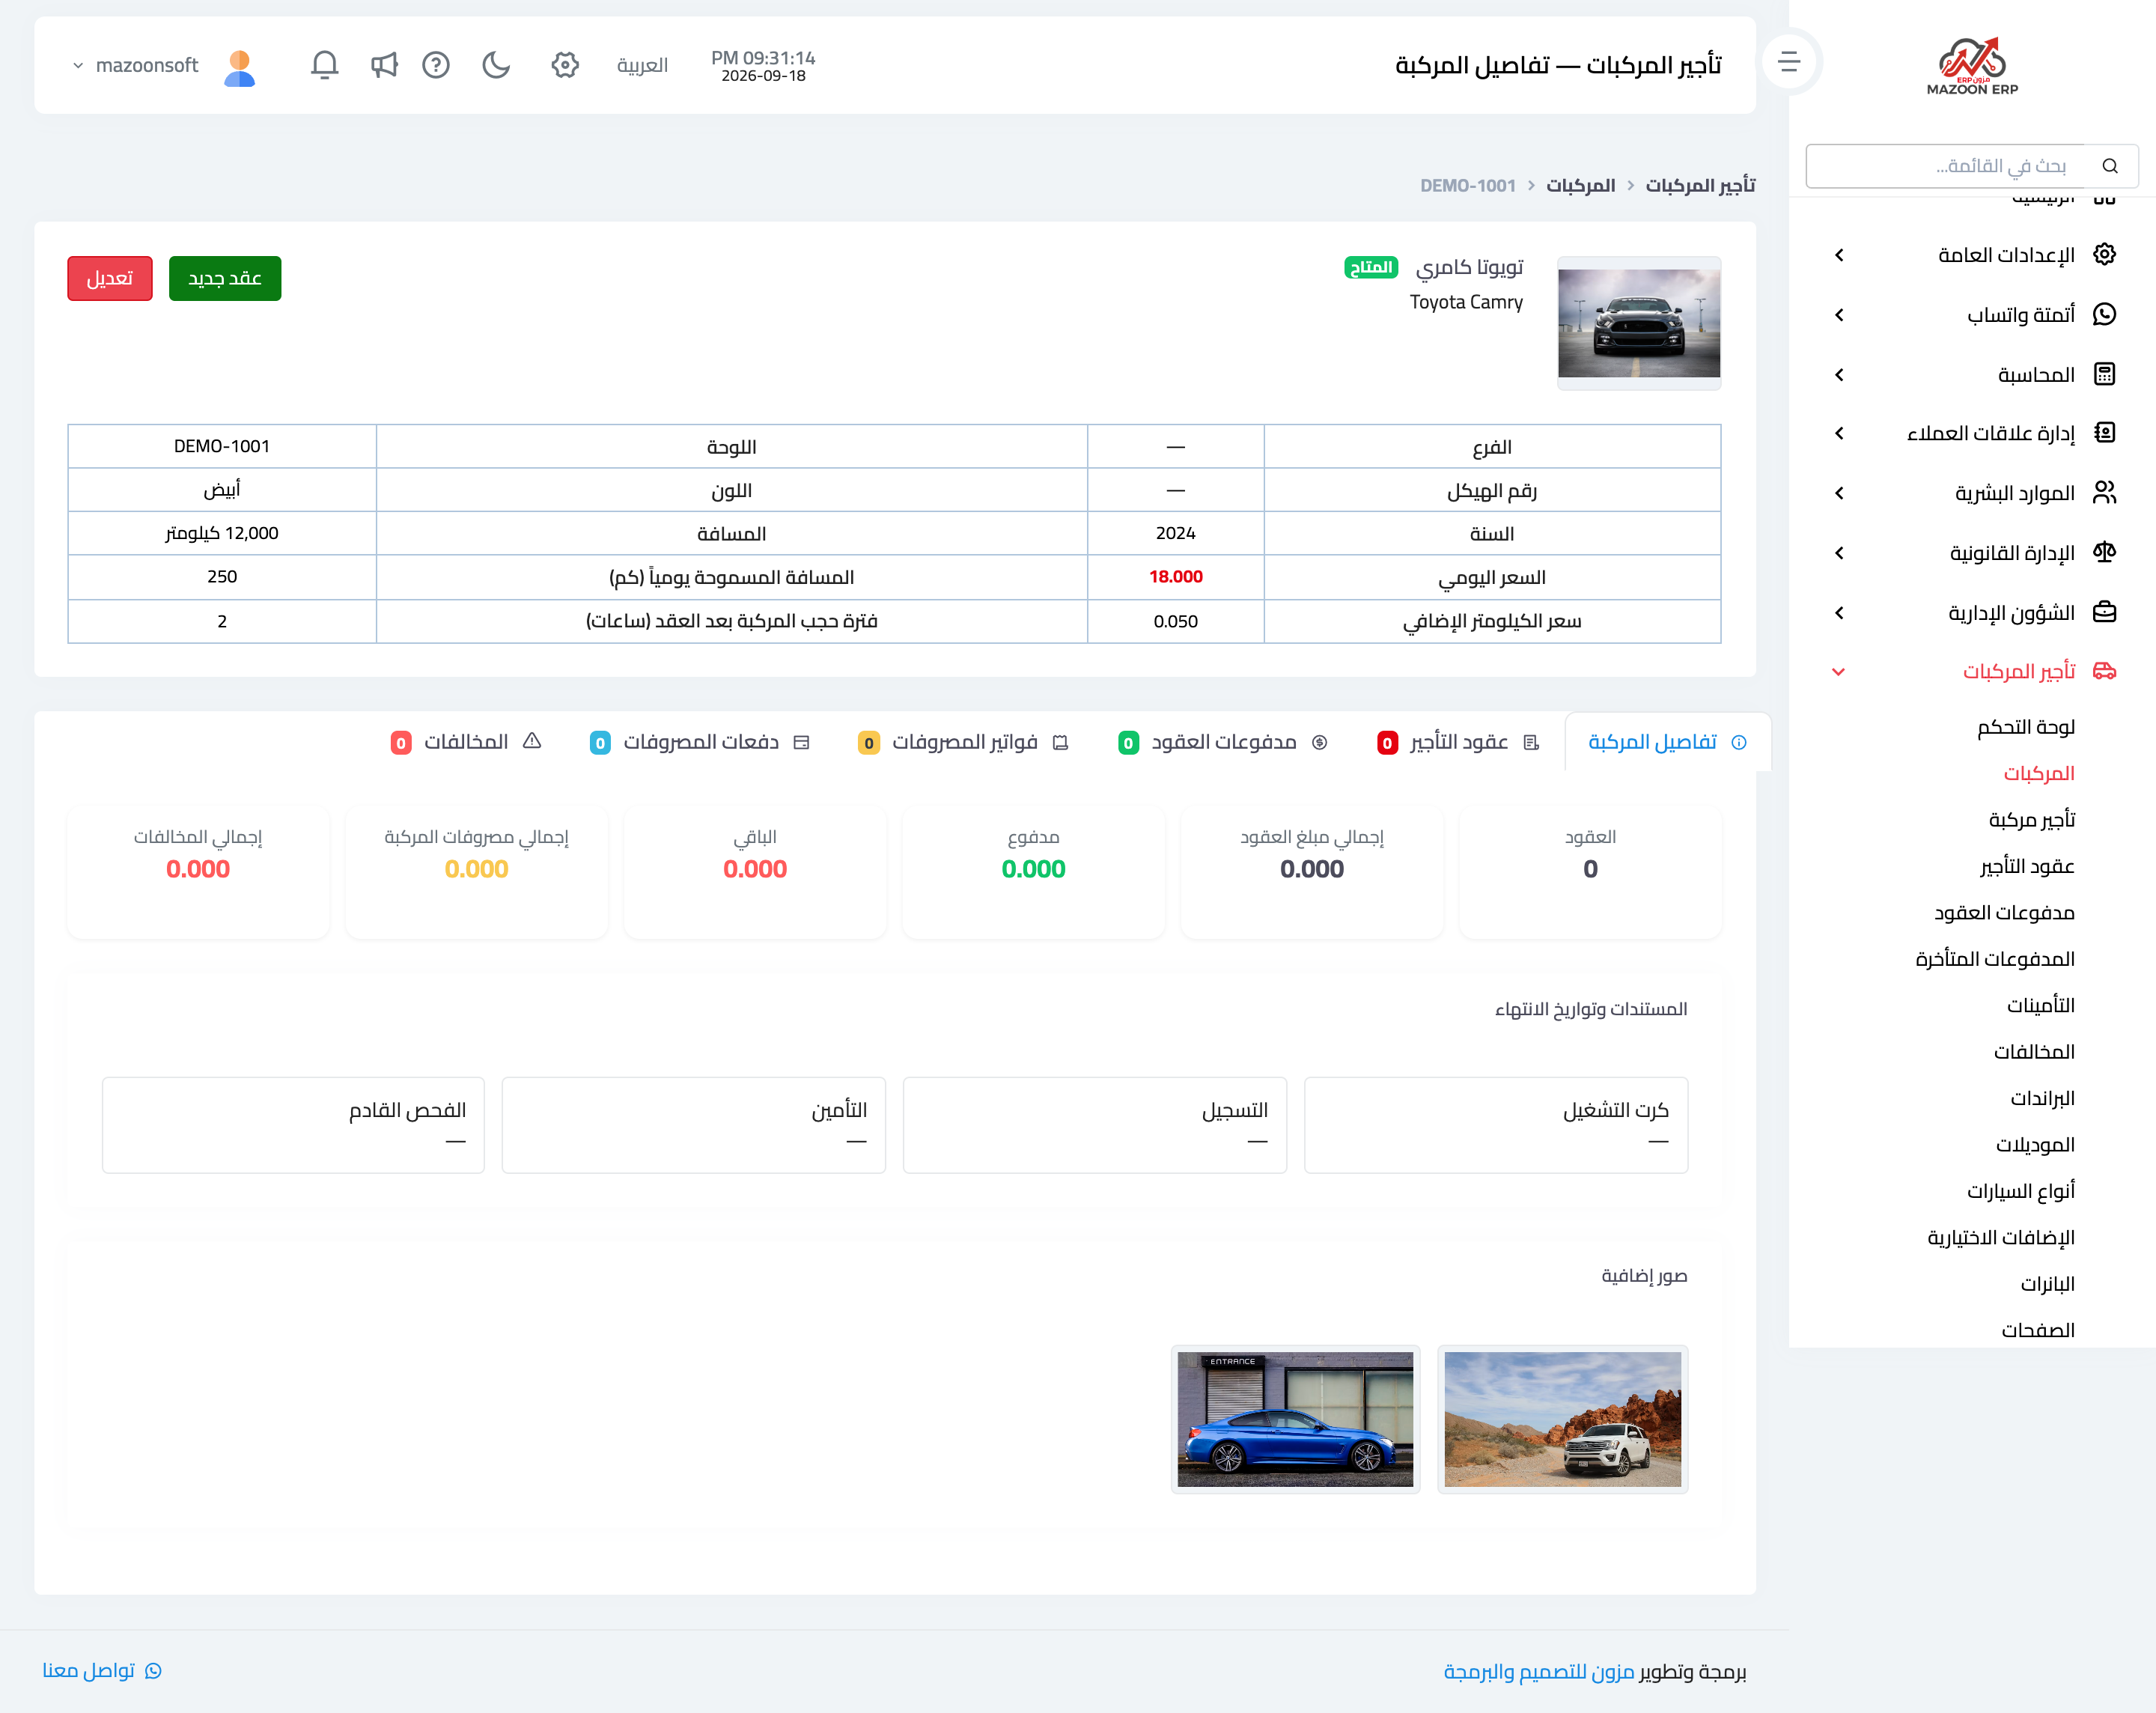
Figure 2
Try what you just read on your own data
Open a free 7-day trial — no credit card, with your own company link in minutes.