
How do I add pages, banners and social links to the rental website?
The rental website is more than a list of cars: it has informational pages, rotating banners at the top of the homepage, and social links in the footer. All of it is managed from inside the system.
Pages
- Open Vehicle Rental → Pages — Figure 1 — then Add page.
- Write the title and the content in Arabic and English — things like “About us” and “Terms and conditions”.
- Choose the location: header, footer, both, or a direct link only.
- Leave the slug empty to have it generated, set the status to active, and save.
Banners
- Open Banners — Figure 2 — then Add banner.
- Upload the image and enter the name and the link the visitor goes to when they click.
- Set the sort order; banners rotate at the top of the homepage.
- When editing, leave the image field empty to keep the current image.
Social links
- Open Social links — Figure 3 — then Add social link.
- Pick the platform and enter the URL. If you choose “Other”, write a custom label.
- These links appear in the website footer.
Notes
- Do not delete a page linked from the footer without removing its link; setting it inactive is safer.
- The terms and conditions page on the website is separate from the contract terms in office settings; keep the two consistent.
- A banner with no link is wasted space; always point it at a vehicle page or a specific offer.
Screenshots
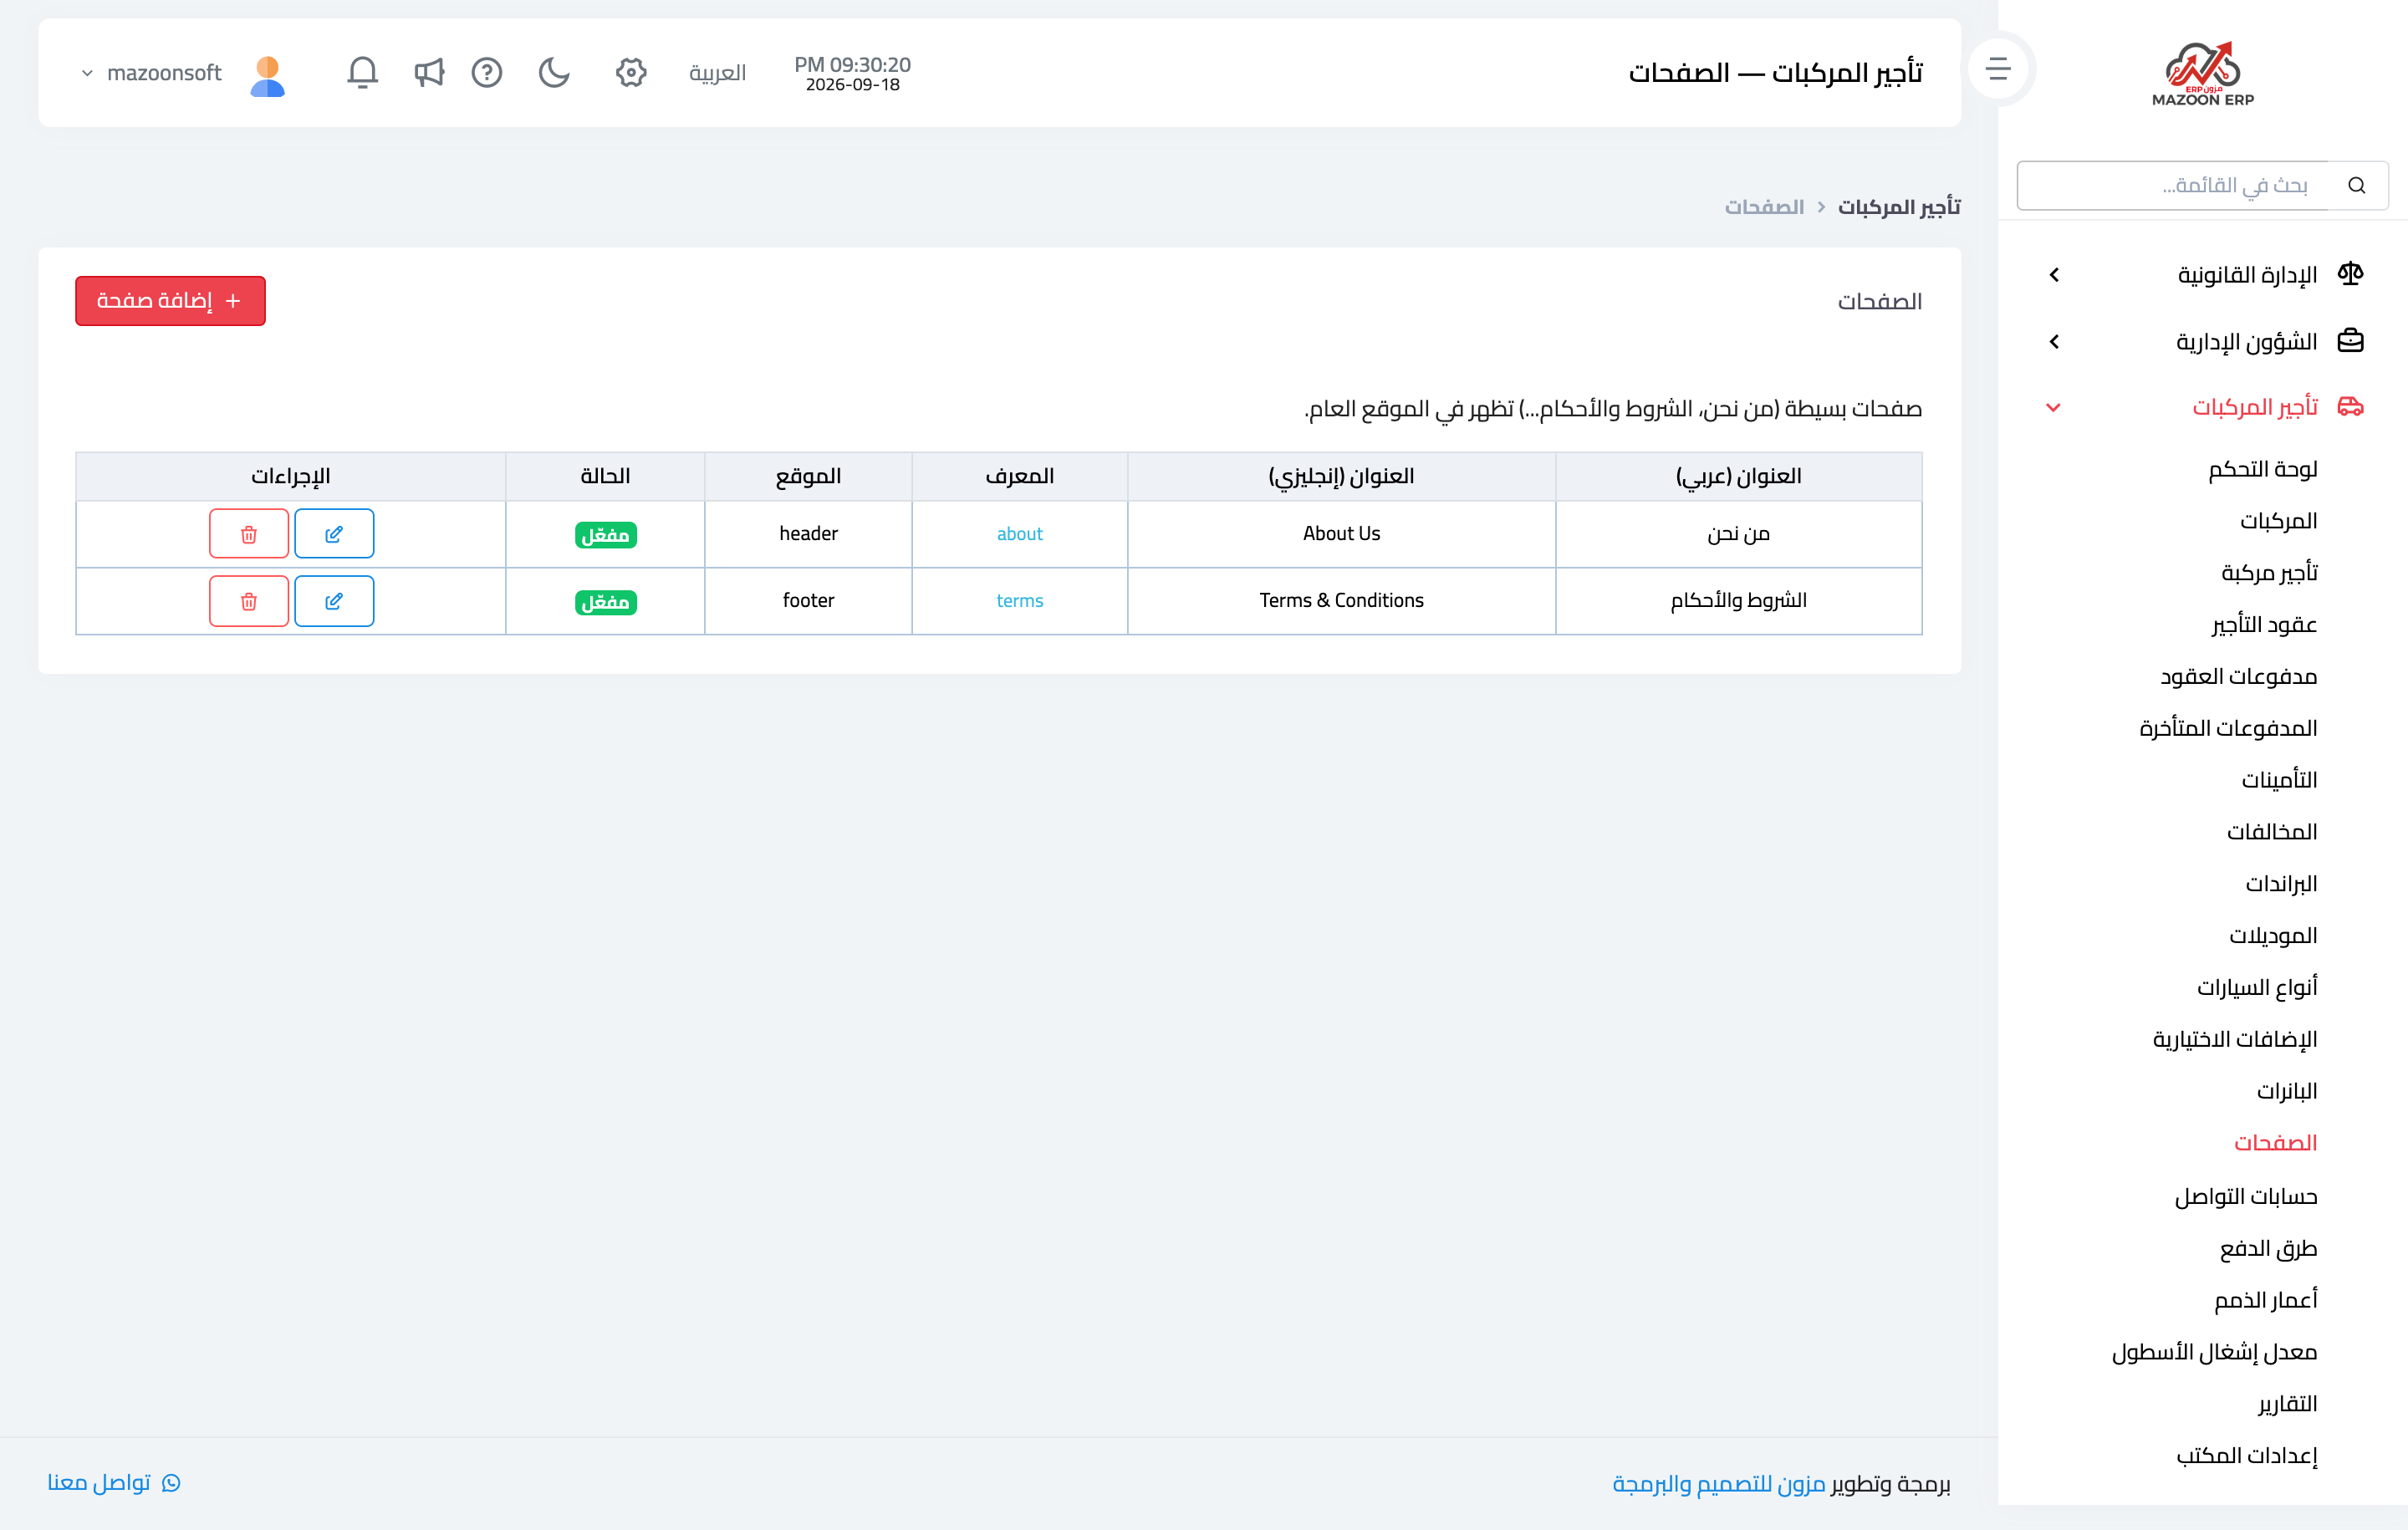
Figure 1
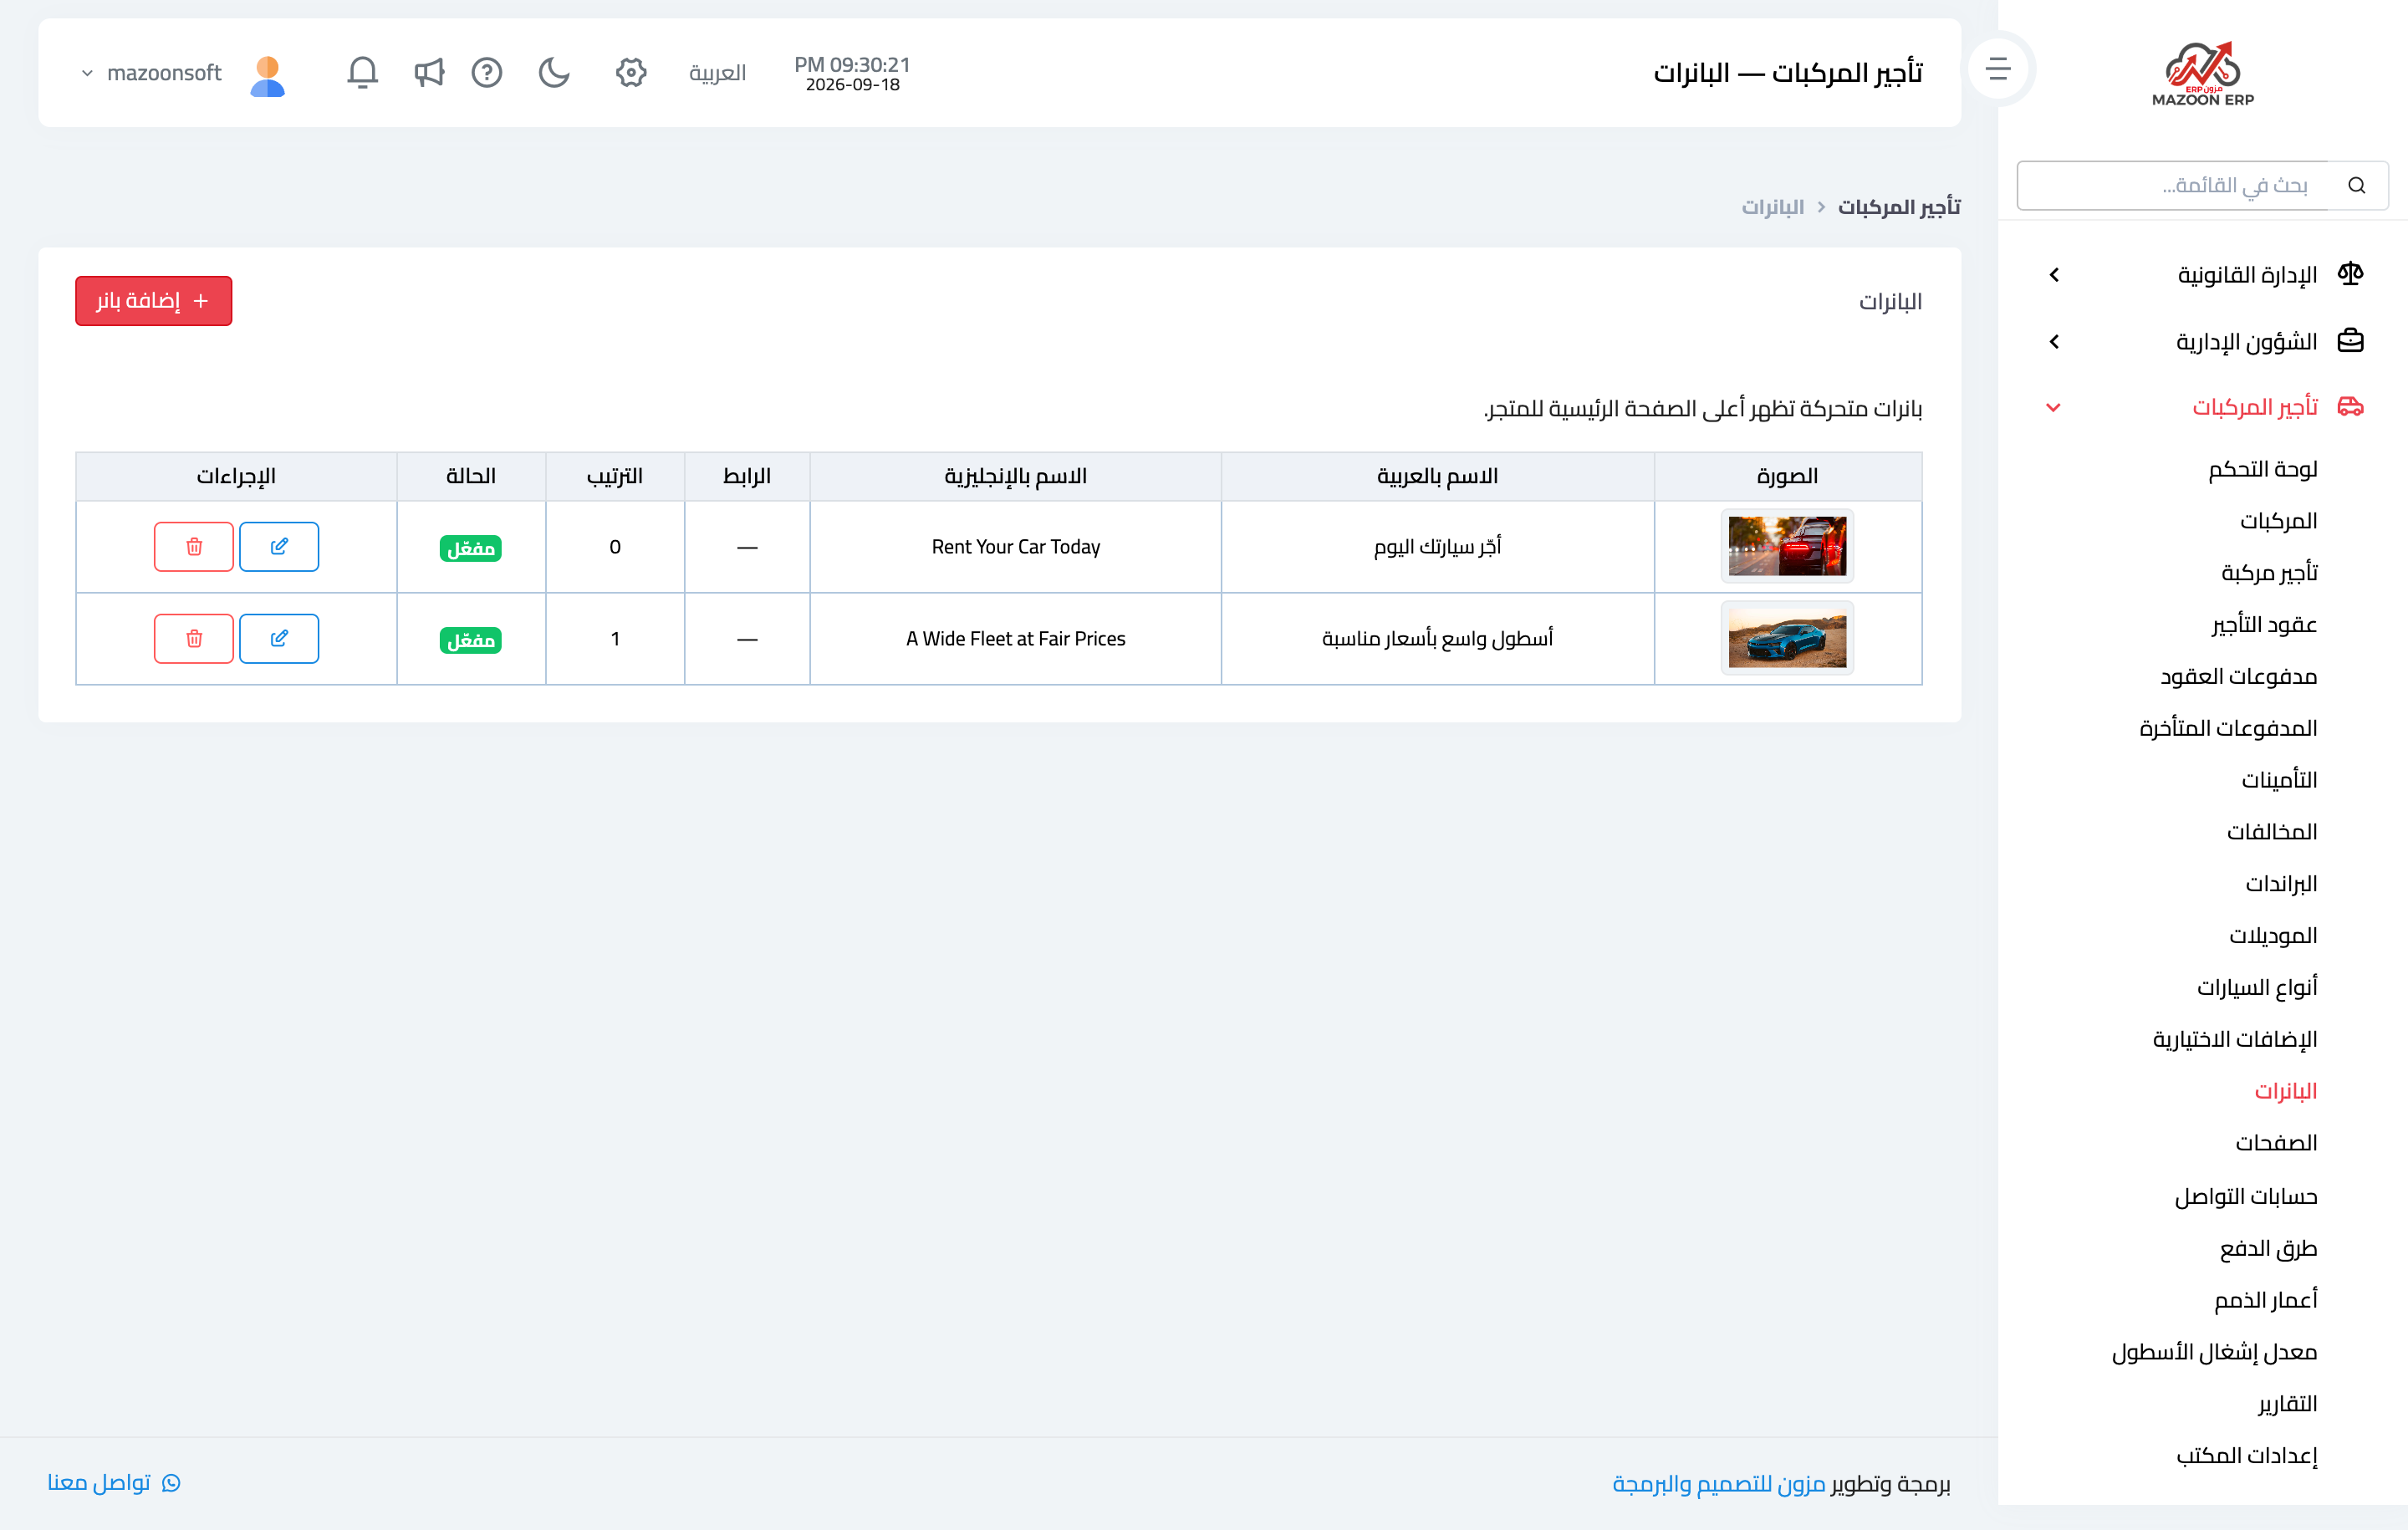
Figure 2
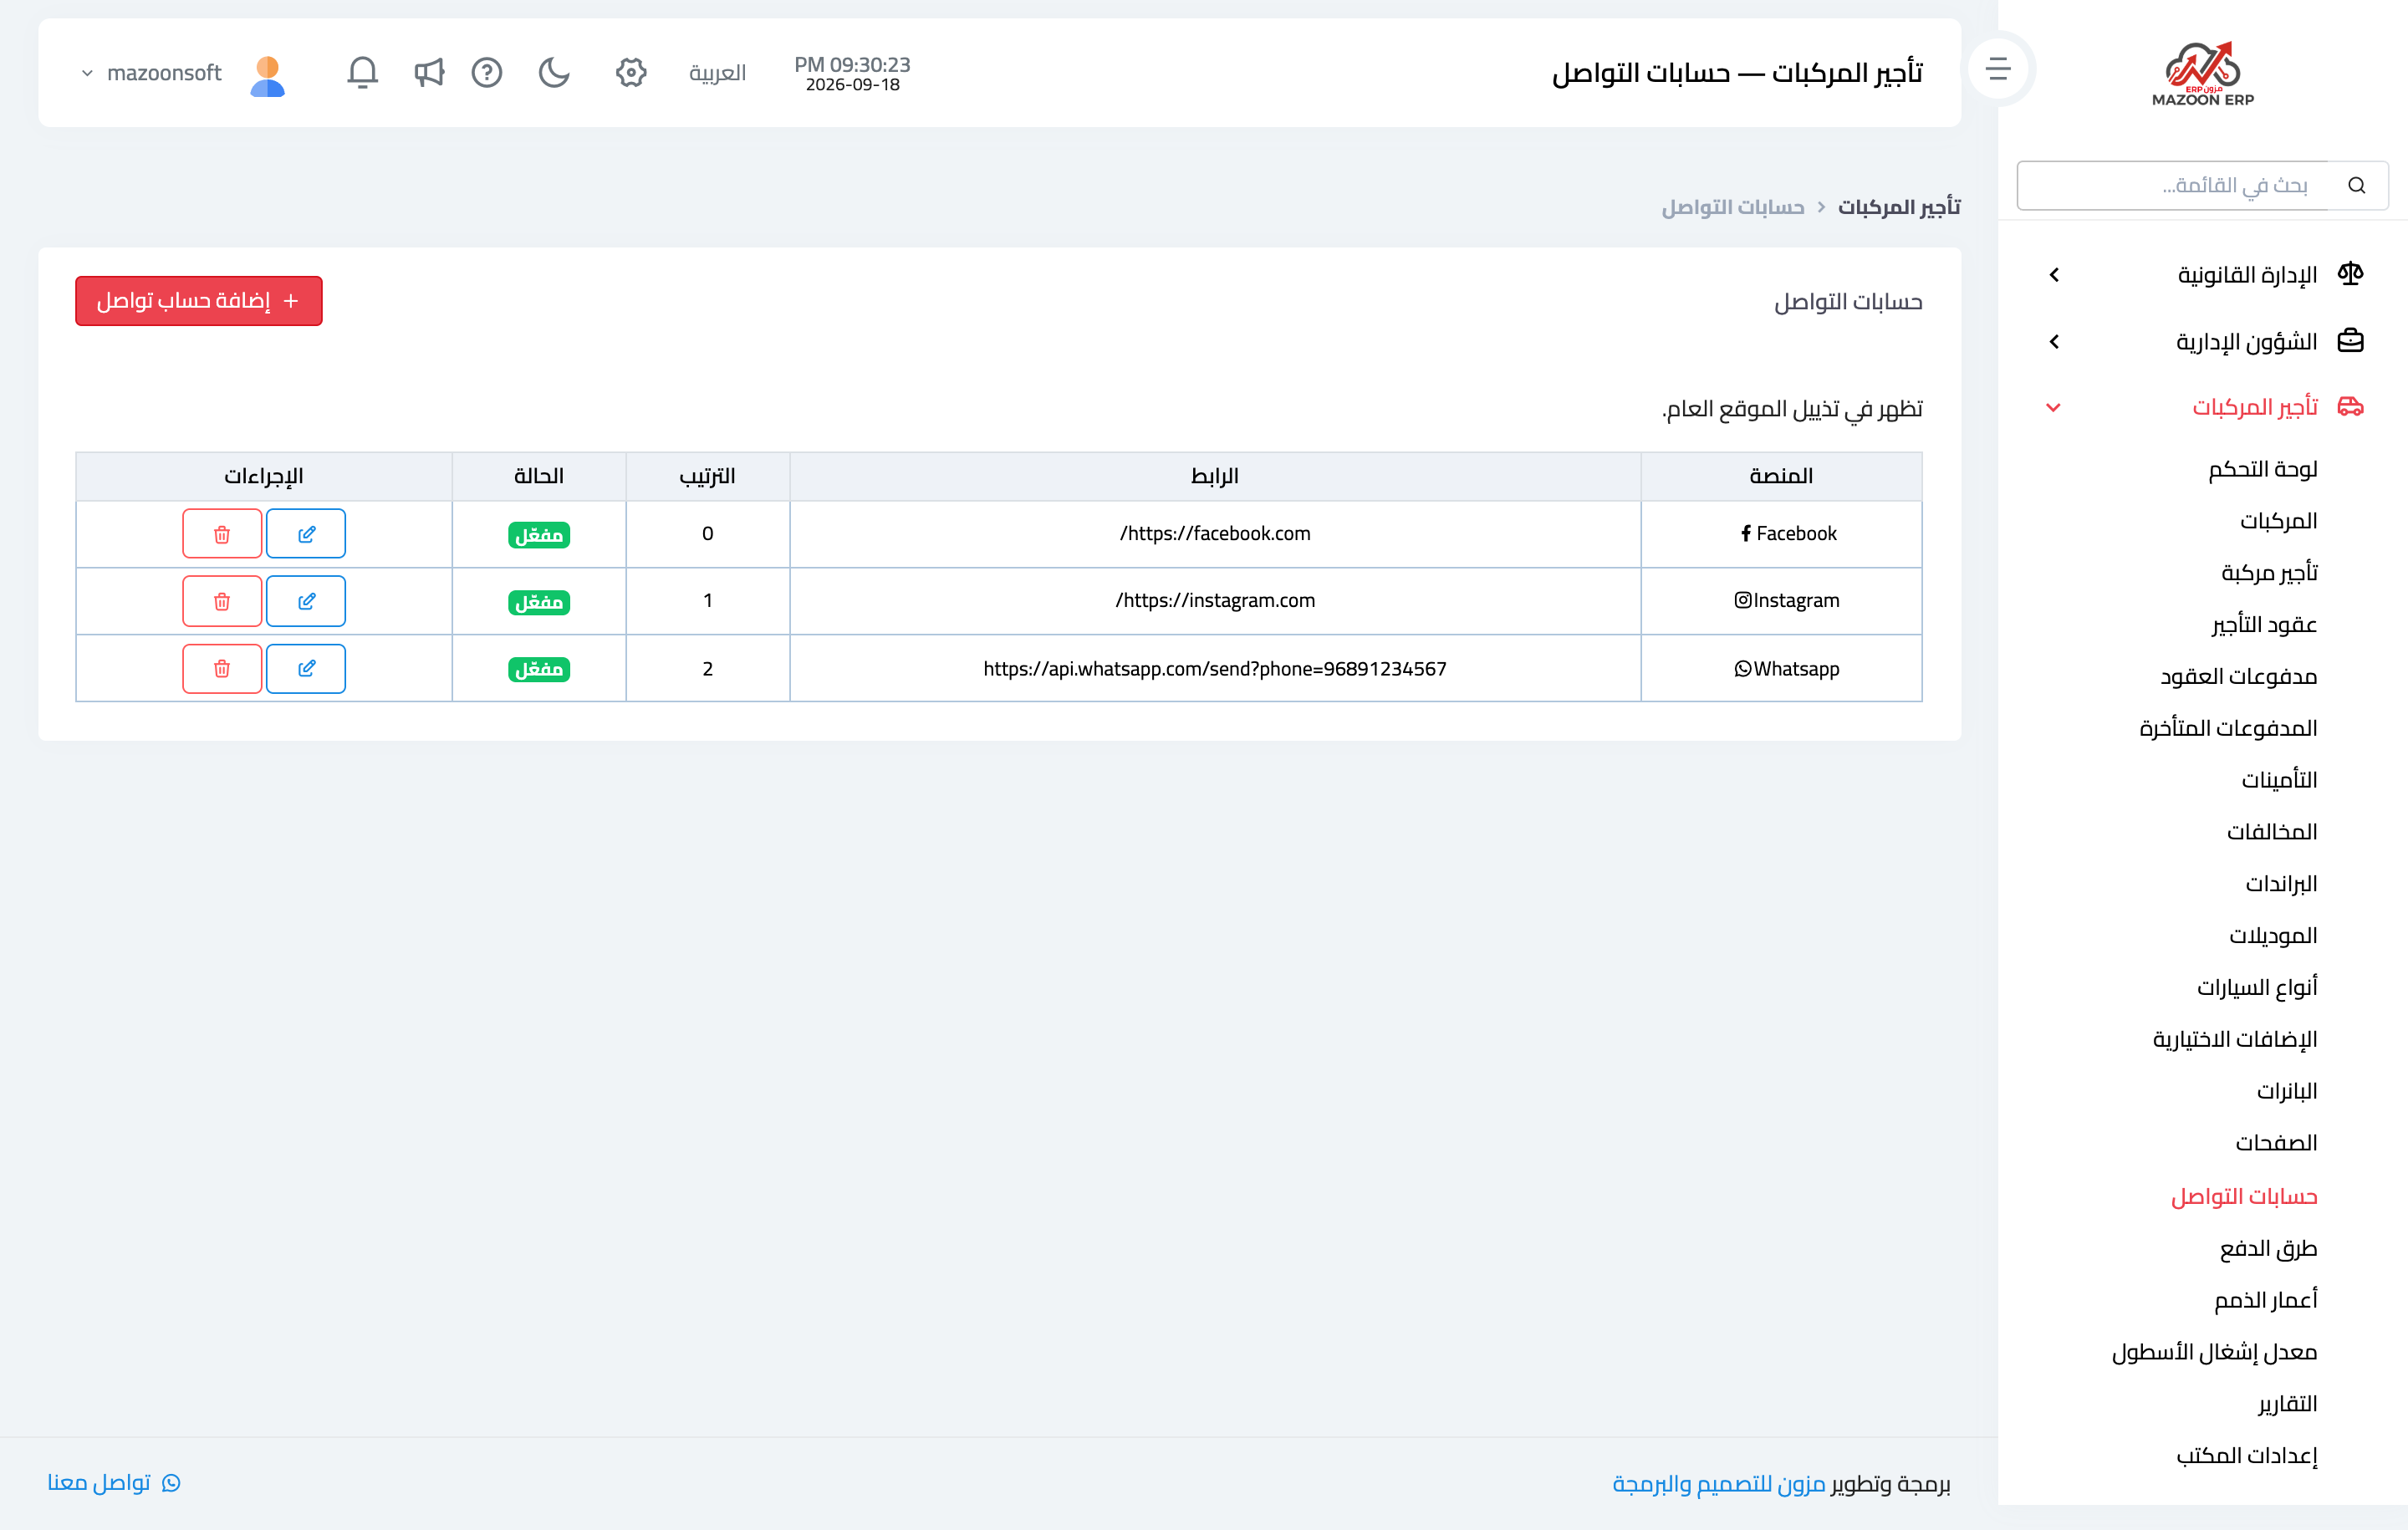
Figure 3
Try what you just read on your own data
Open a free 7-day trial — no credit card, with your own company link in minutes.