
Recording attendance: one by one, in bulk, and by import
Three ways to enter attendance, each suited to a different size. Pick the one that fits your headcount rather than making life hard.
1 — A single record
- Open HR → Attendance and press Add Attendance Record — image 1.
- Pick the employee and the date.
- Enter the check-in and check-out times and the status.
- Save.
2 — Bulk entry
Press Bulk Entry for a screen listing every employee for one day — image 2. Set the date, run down the rows setting each person's status and times, and save them all at once. This suits a business under fifty people with no biometric device.
3 — Importing a file
- Press Import, then Download Template.
- The template has four columns: employee_number, date, check_in, check_out.
- Fill it in — the employee number like EMP-000001, the date as 2026-02-15, and times as 08:00 and 17:00.
- Upload the file and press Import.
The screen also accepts Arabic column headings, so an Arabic export from a biometric device needs no renaming.
The five statuses
Present · Absent · Late · Half day · On leave.
Notes
- Importing is the practical route for anyone with a biometric device: export a monthly file and upload it instead of hundreds of manual entries.
- The employee number is the key in the file — not the name. Check it before uploading.
- Test the import with ten rows and check the result before uploading a whole month.
- Attendance records feed salary calculation, so review them before generating the month's payroll, not after.
- The dashboard shows present today and absent today — a quick signal that entry is actually happening.
- Employees see their own attendance in My Portal with monthly and calendar views, so they can check it and report errors early.
Screenshots
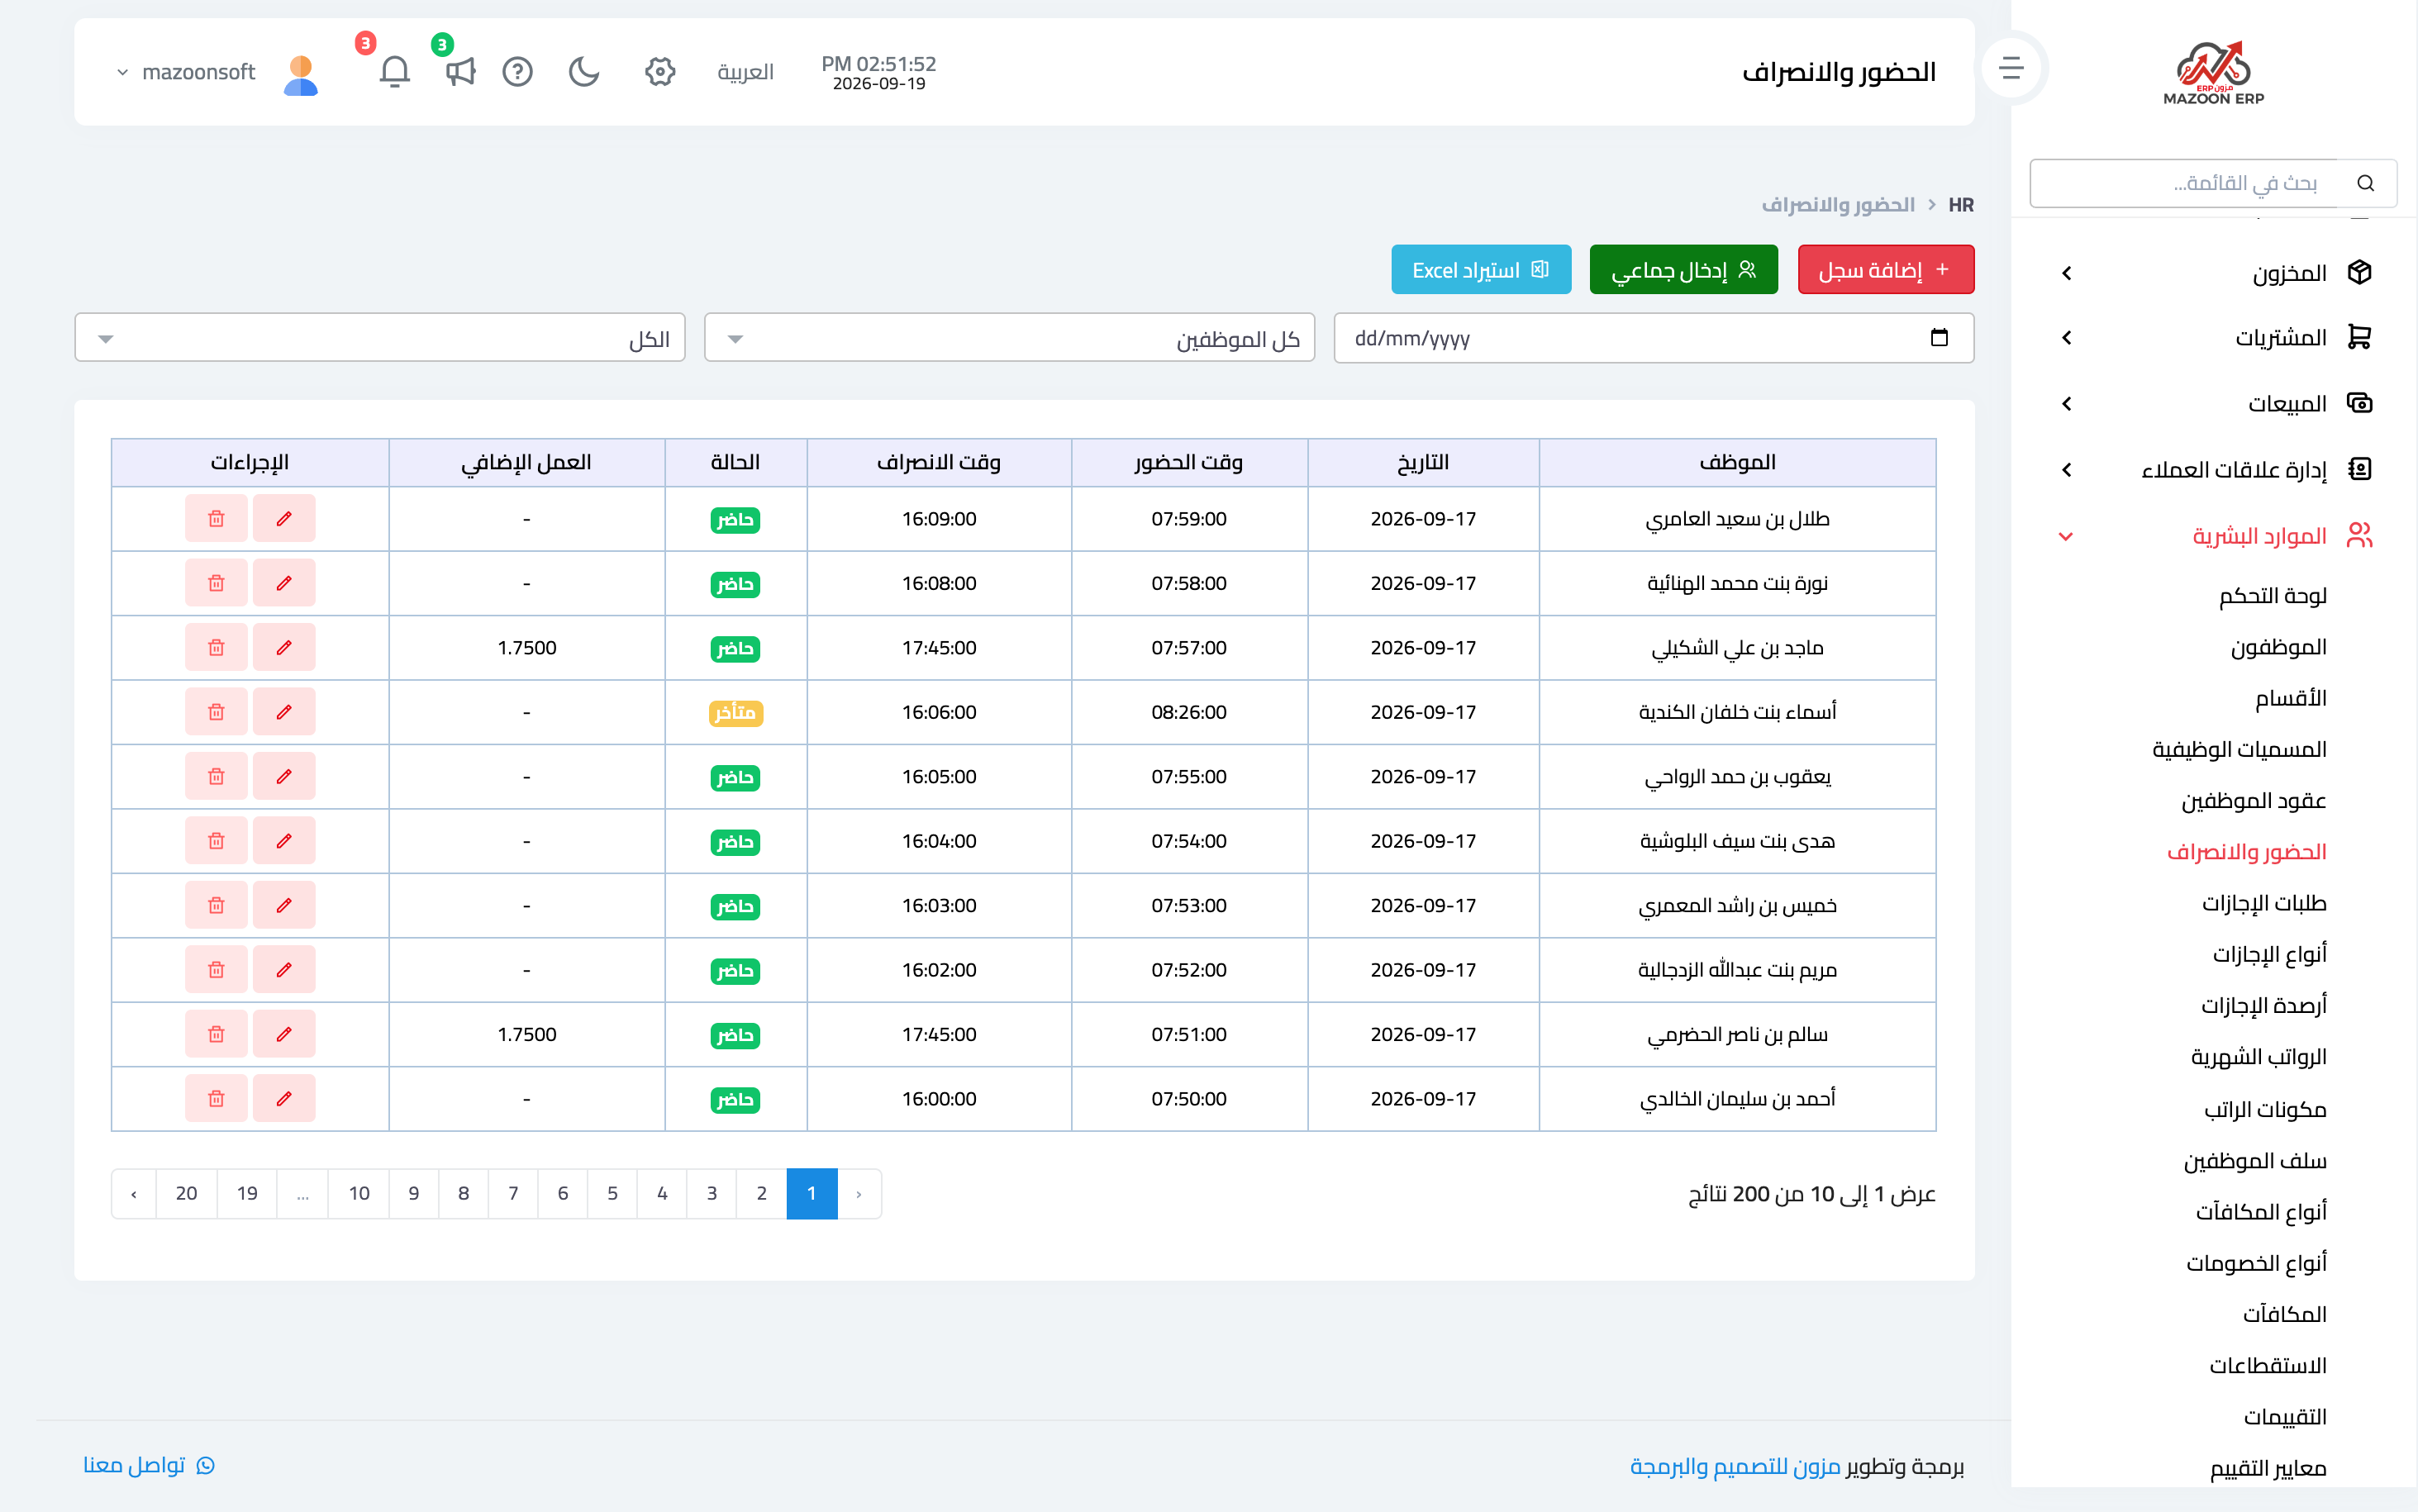
Figure 1
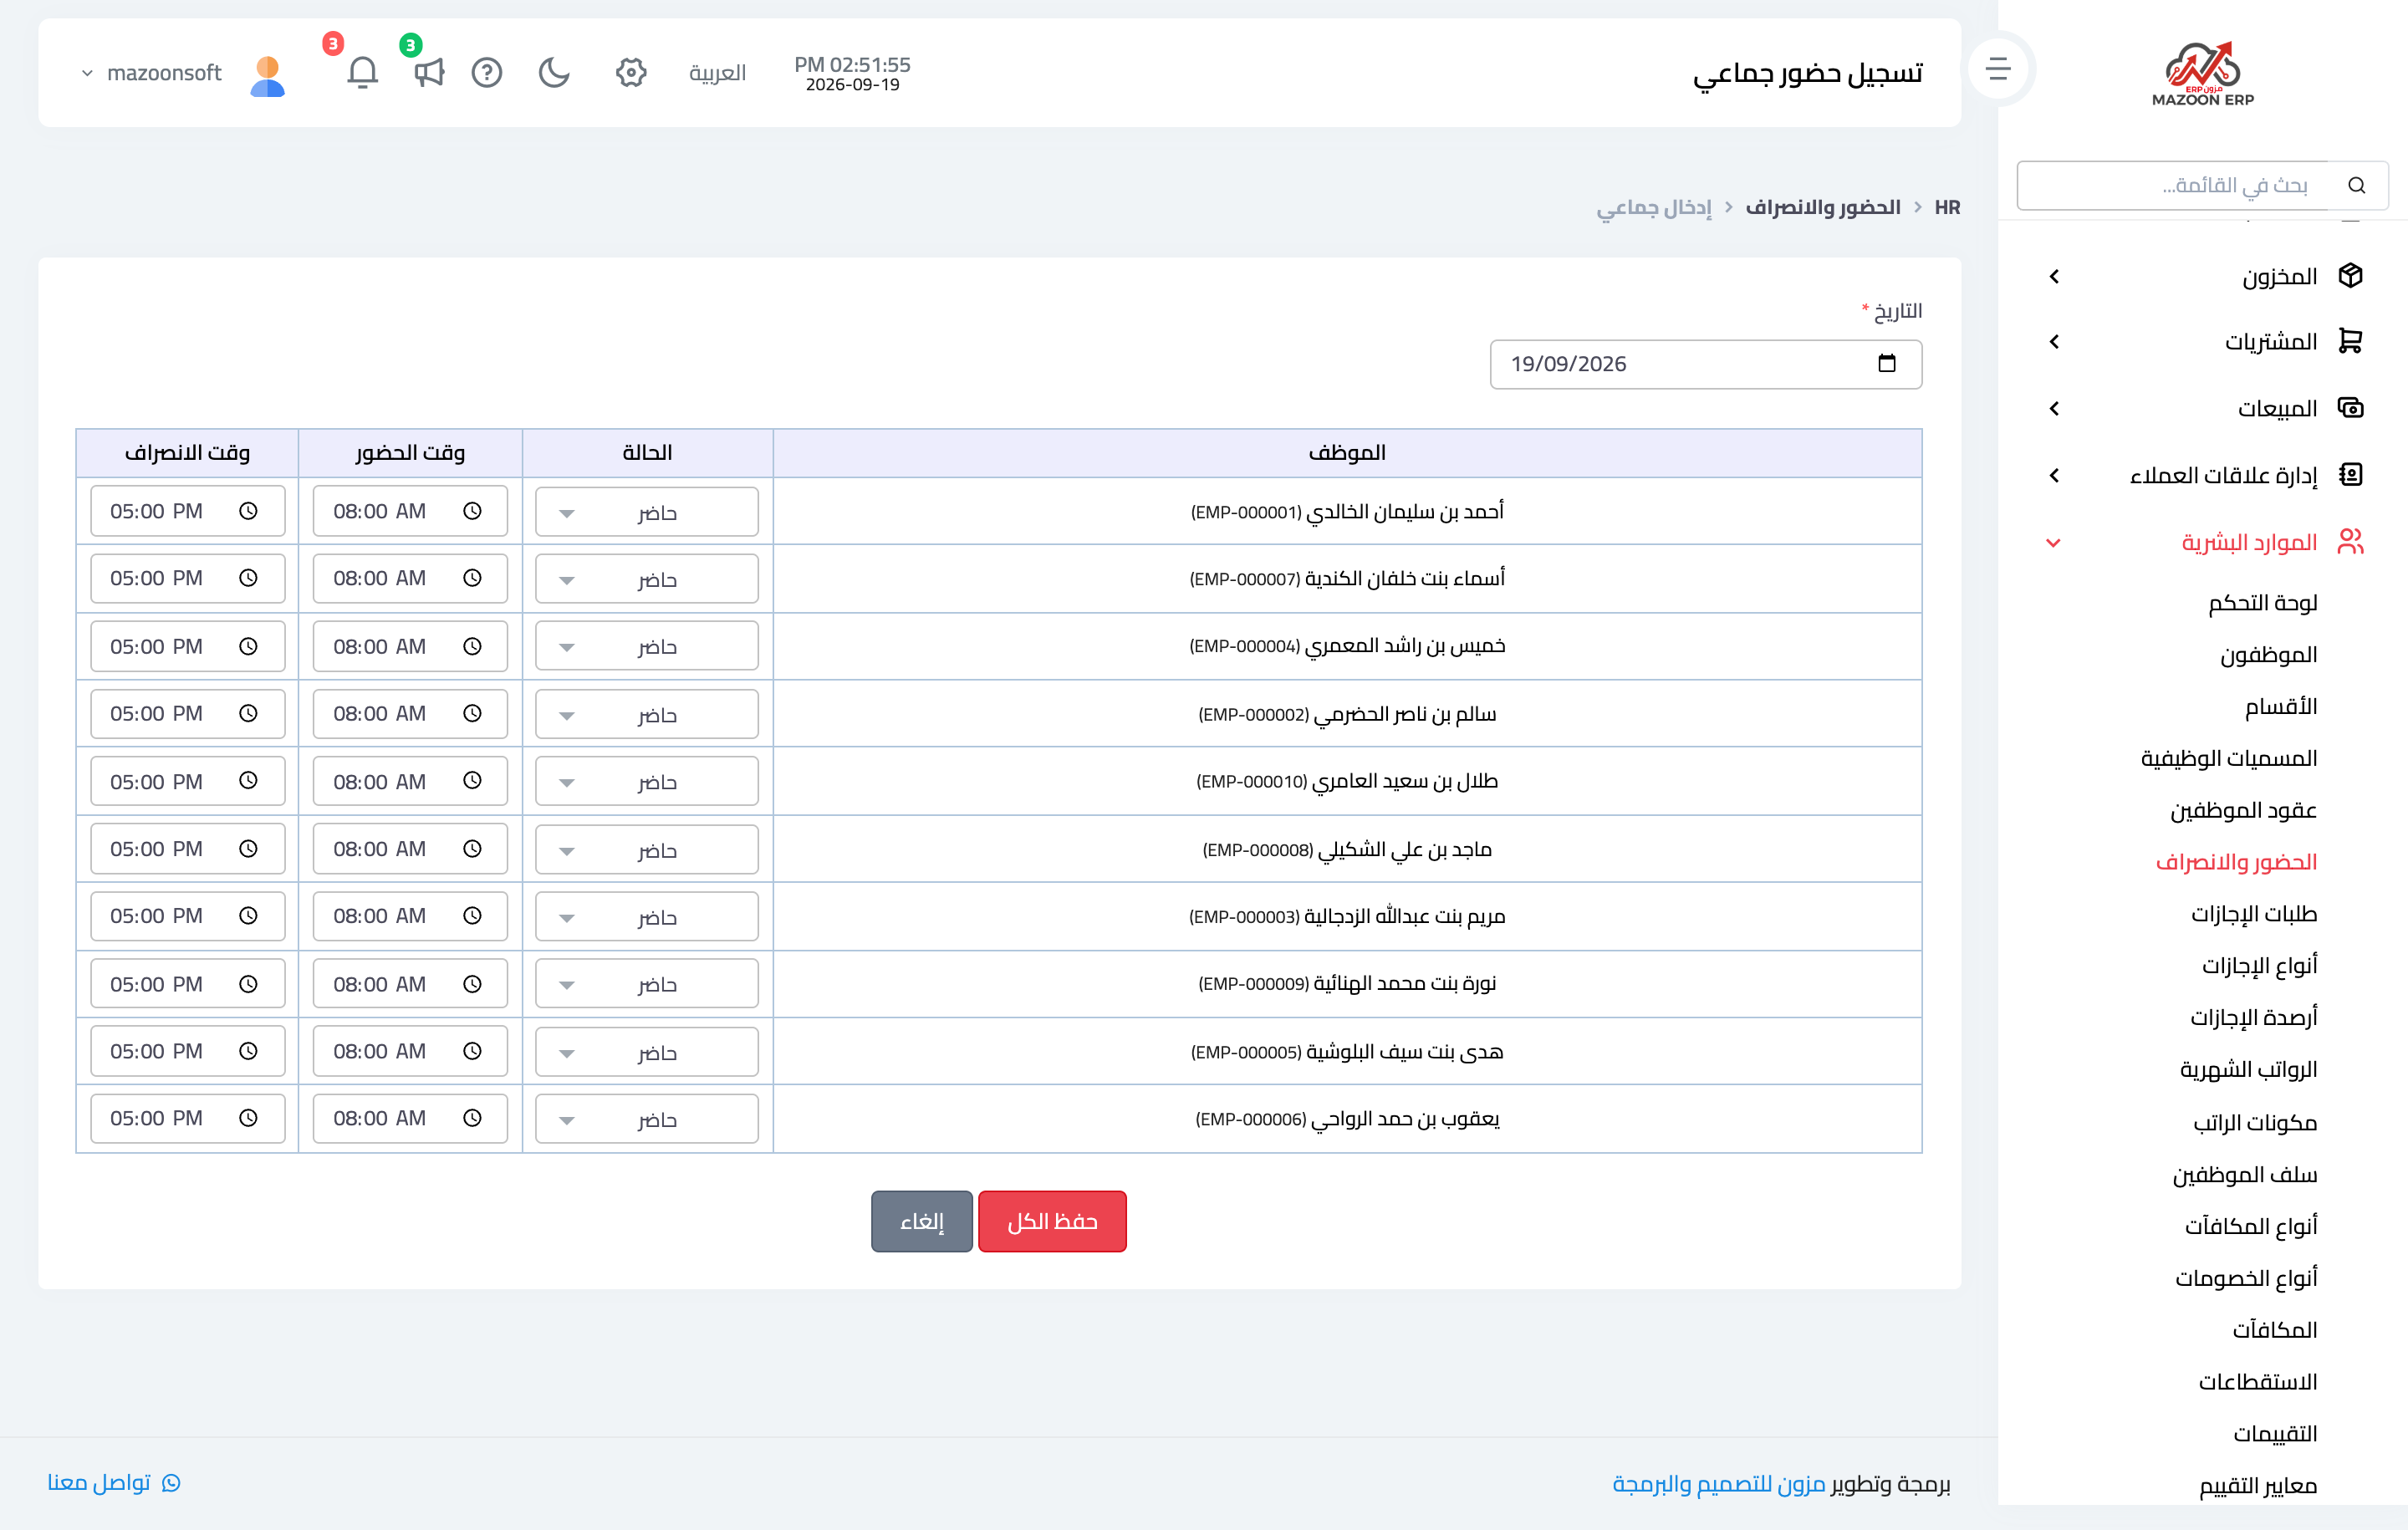
Figure 2
Try what you just read on your own data
Open a free 7-day trial — no credit card, with your own company link in minutes.