
How do I add a building with its floors and units?
Everything in property rental rests on the unit: the contract is written against a unit, the expense is charged to a building, and the owner’s account is built from both. The order is fixed: building → floor → unit.
First: the building
- Open Property Rental → Buildings — Figure 1 — and add a new building.
- Enter the building name and address, and link it to the owner registered in the system.
Second: the floors
- Open Floors — Figure 2 — and add a floor under the building.
- Floors are optional in small buildings, but they save a great deal of time in towers.
Third: the units
- Open Units — Figure 3 — and add the unit under its building and floor.
- Enter the unit number, the type (apartment, shop, office, store), the area and the number of rooms.
- Enter the expected rent; it is the figure suggested to you when you create a contract on the unit.
- Set the unit status: vacant, rented or under maintenance, then save.
Notes
- Standardise unit numbering from the start (G1, 101, 102…); changing it after dozens of contracts is painful.
- The unit status changes automatically with the contract, so only override it for a real reason such as maintenance.
- Linking the building to an owner is what makes owner settlements and building expenses work correctly.
- Do not delete a unit that has past contracts; its financial history is part of your books.
Screenshots
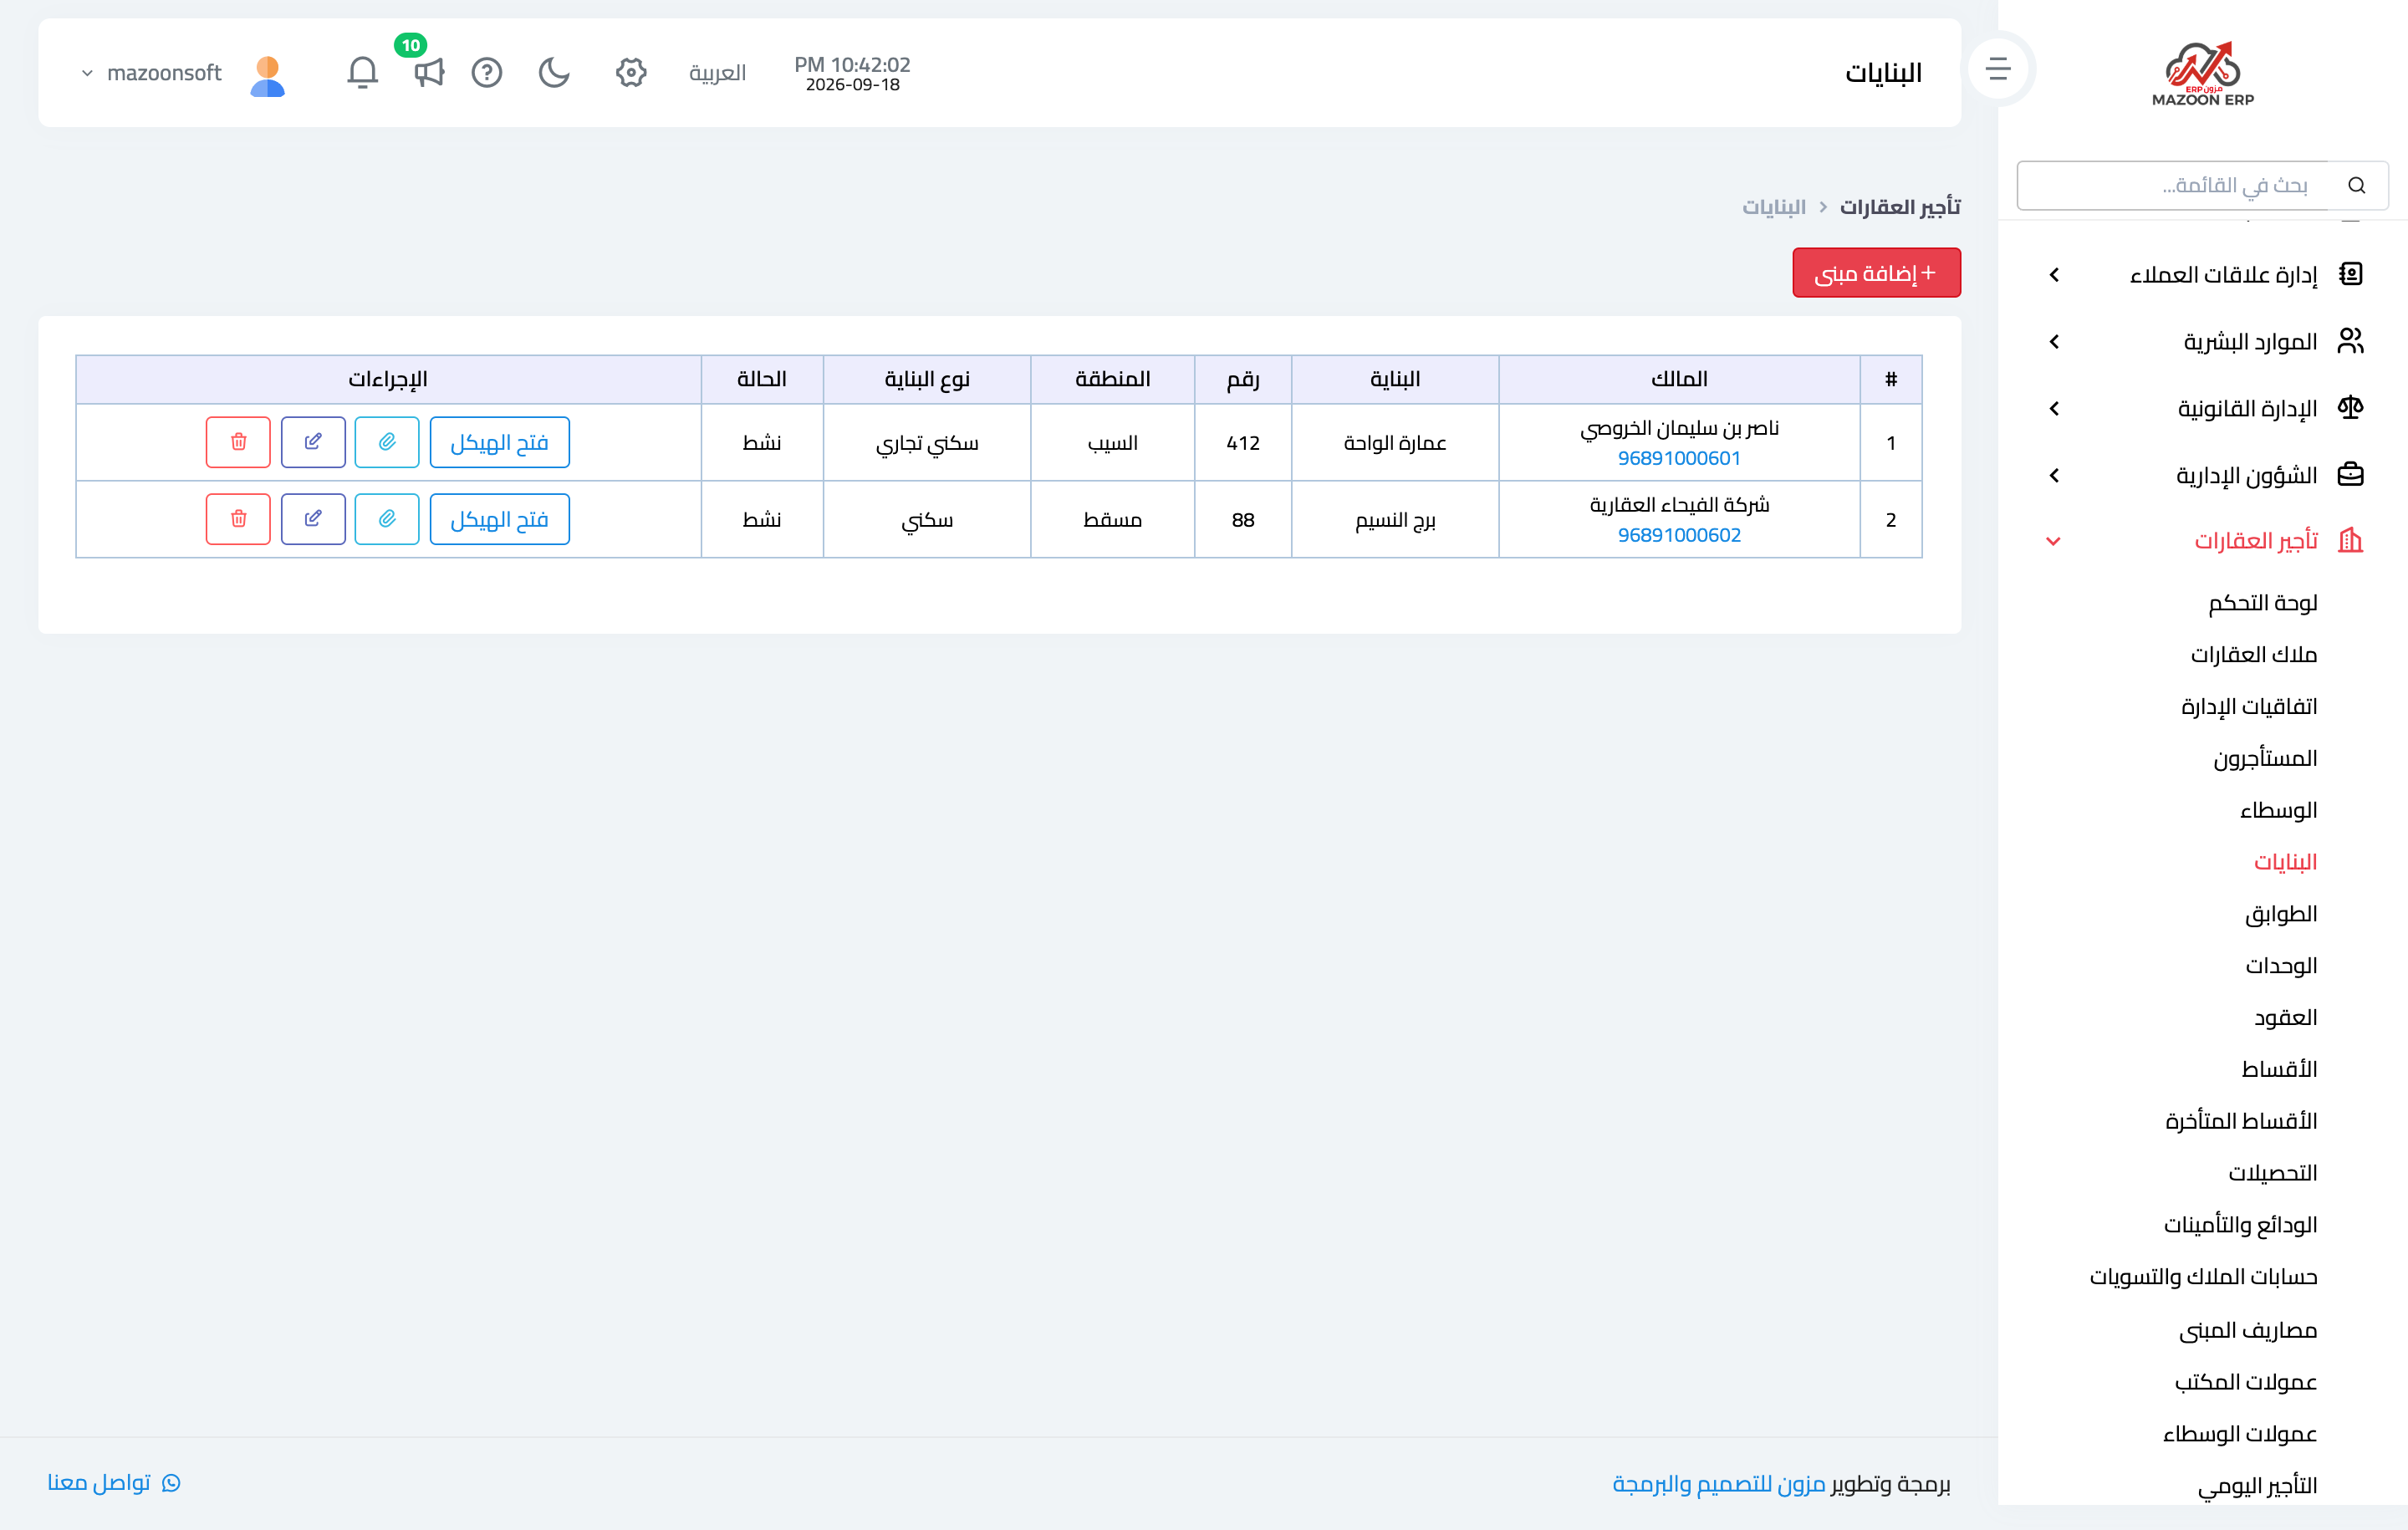
Figure 1
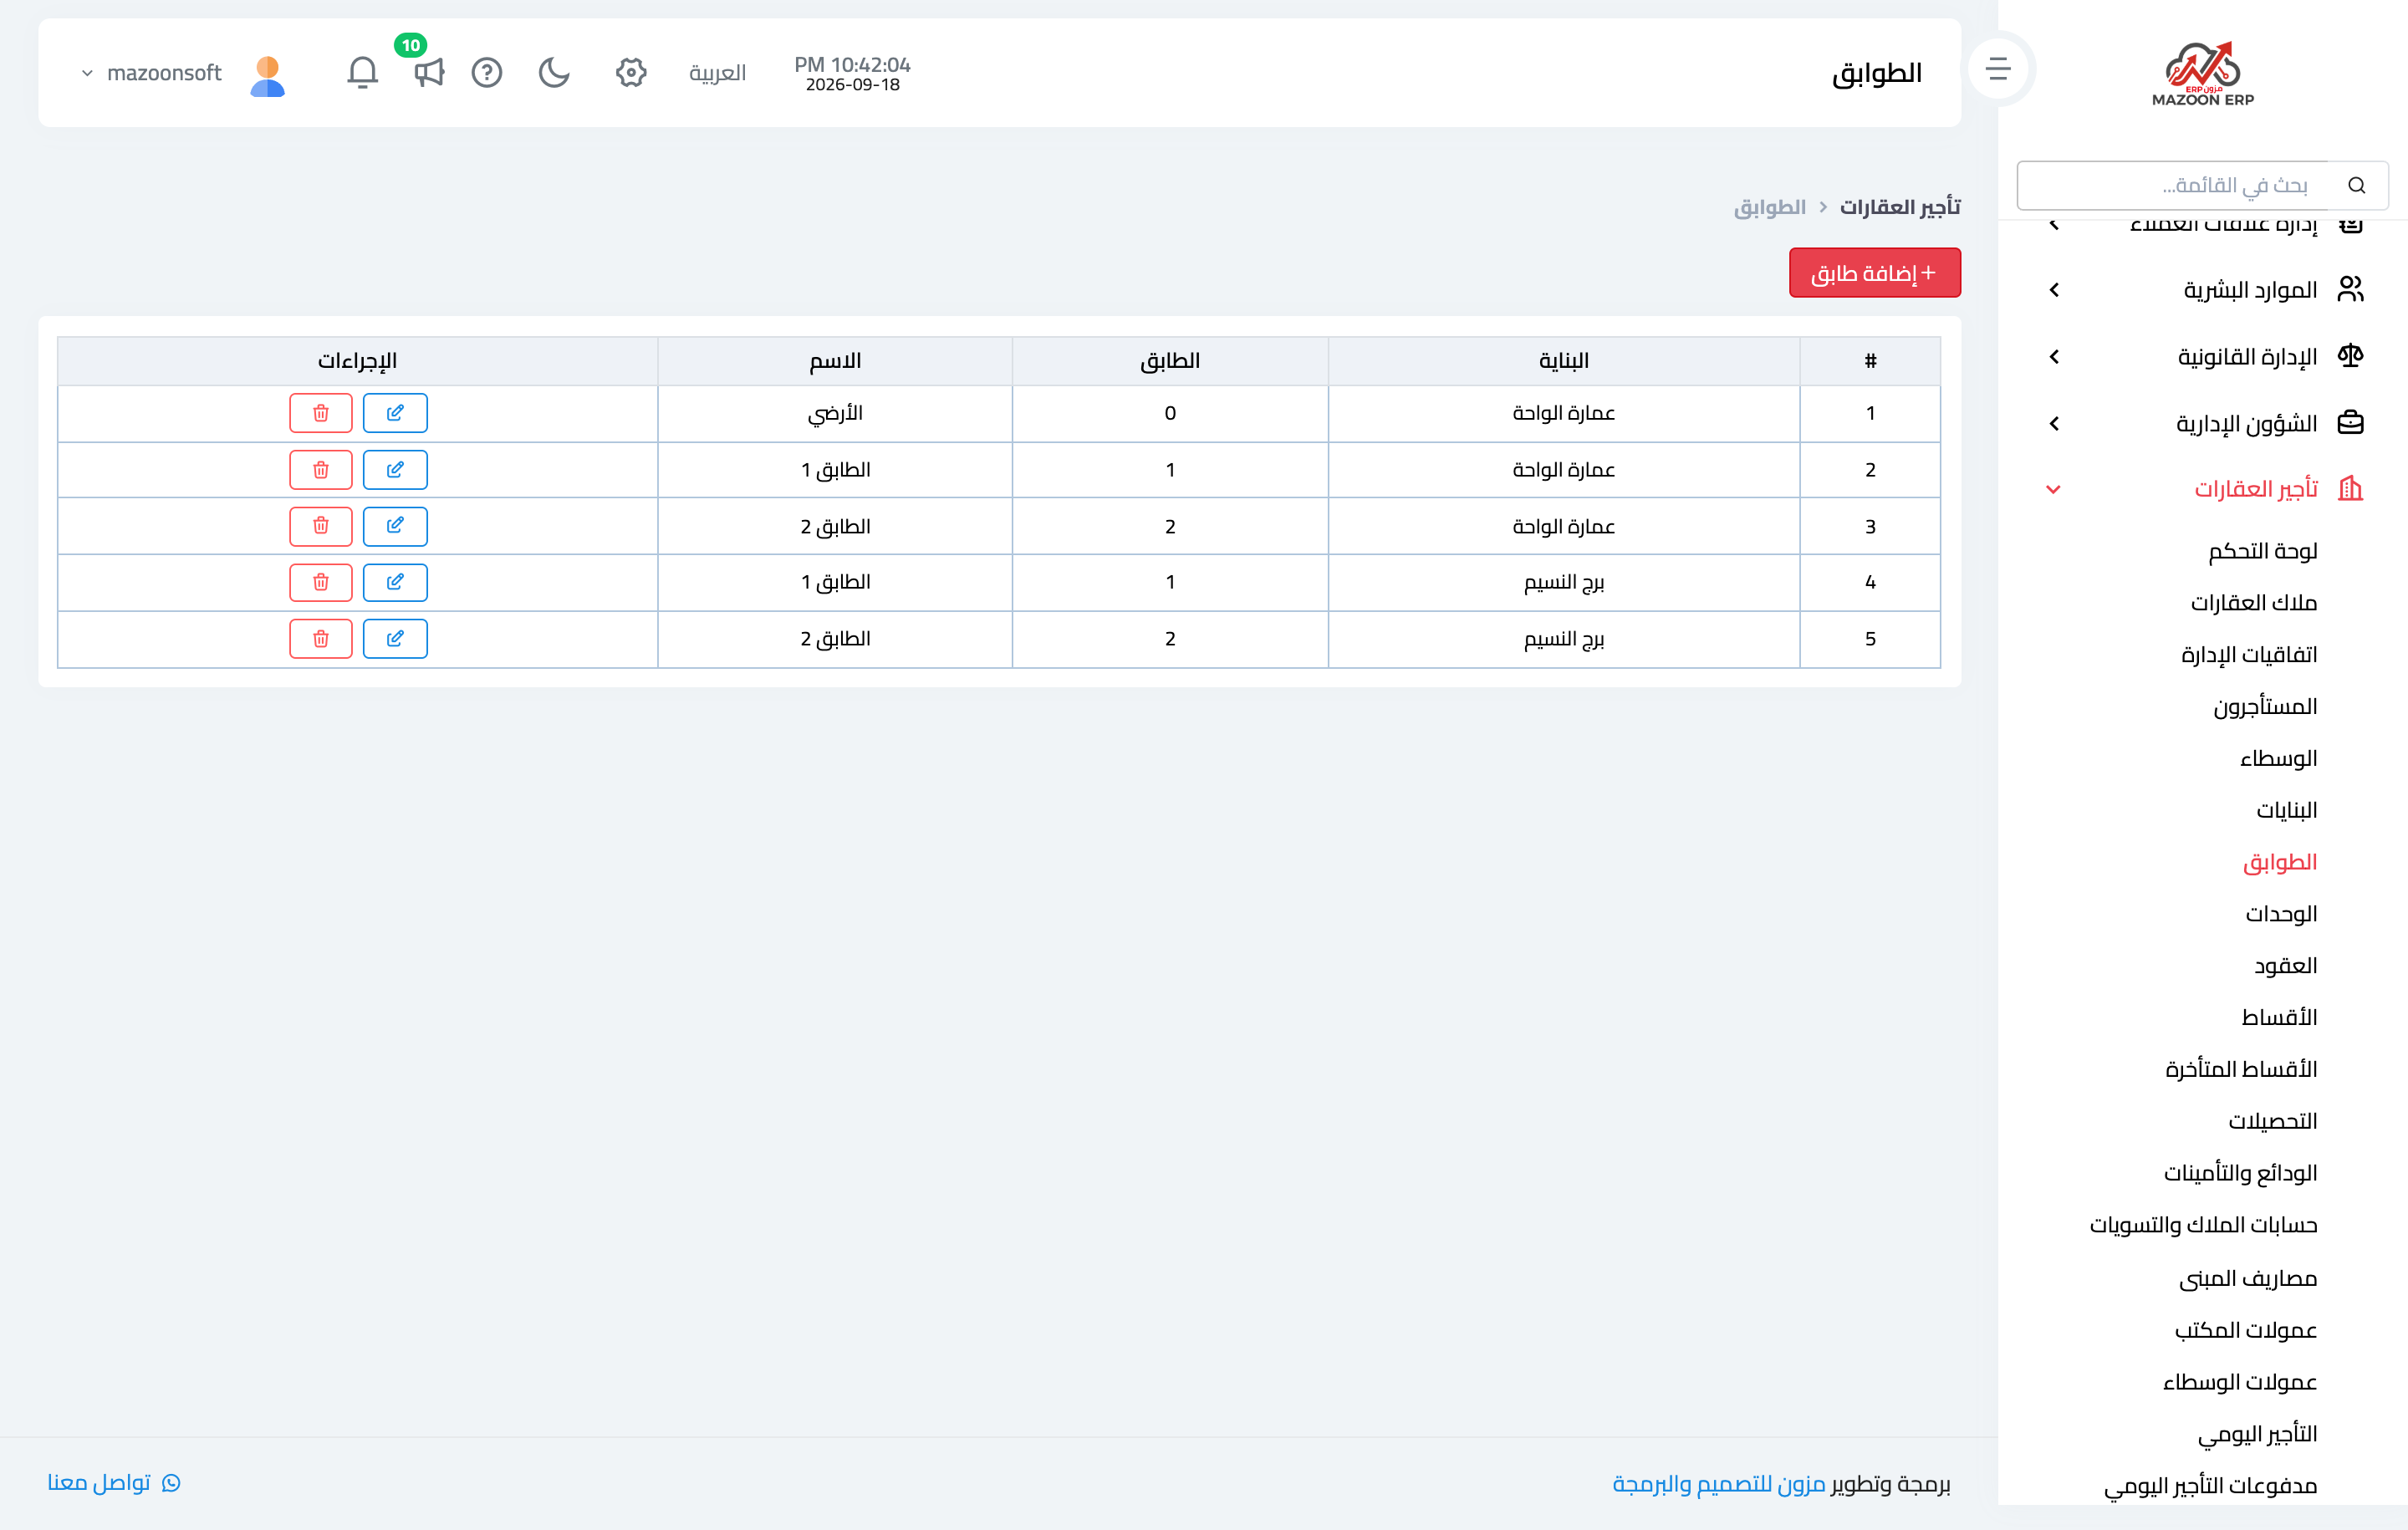
Figure 2
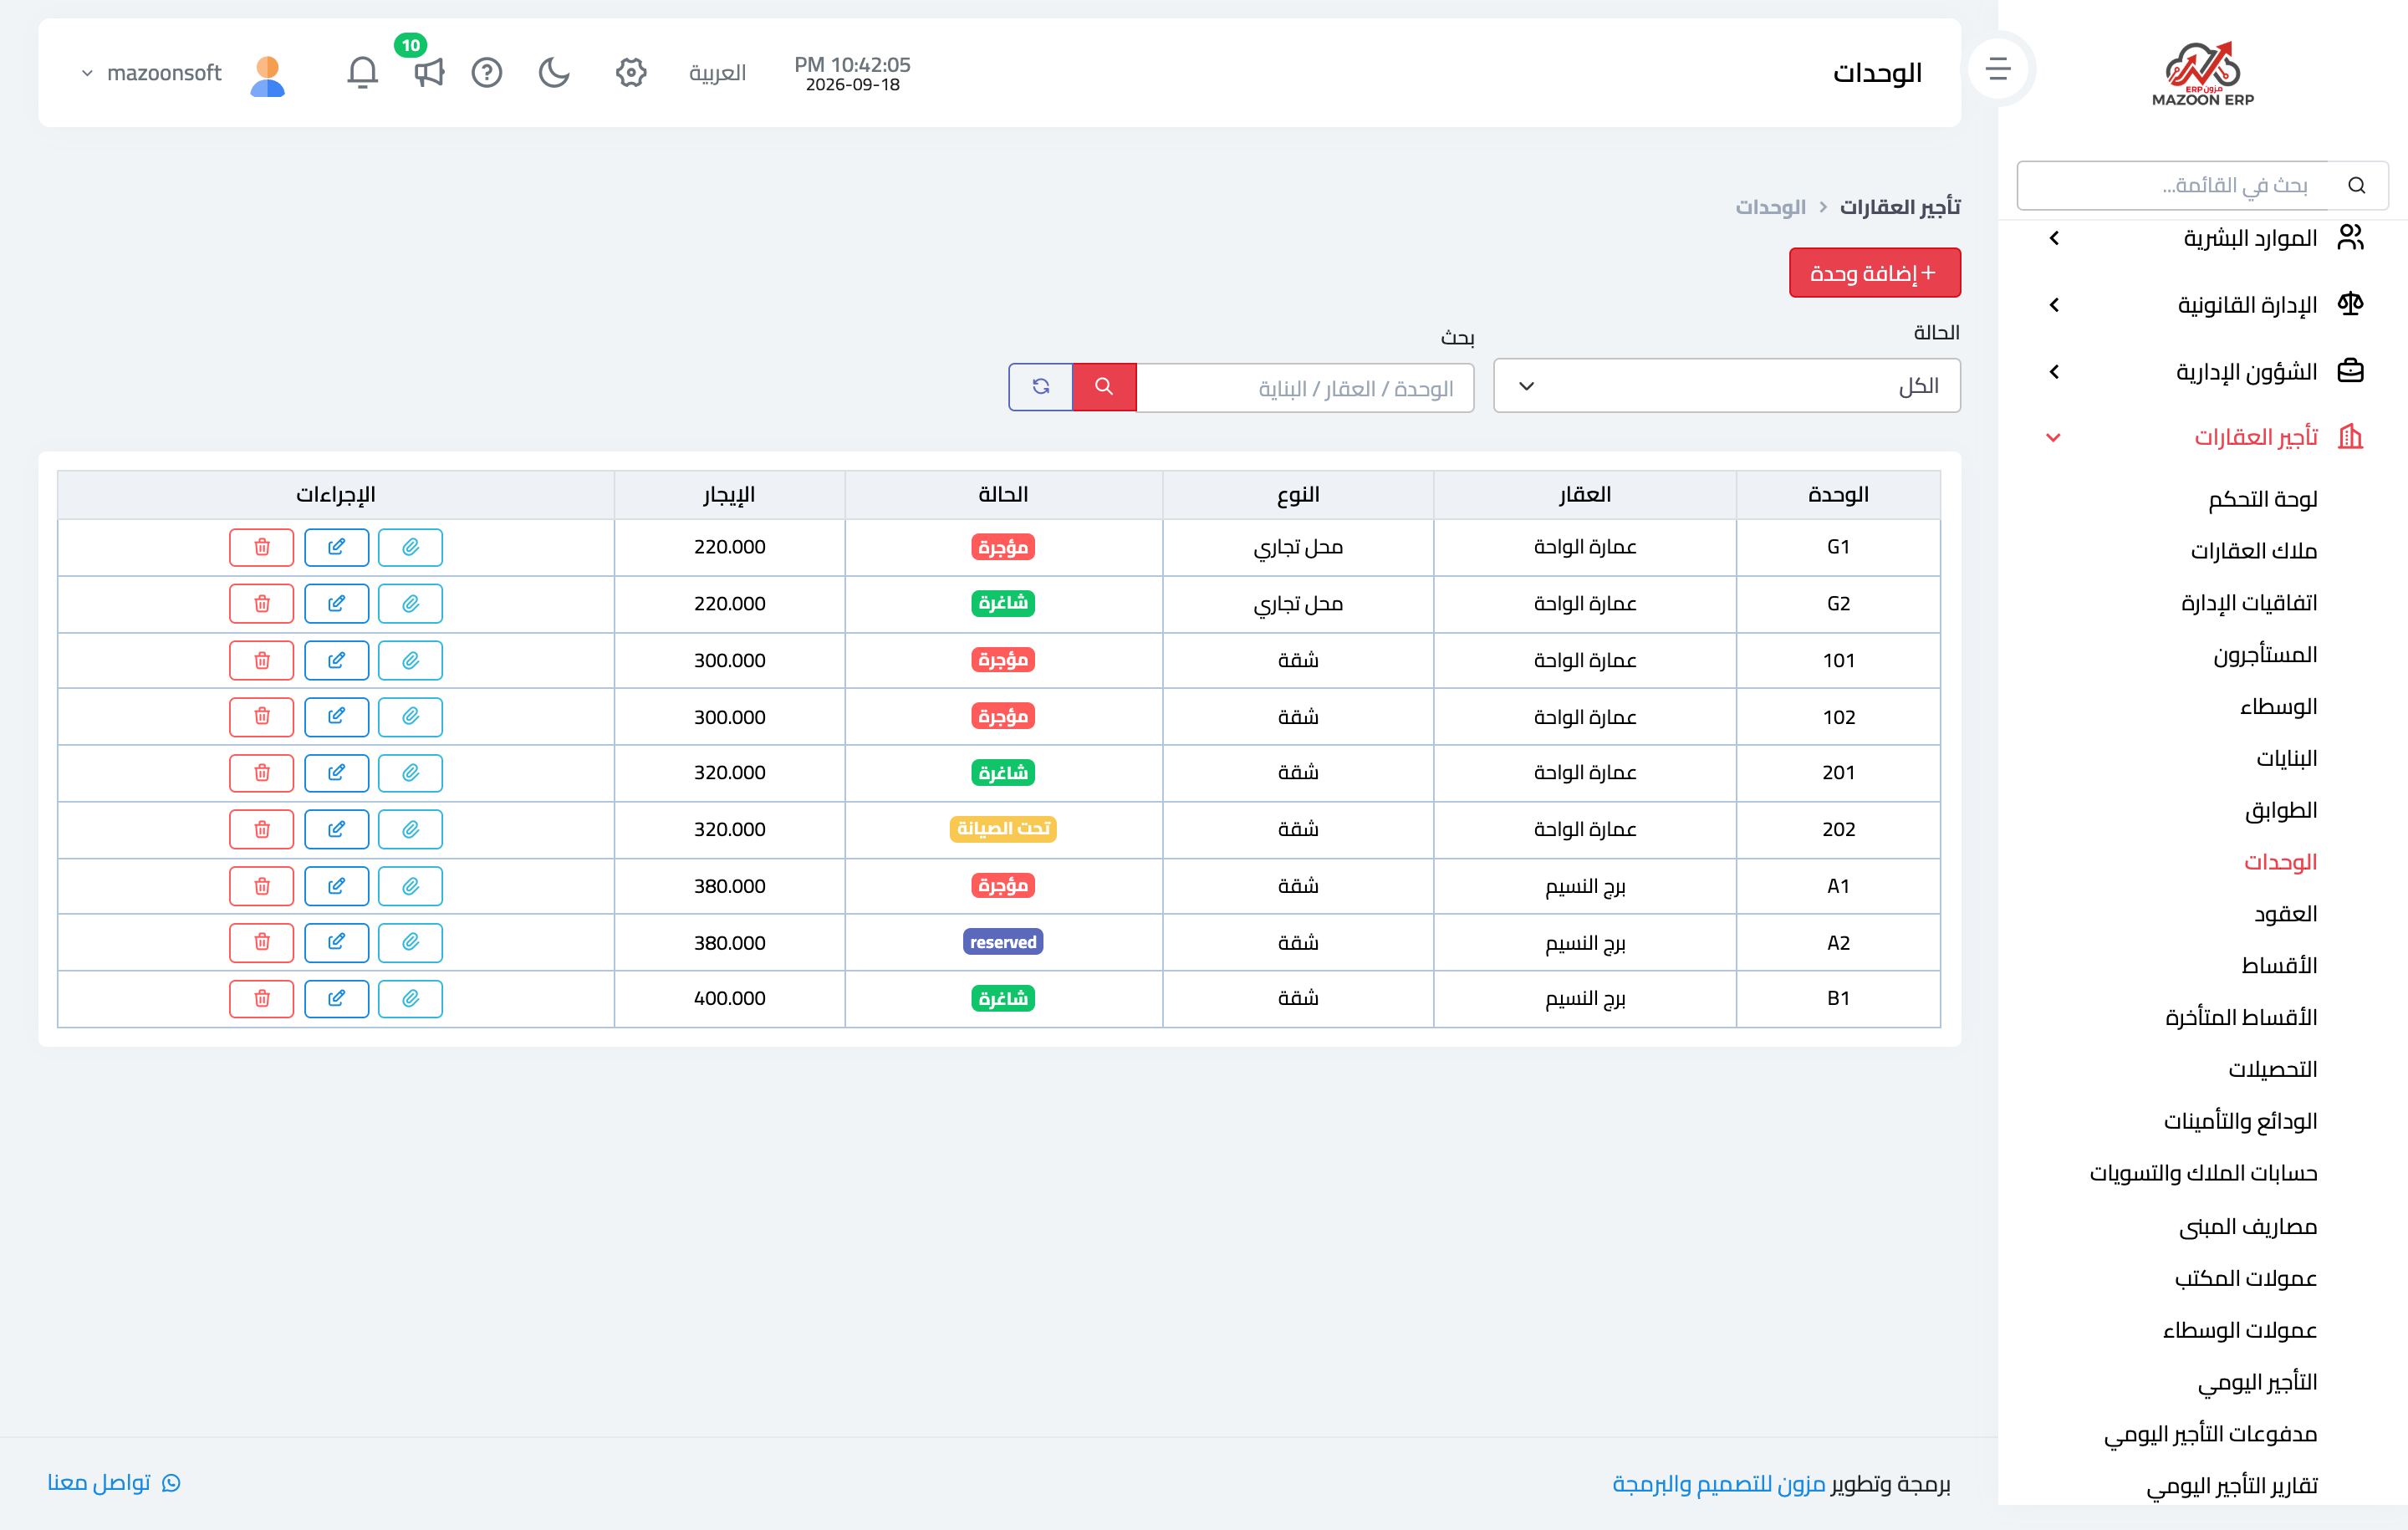
Figure 3
Try what you just read on your own data
Open a free 7-day trial — no credit card, with your own company link in minutes.