
Registering a case: details, parties, and the contract
The case is the unit of work in this module: every session, pleading, ruling, and task hangs off it. That is why two extra minutes at registration save hours later.
The cases screen
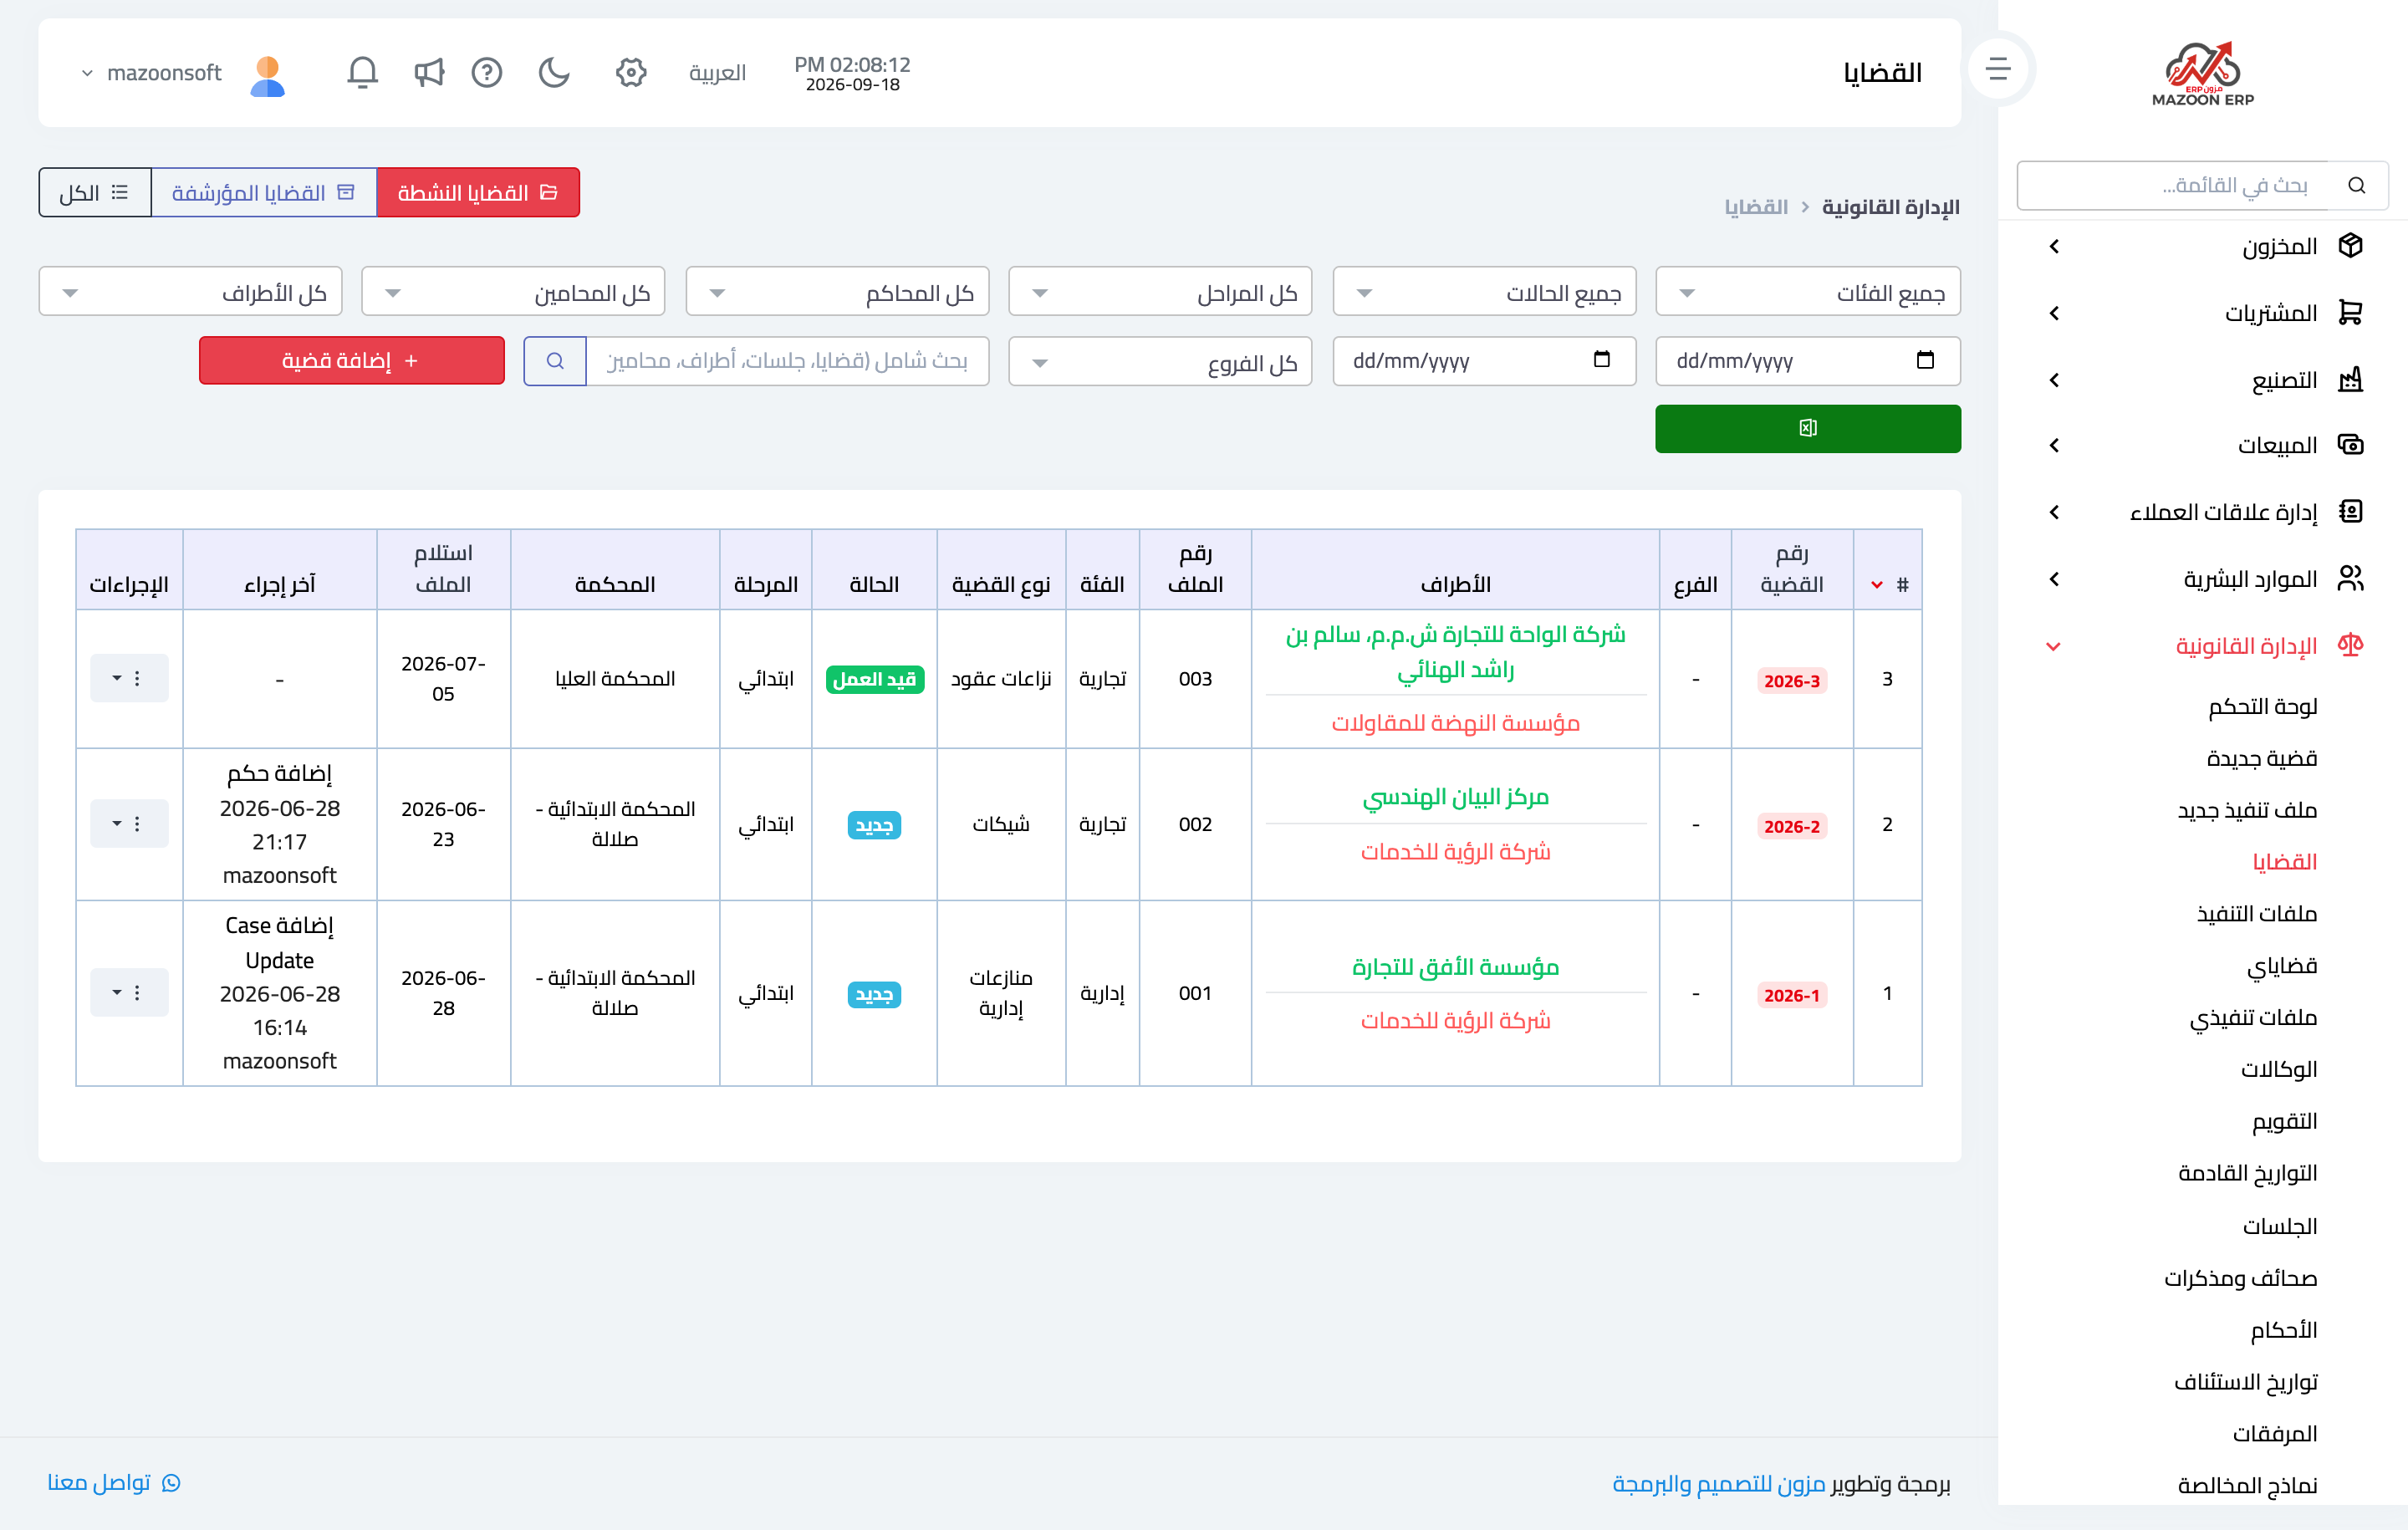
Open Legal → Cases, as in Figure 1. The table shows the case number, the office file number, the parties (client in green, opponent in red), the category and type, the status, the stage, the court, the file received date, and the last action taken, when, and by whom.
Above the table, three buttons switch between active, archived, and all cases, followed by a full filter row: category, status, stage, court, lawyer, party, branch, date range, and a global search that sweeps cases, sessions, parties, and lawyers together. The export button sends the current result to Excel.
Adding a case: four steps
The Add case button opens a form split into four tabs; move between them with Next and Previous, or by clicking a tab directly. Saving works from any tab.
1) Basic details
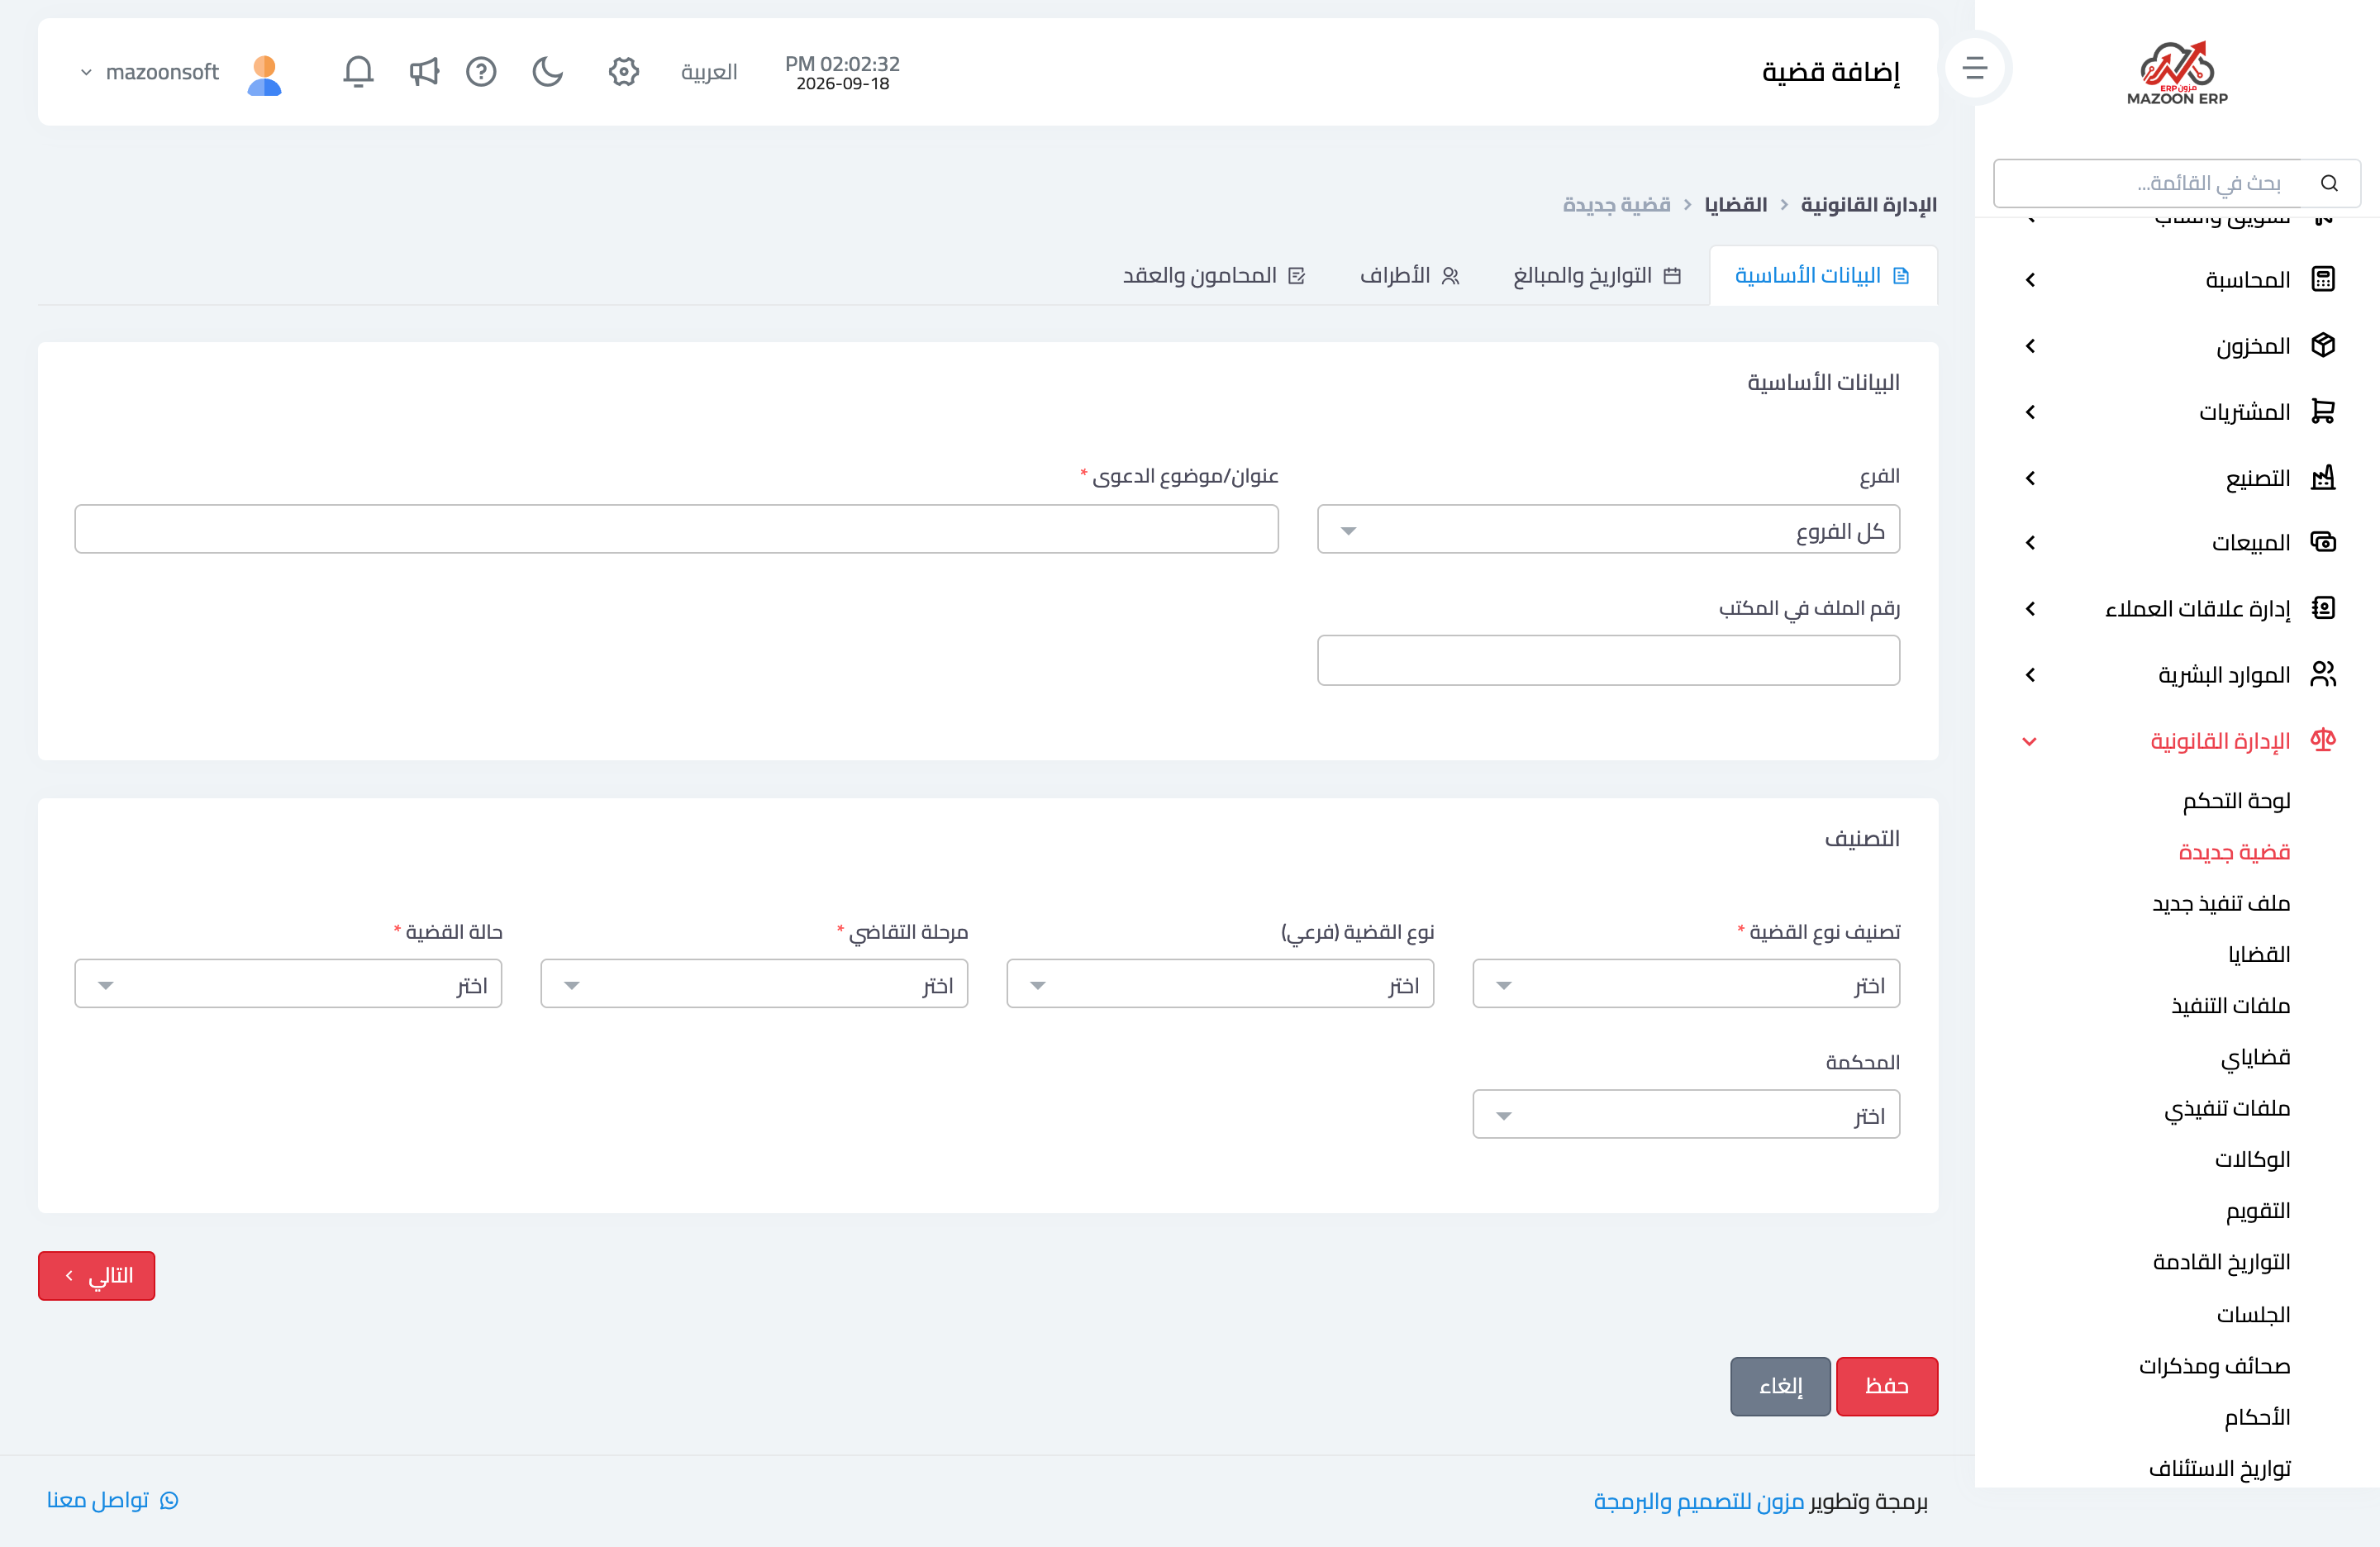
As in Figure 2: the branch, the required case title that describes the subject in one line, and the office file number, which is your internal numbering, not the court’s. Then the classification: case type category, sub-type, litigation stage, case status, and court.
The court’s own case number is not entered here, because one case may carry several numbers (first instance, then appeal, then expert registration); it has its own tab on the case page after saving.
2) Dates and amounts
File received date, case registration date, and the limitation date the dashboard builds its warnings on. Then the claim value, interest rate, expert name and fees, whether a legal notice was sent, and the fee amount — which can be a percentage of the claim instead of a fixed sum.
3) Parties
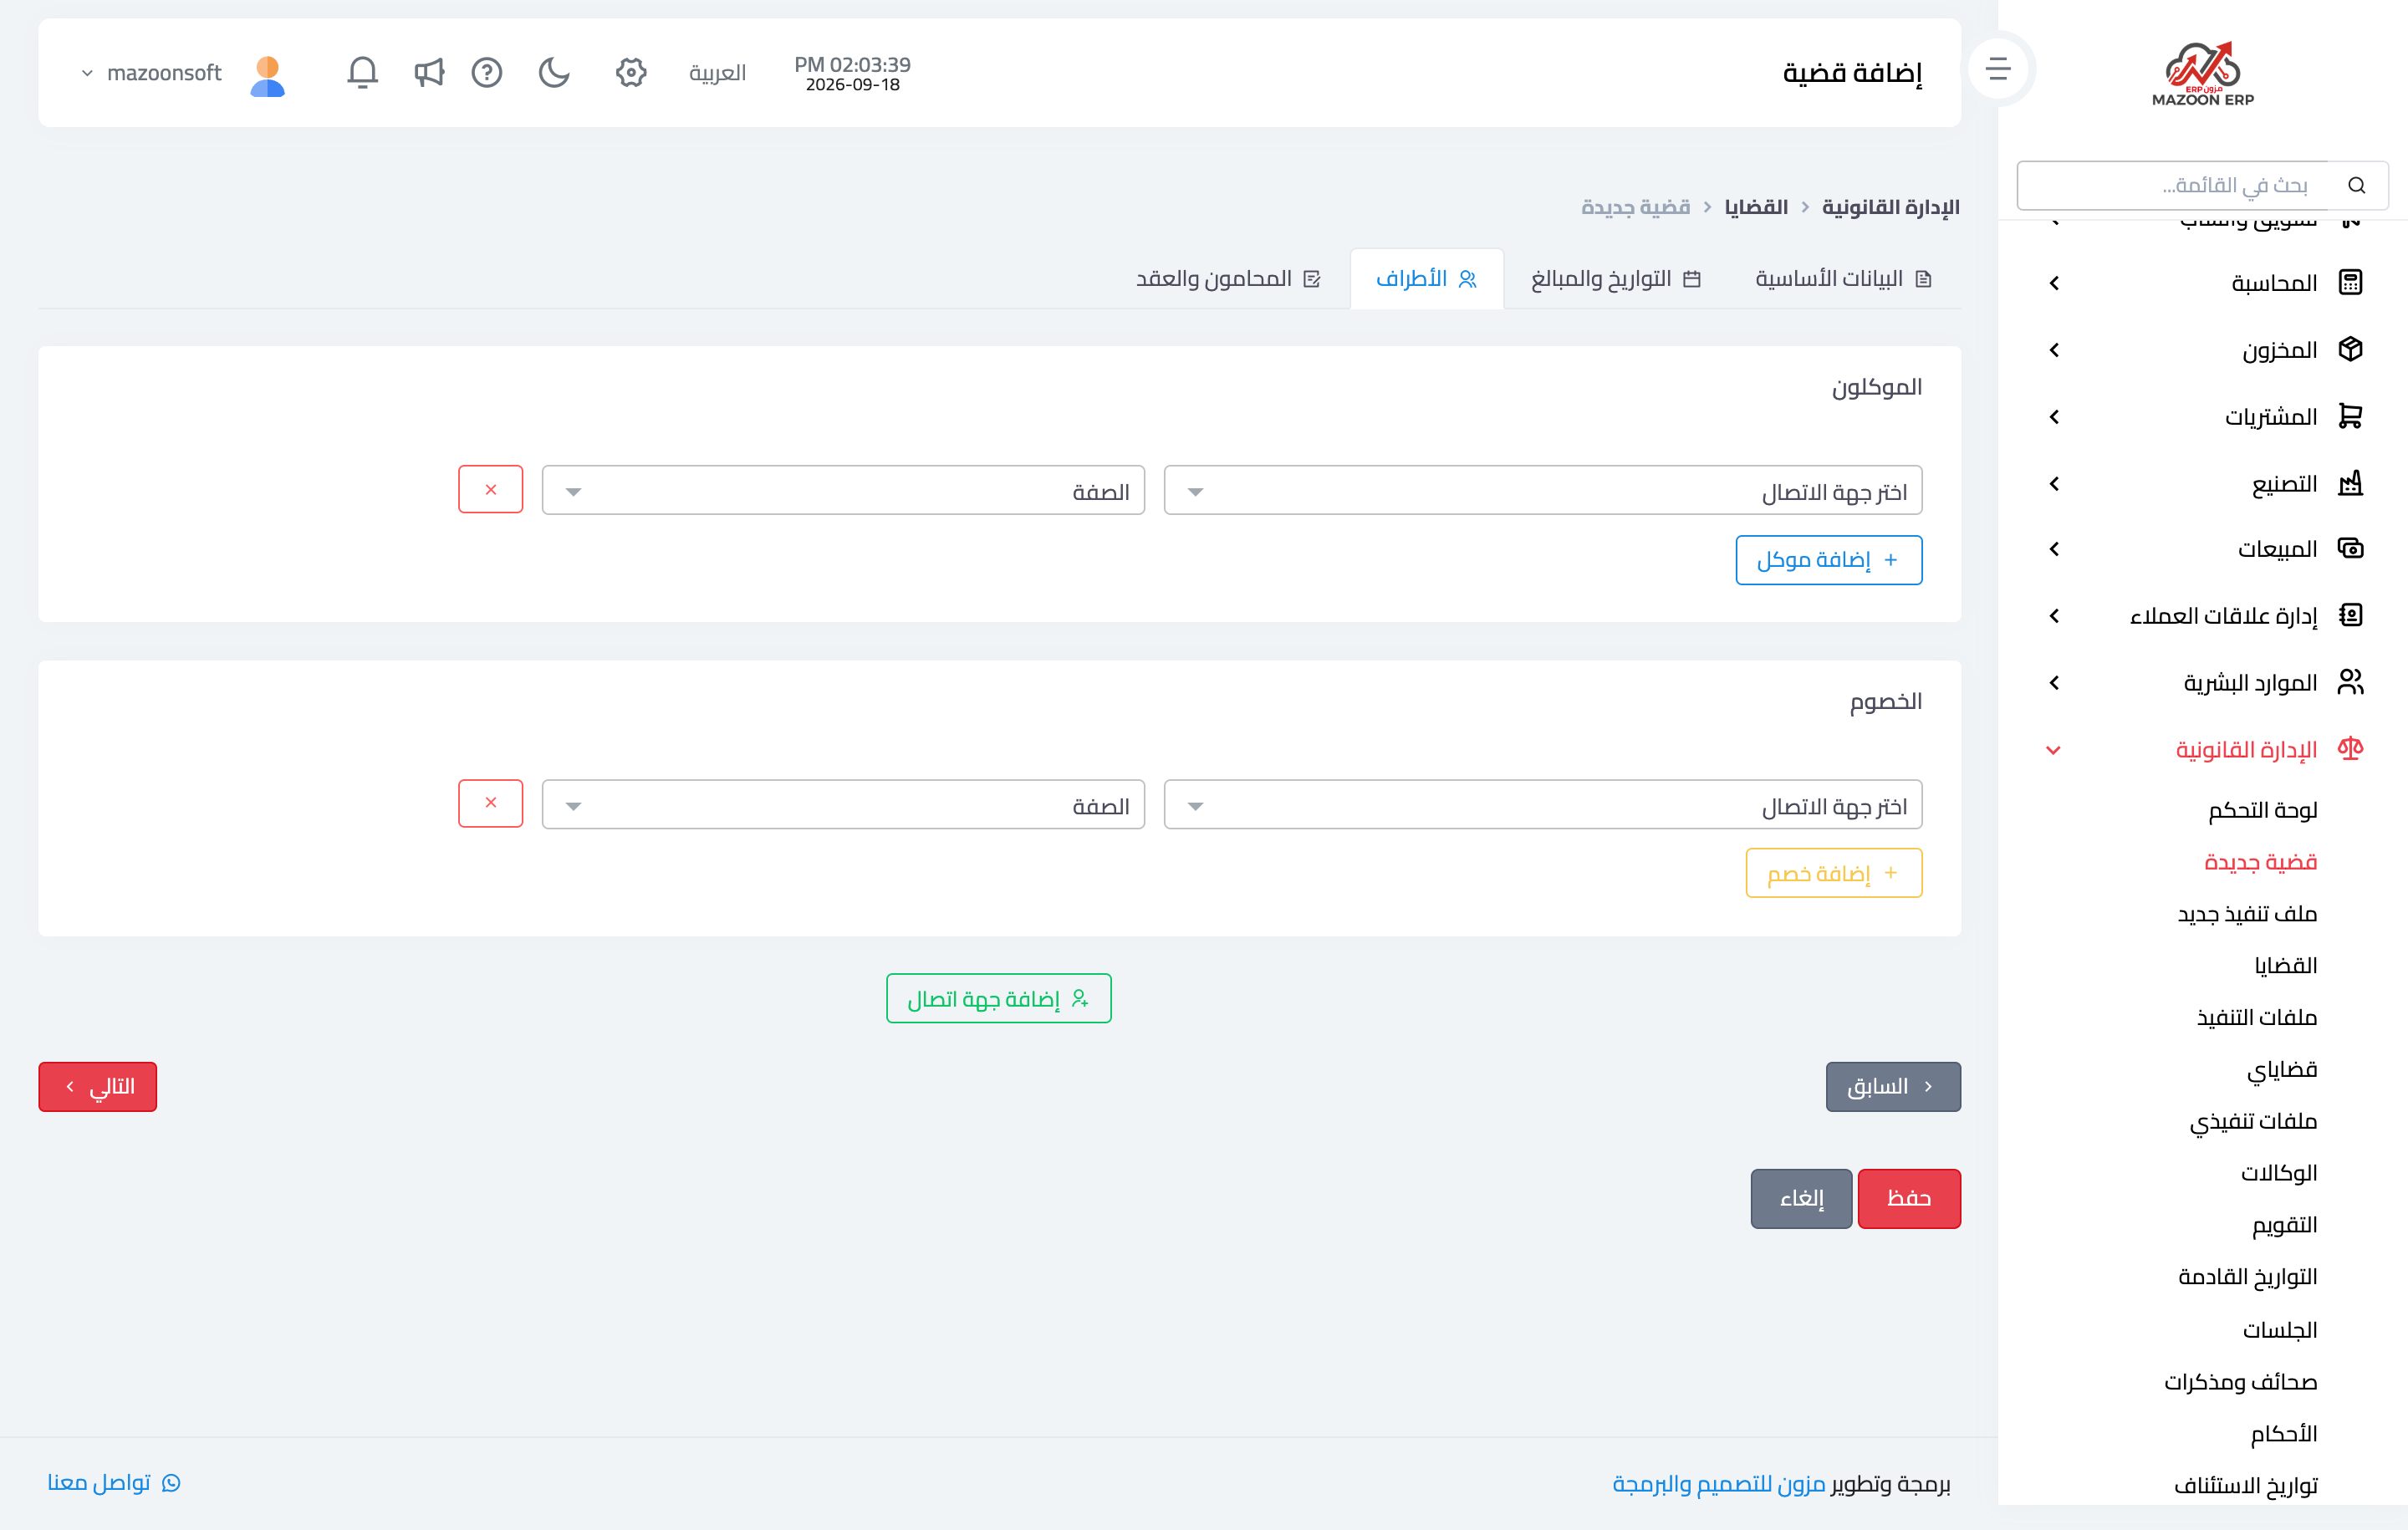
Parties are split into clients and opponents, as in Figure 3. Each is picked from the system contacts, then given an attribute (plaintiff, defendant, witness, agent). If a party is not on file yet, Add contact creates one without leaving the form.
Each side accepts more than one party, since a claim may be brought by two plaintiffs or against three opponents.
4) Lawyers and the contract
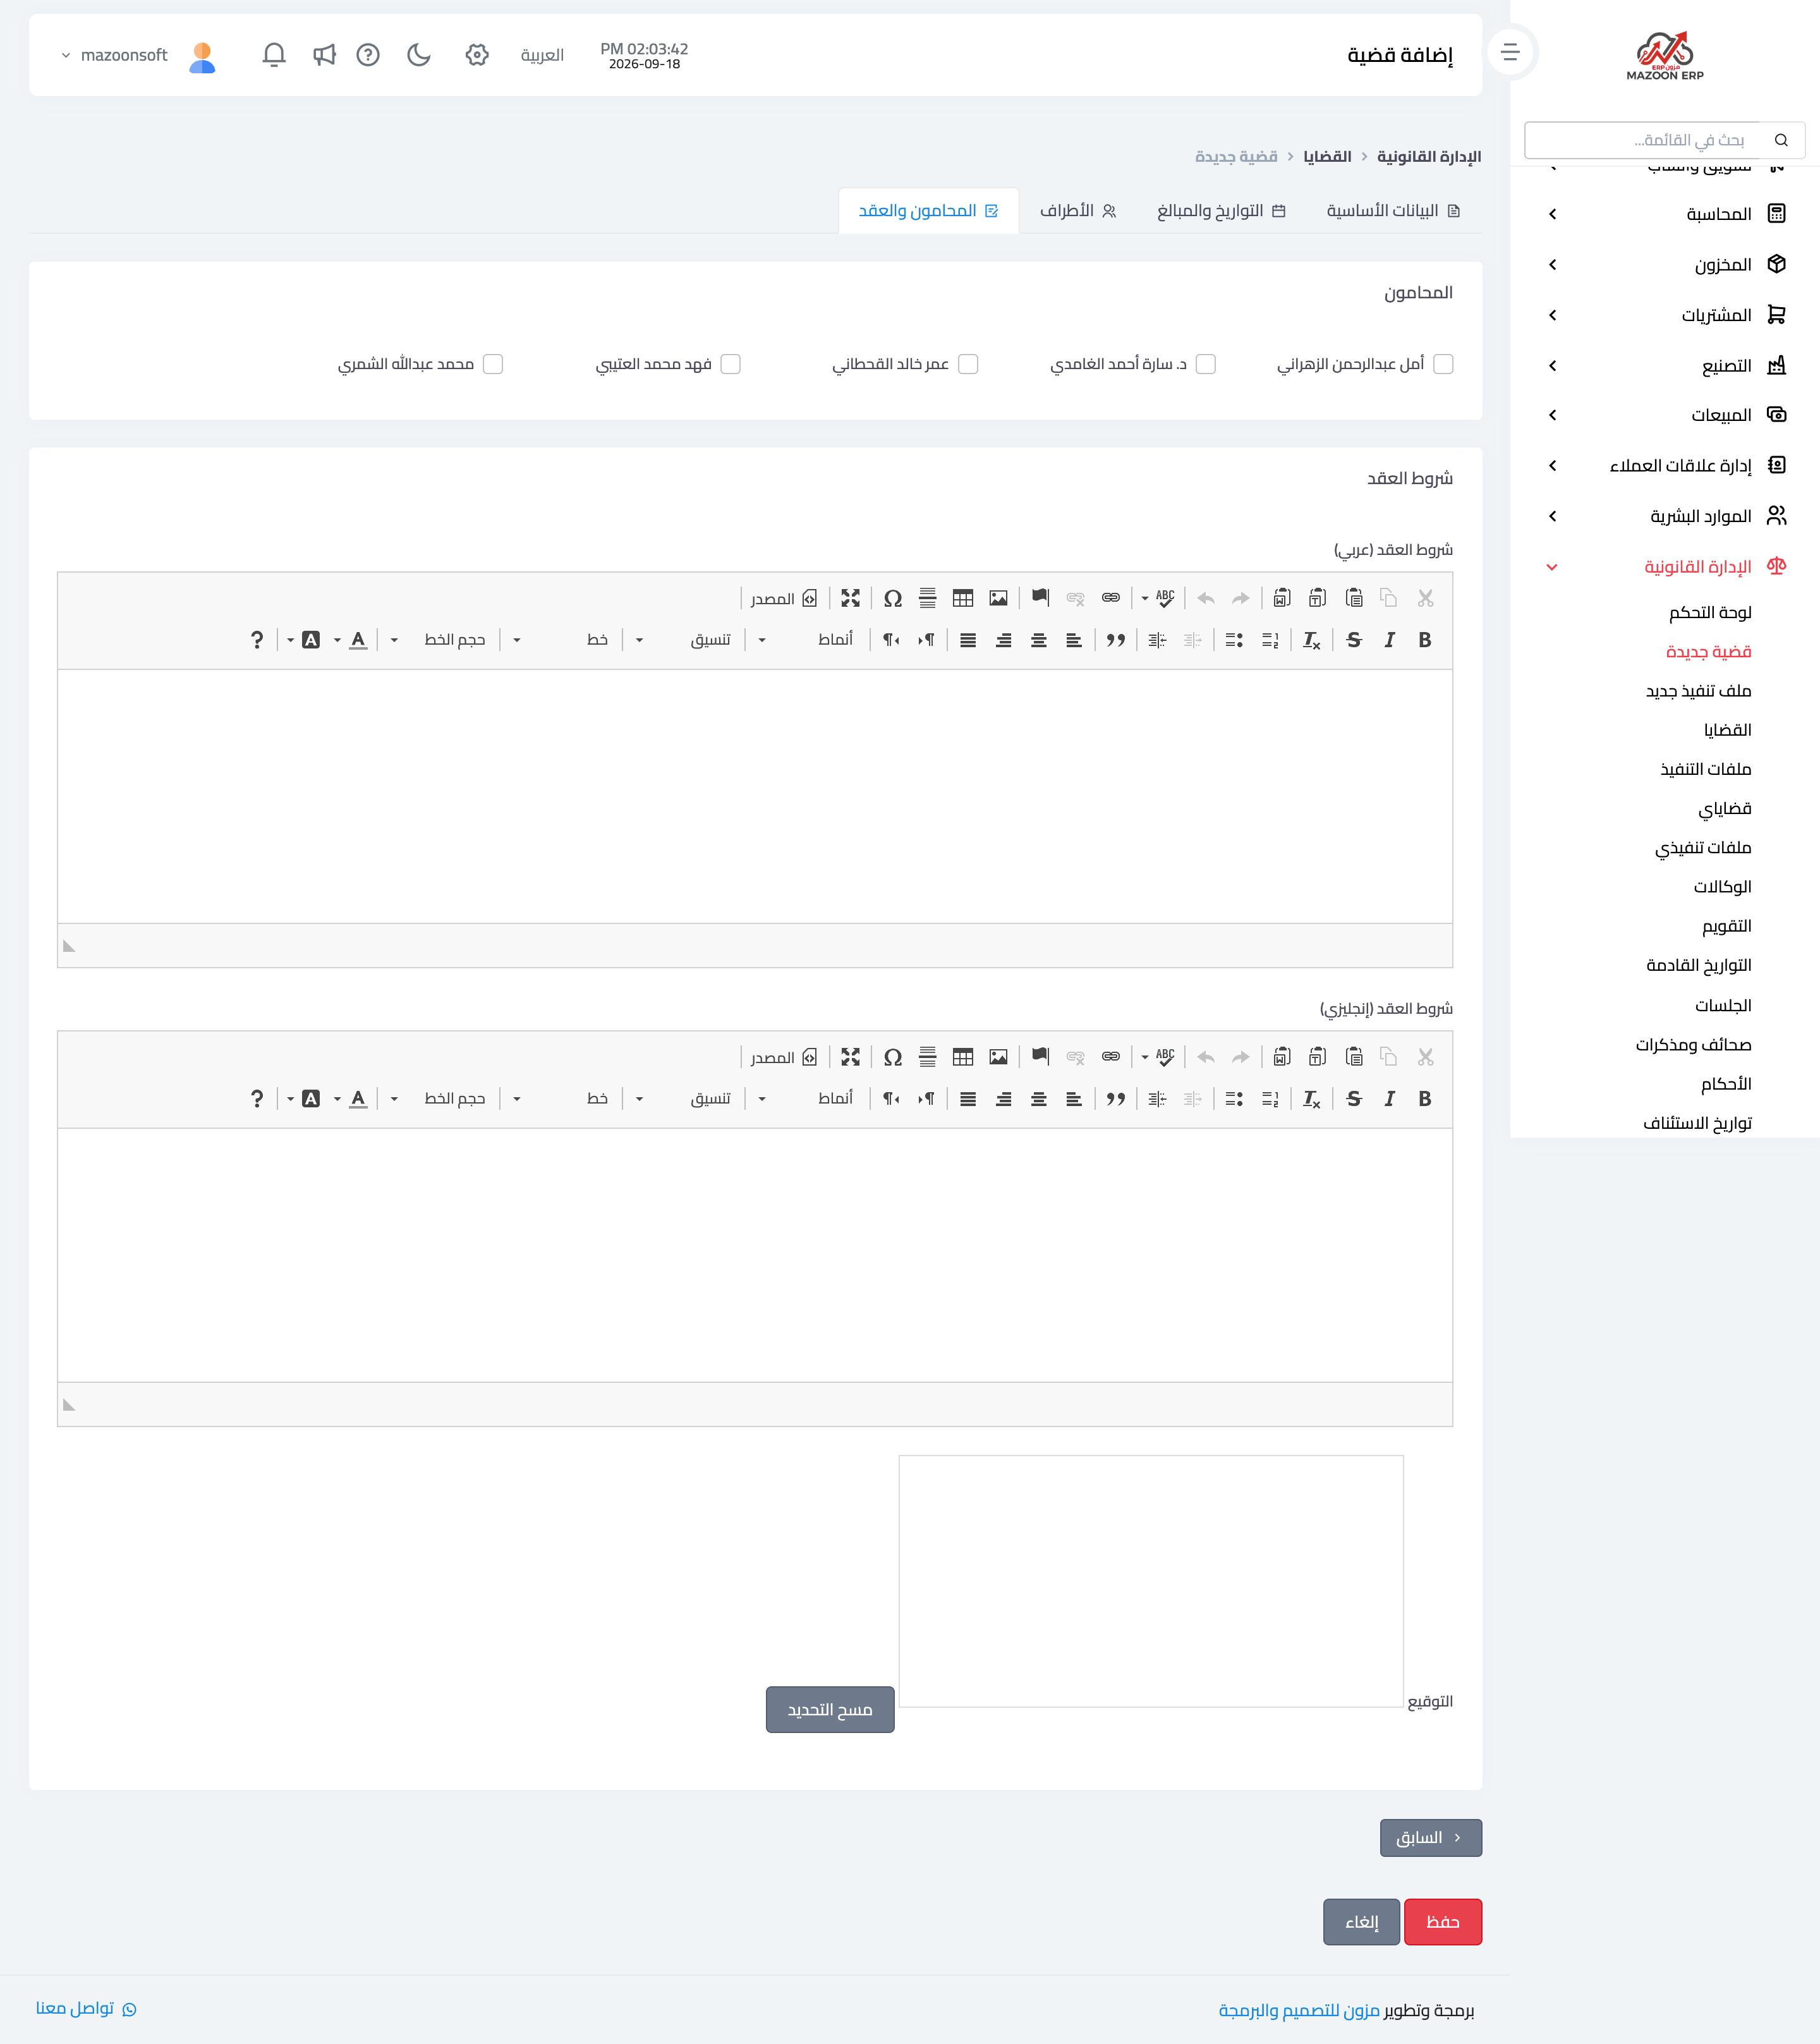
As in Figure 4: tick the lawyer or lawyers assigned to the case from the office list, write the contract terms in Arabic and English in a full rich-text editor, and sign in the signature pad with a mouse or by touch.
After saving, the Print contract button on the case page produces a ready fee agreement carrying the office and client details, the contract terms, and the signature.
Notes
- The case title, classification, stage, and status are required; everything else can be completed later.
- A finished case is archived, not deleted: it leaves the default screen and keeps its full history under the archived tab.
- Linking a party to a contact — rather than typing a name as text — is what later lets you open all of that client’s cases and bill service invoices in their name.
Screenshots
Try what you just read on your own data
Open a free 7-day trial — no credit card, with your own company link in minutes.