
How do I issue a clearance form and print it for the client to sign?
When a client collects their file or receives the awarded sum, you need a document proving discharge, signed by them. The clearance form does that: it is written inside the case so it reads the parties and case data, then prints on the office letterhead with its stamp, ready to sign.
Steps
- Open the case, then the Clearance Forms tab — image 1.
- Press Add Clearance Form — image 2.
- Enter the form number in your own numbering, and the name describing what the discharge covers ("Final discharge of principal and compensation" or "Partial discharge of the first instalment").
- In Notes write the acknowledgement the client will read and sign; this is what appears in the body of the printed page.
- You can upload a scanned signed copy in the file field, either now or after signature through editing.
- Save, then press the print icon beside the line — image 3. The page appears titled Case File Receipt with its reference number and date, a clients table with their attributes, the acknowledgement text, the case information, then the declarant details with a signature box, and the company stamp below.
Notes
- Keep partial and final discharges apart in the wording of the acknowledgement itself, not just in your head: state plainly what it covers and what it does not, because the page will be read years later.
- State the amount in figures and in words in the acknowledgement when the discharge concerns money.
- After signature, scan the page and upload it in the file field; a paper copy alone is no use once it is lost.
- To see clearance forms across every case, open Legal → Clearance Forms.
Screenshots
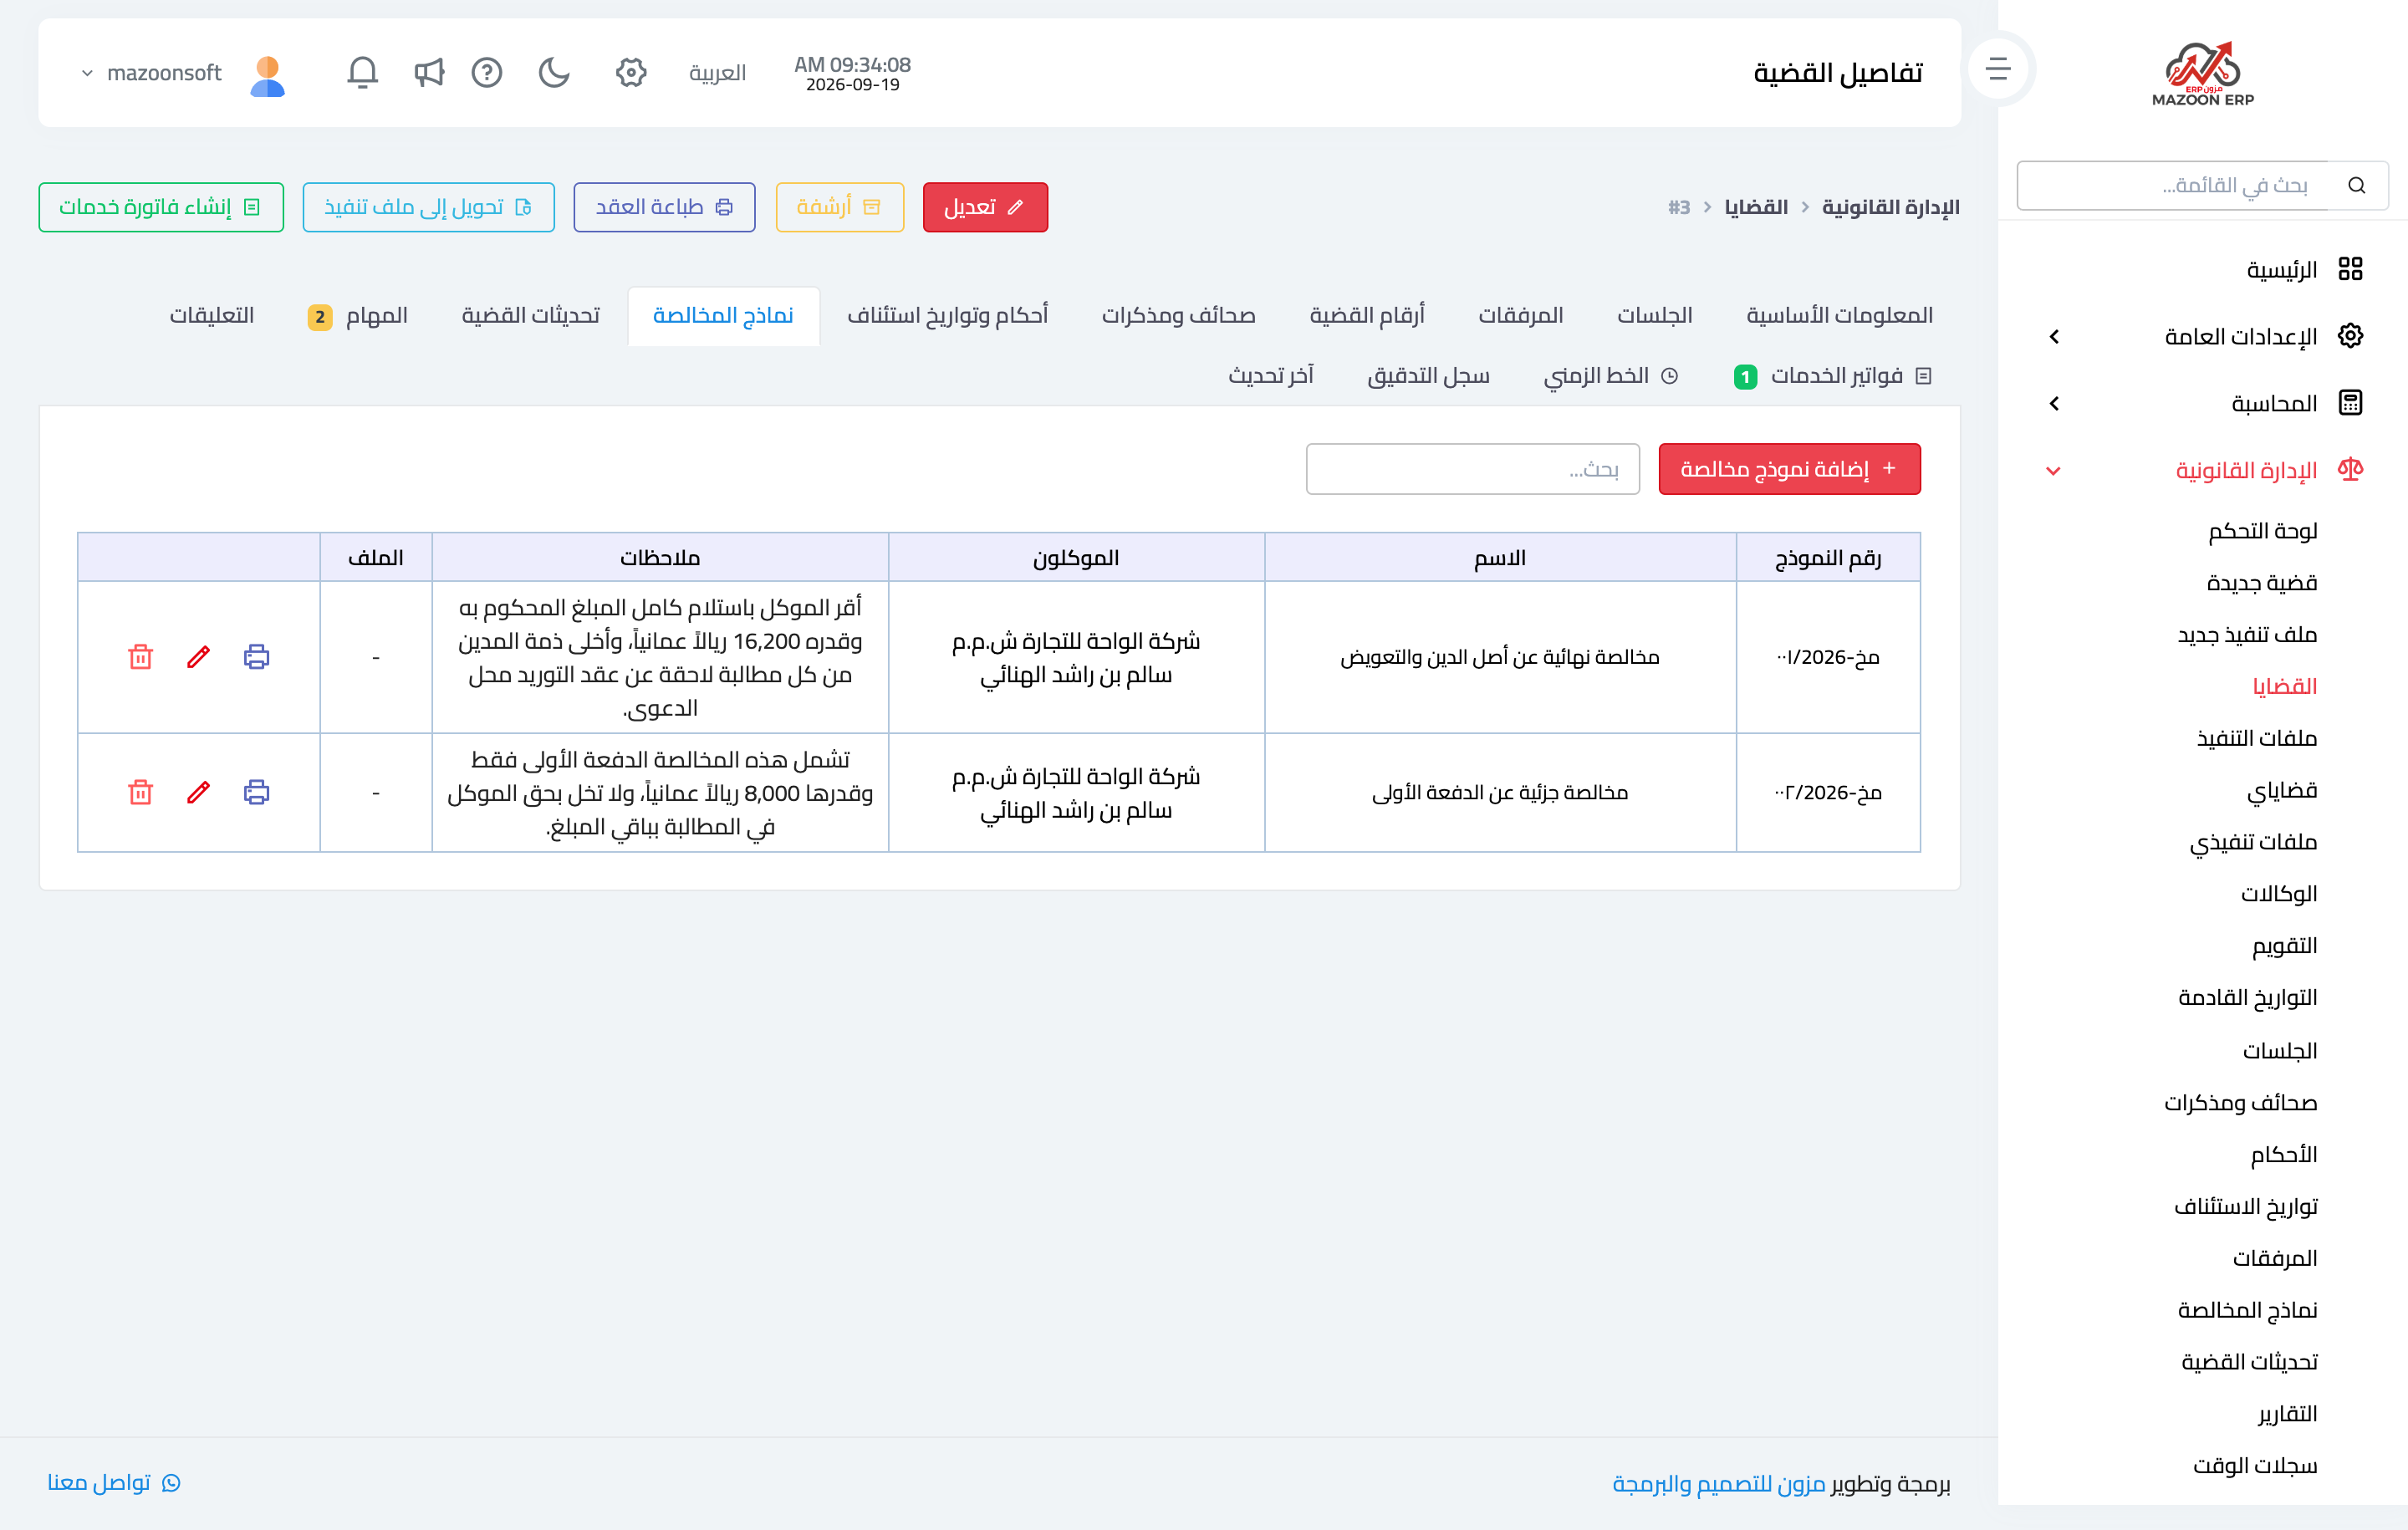
Figure 1
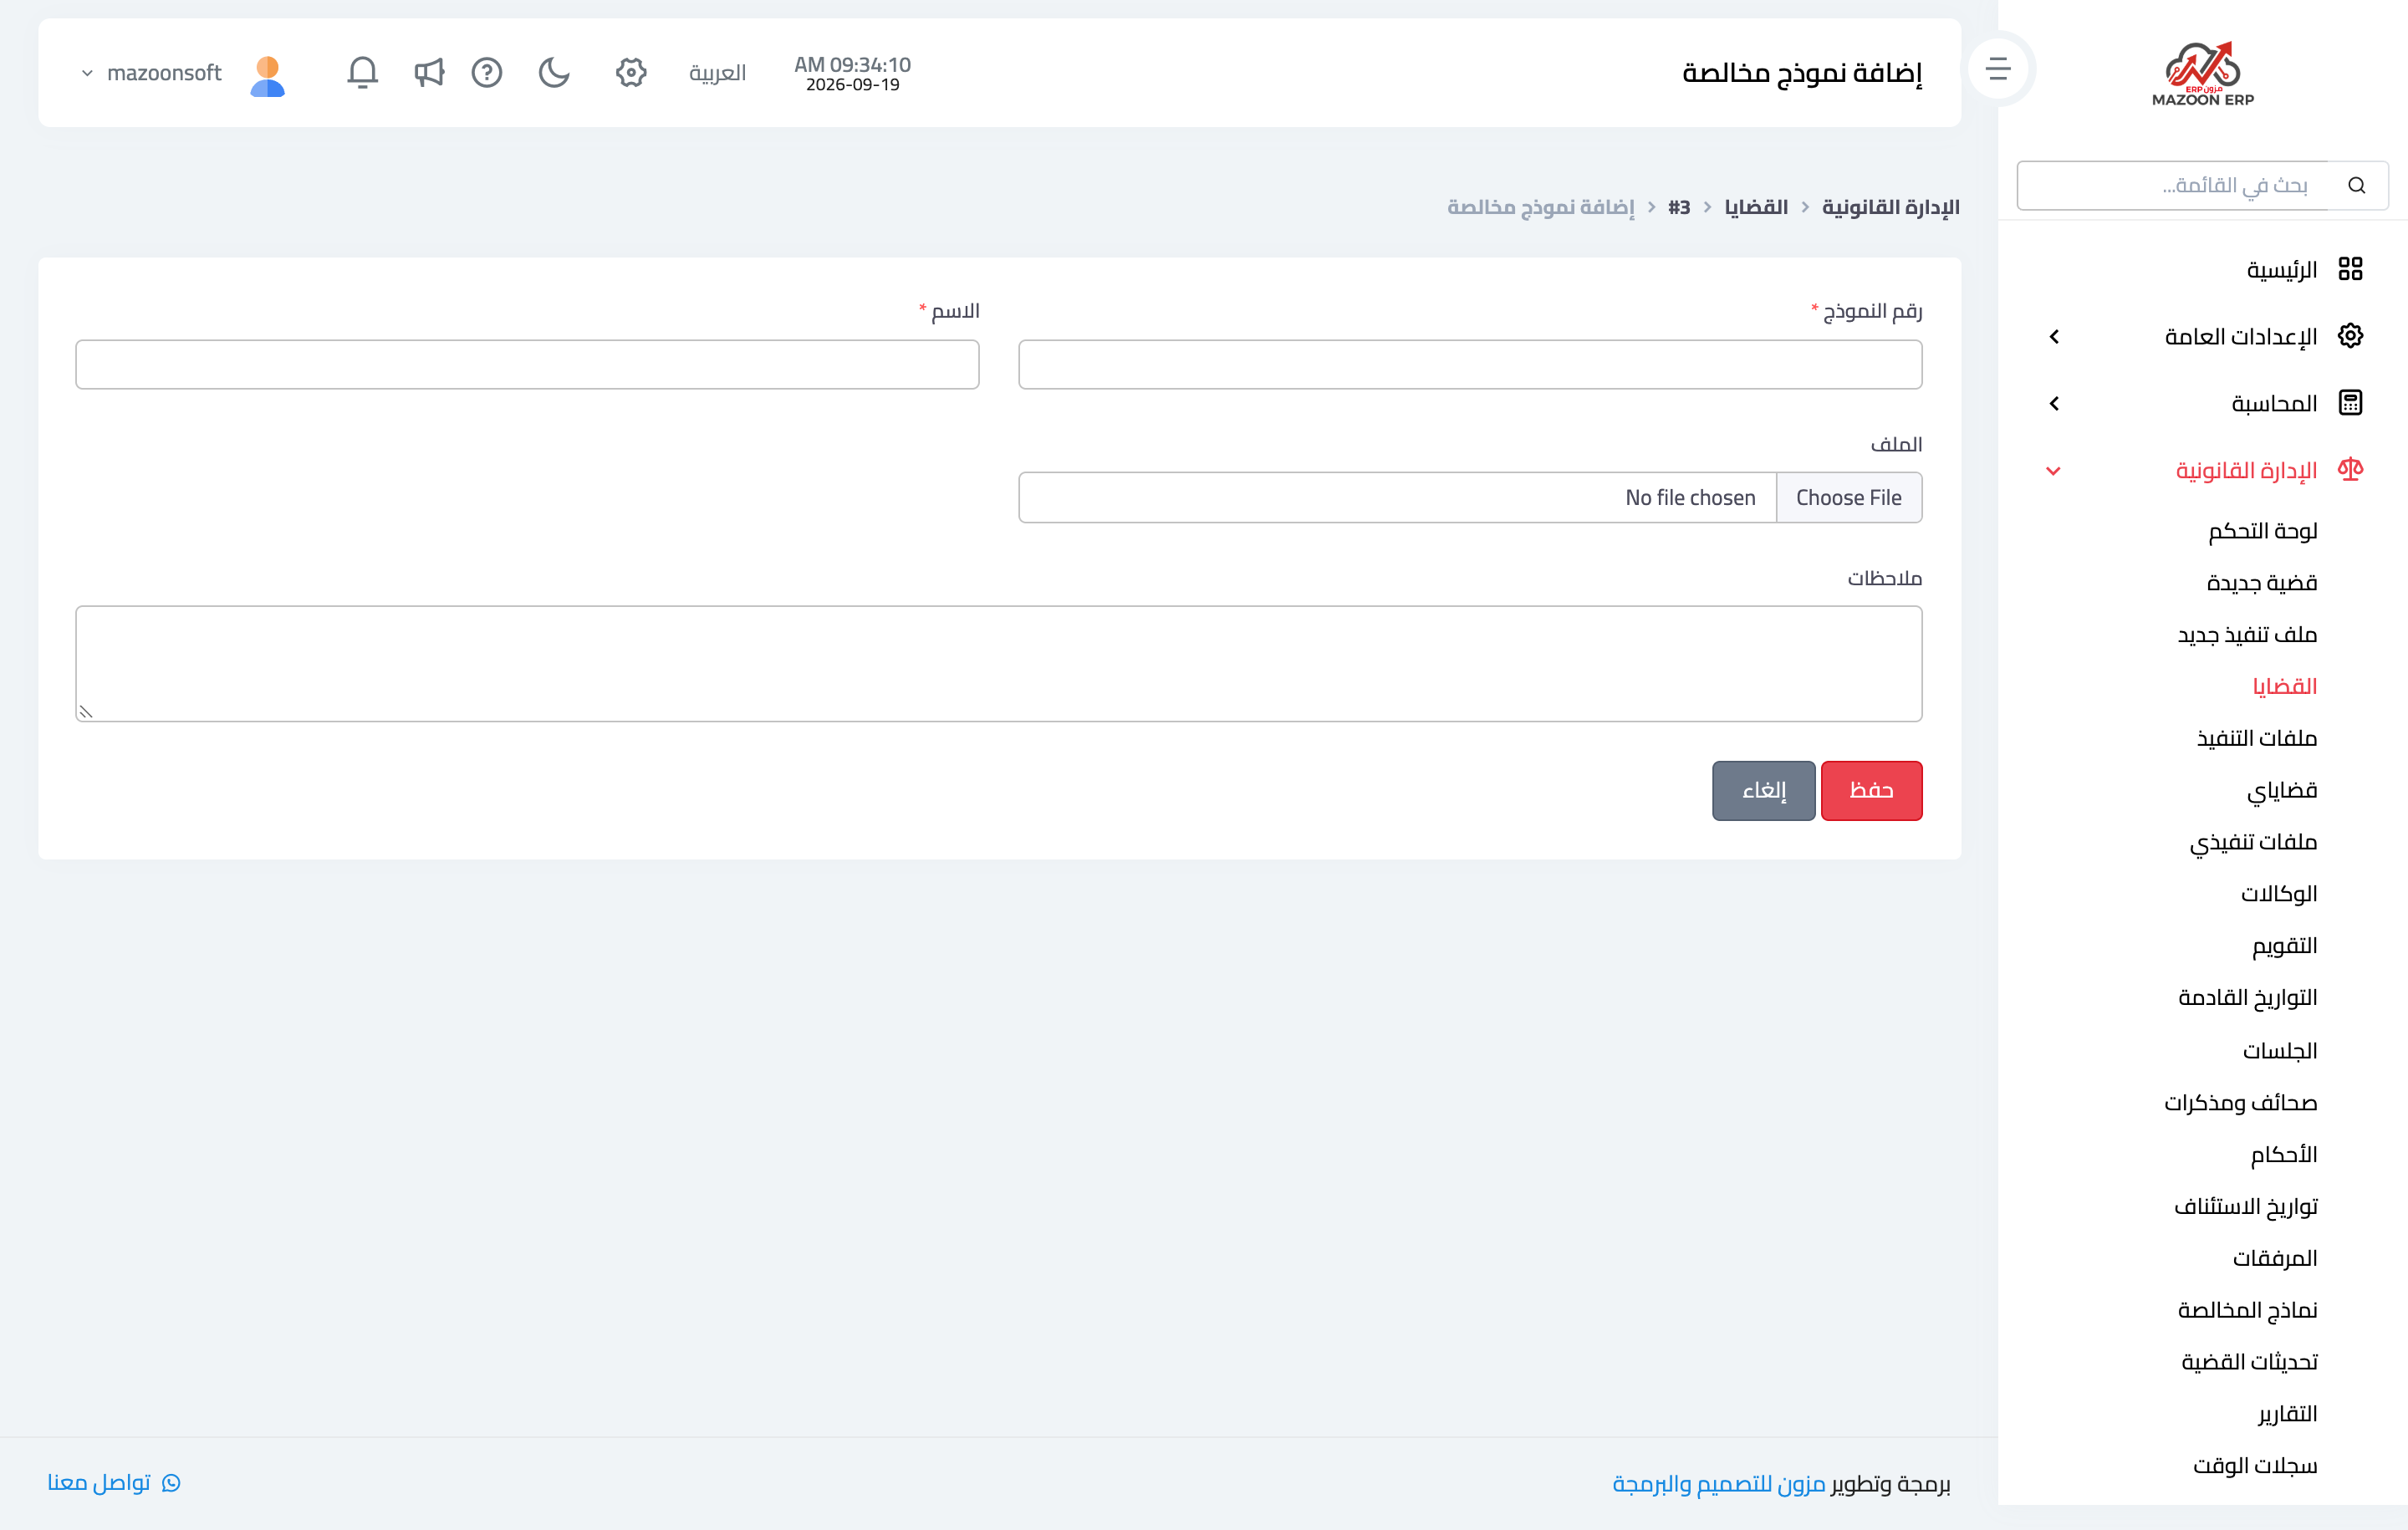
Figure 2
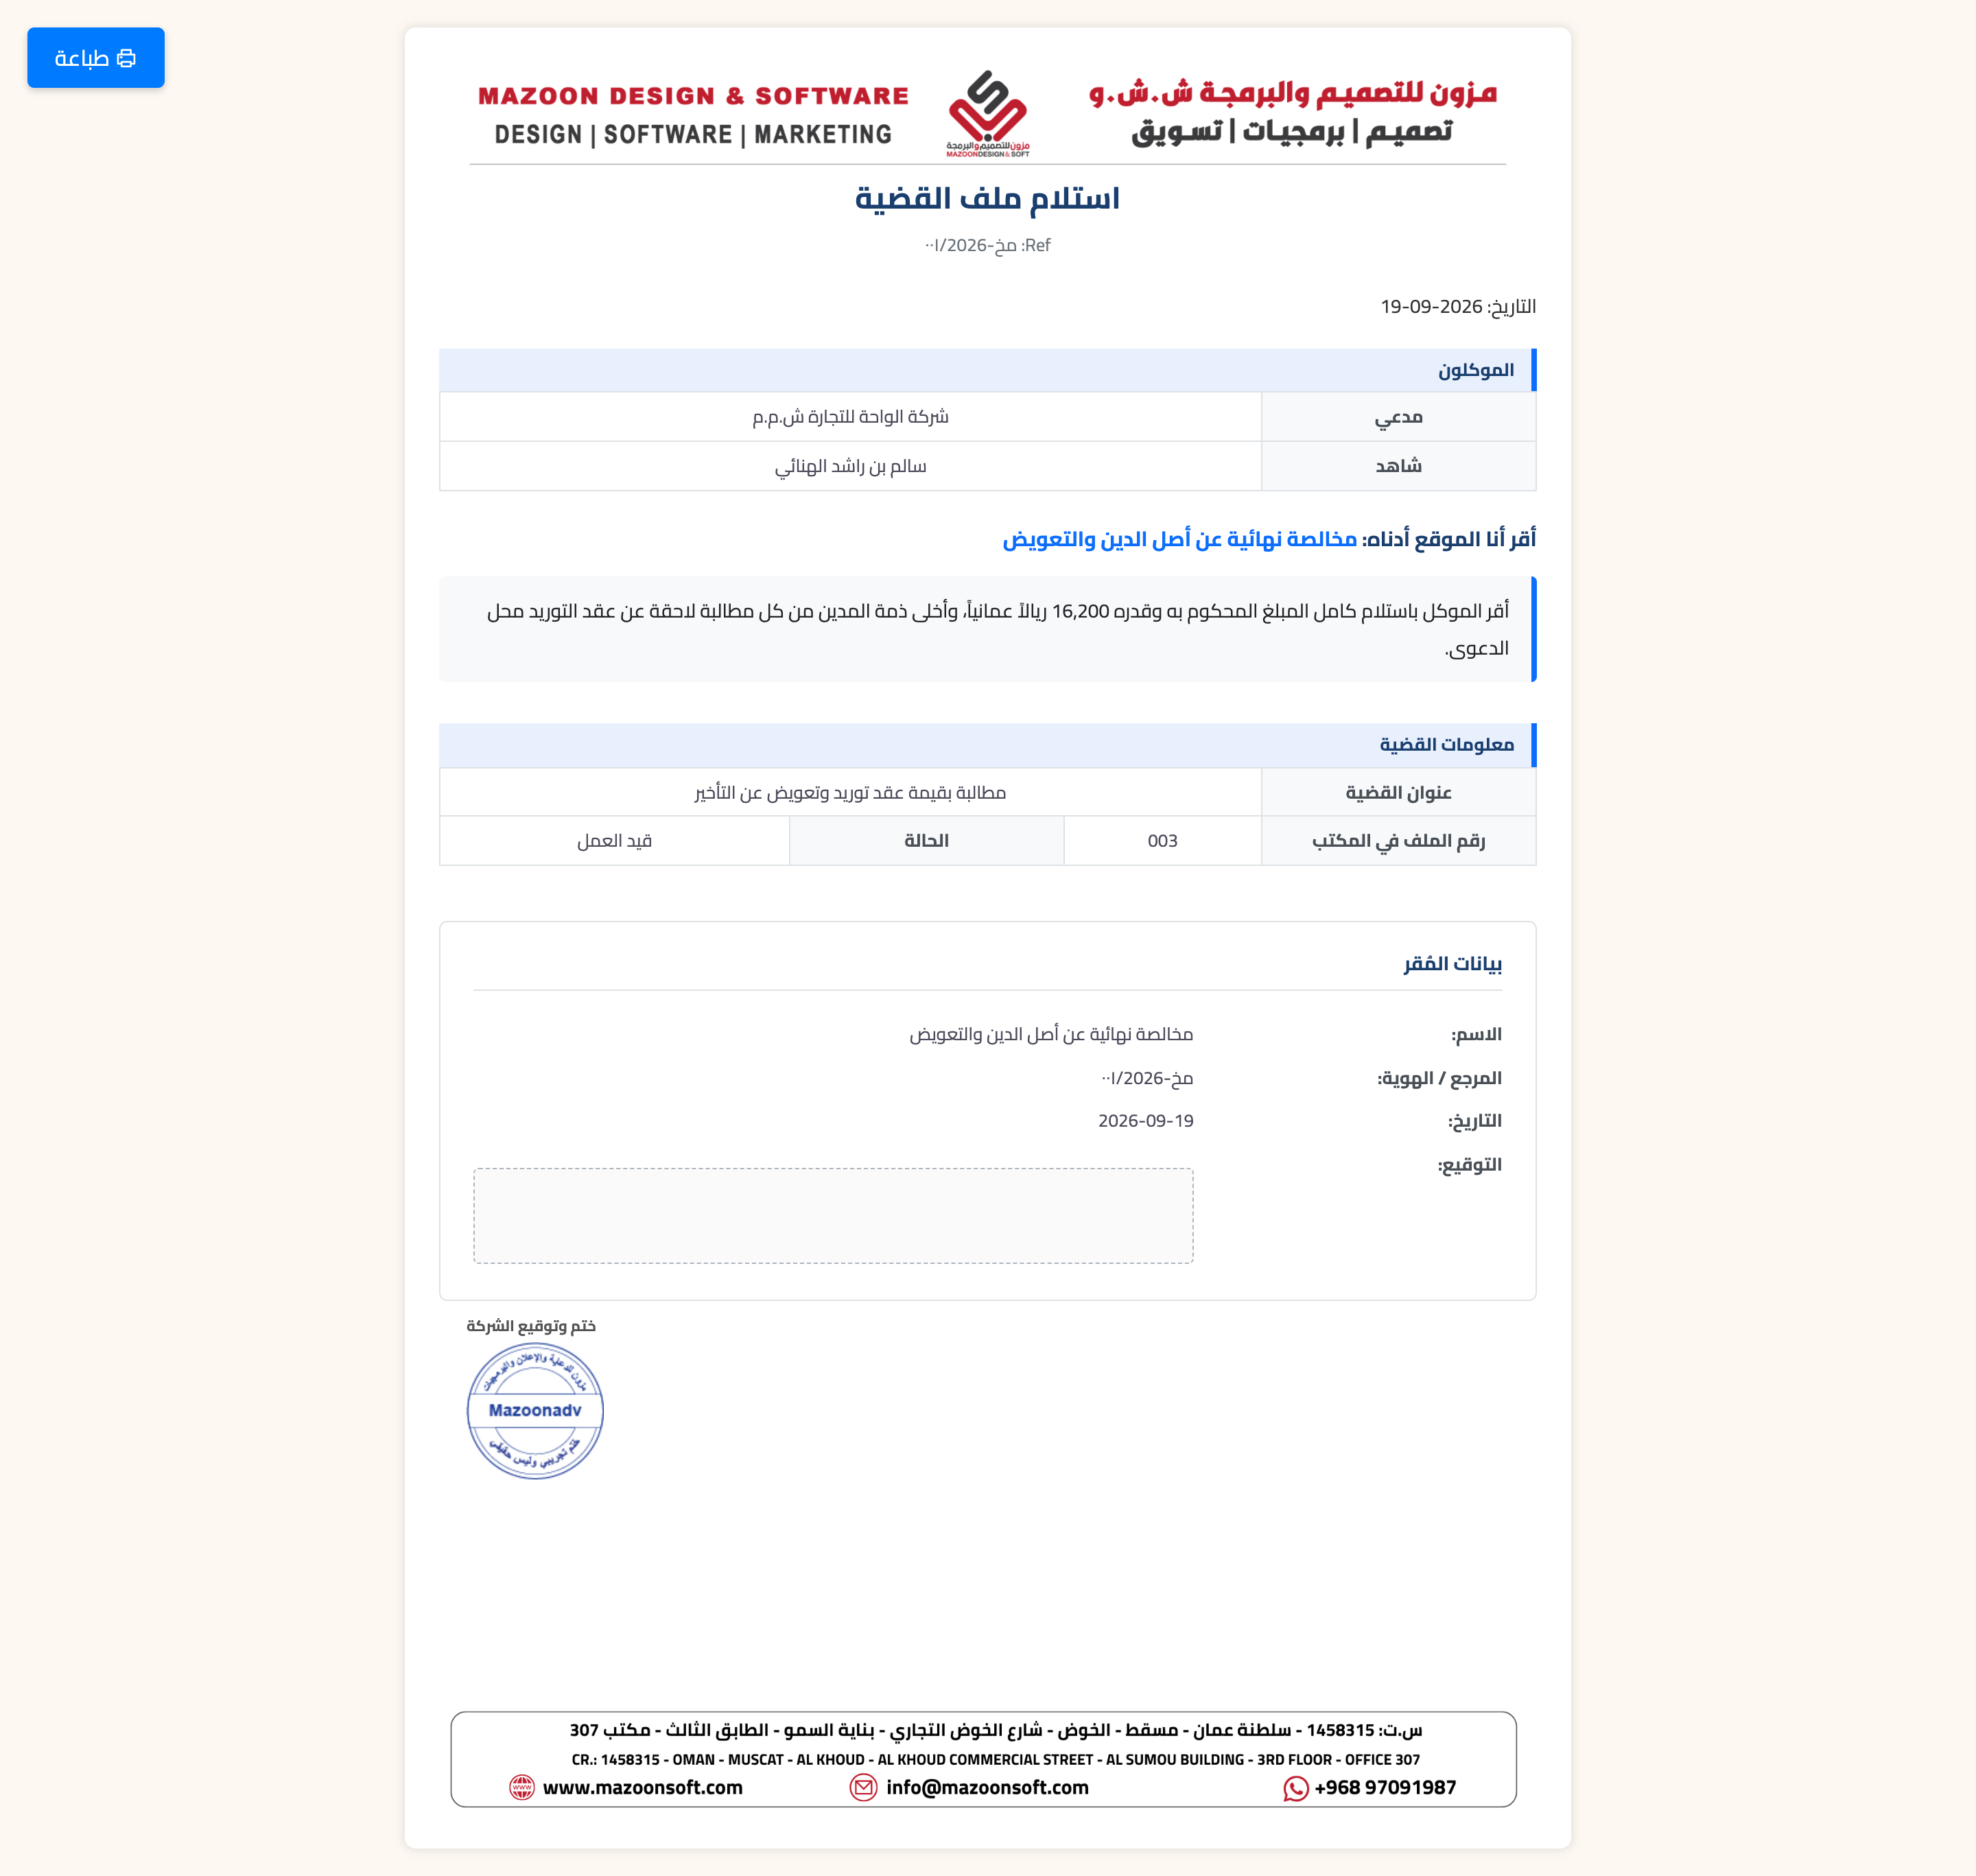
Figure 3
Try what you just read on your own data
Open a free 7-day trial — no credit card, with your own company link in minutes.