
How to Get a Free Trial of Mazoon ERP
This guide walks you through creating your own free Mazoon ERP trial, from the sign-up page to your first login. The screenshots at the bottom of this article are numbered, and each step points to its figure.
What you get
- The full system for 7 days, free.
- No credit card — we ask for no payment method to start a trial.
- A login link of your own, in the form
your-company.mazoonerp.com. - The modules that suit your sector, enabled automatically.
- Sample data already loaded so you can explore right away.
Step 1: Choose your business sector
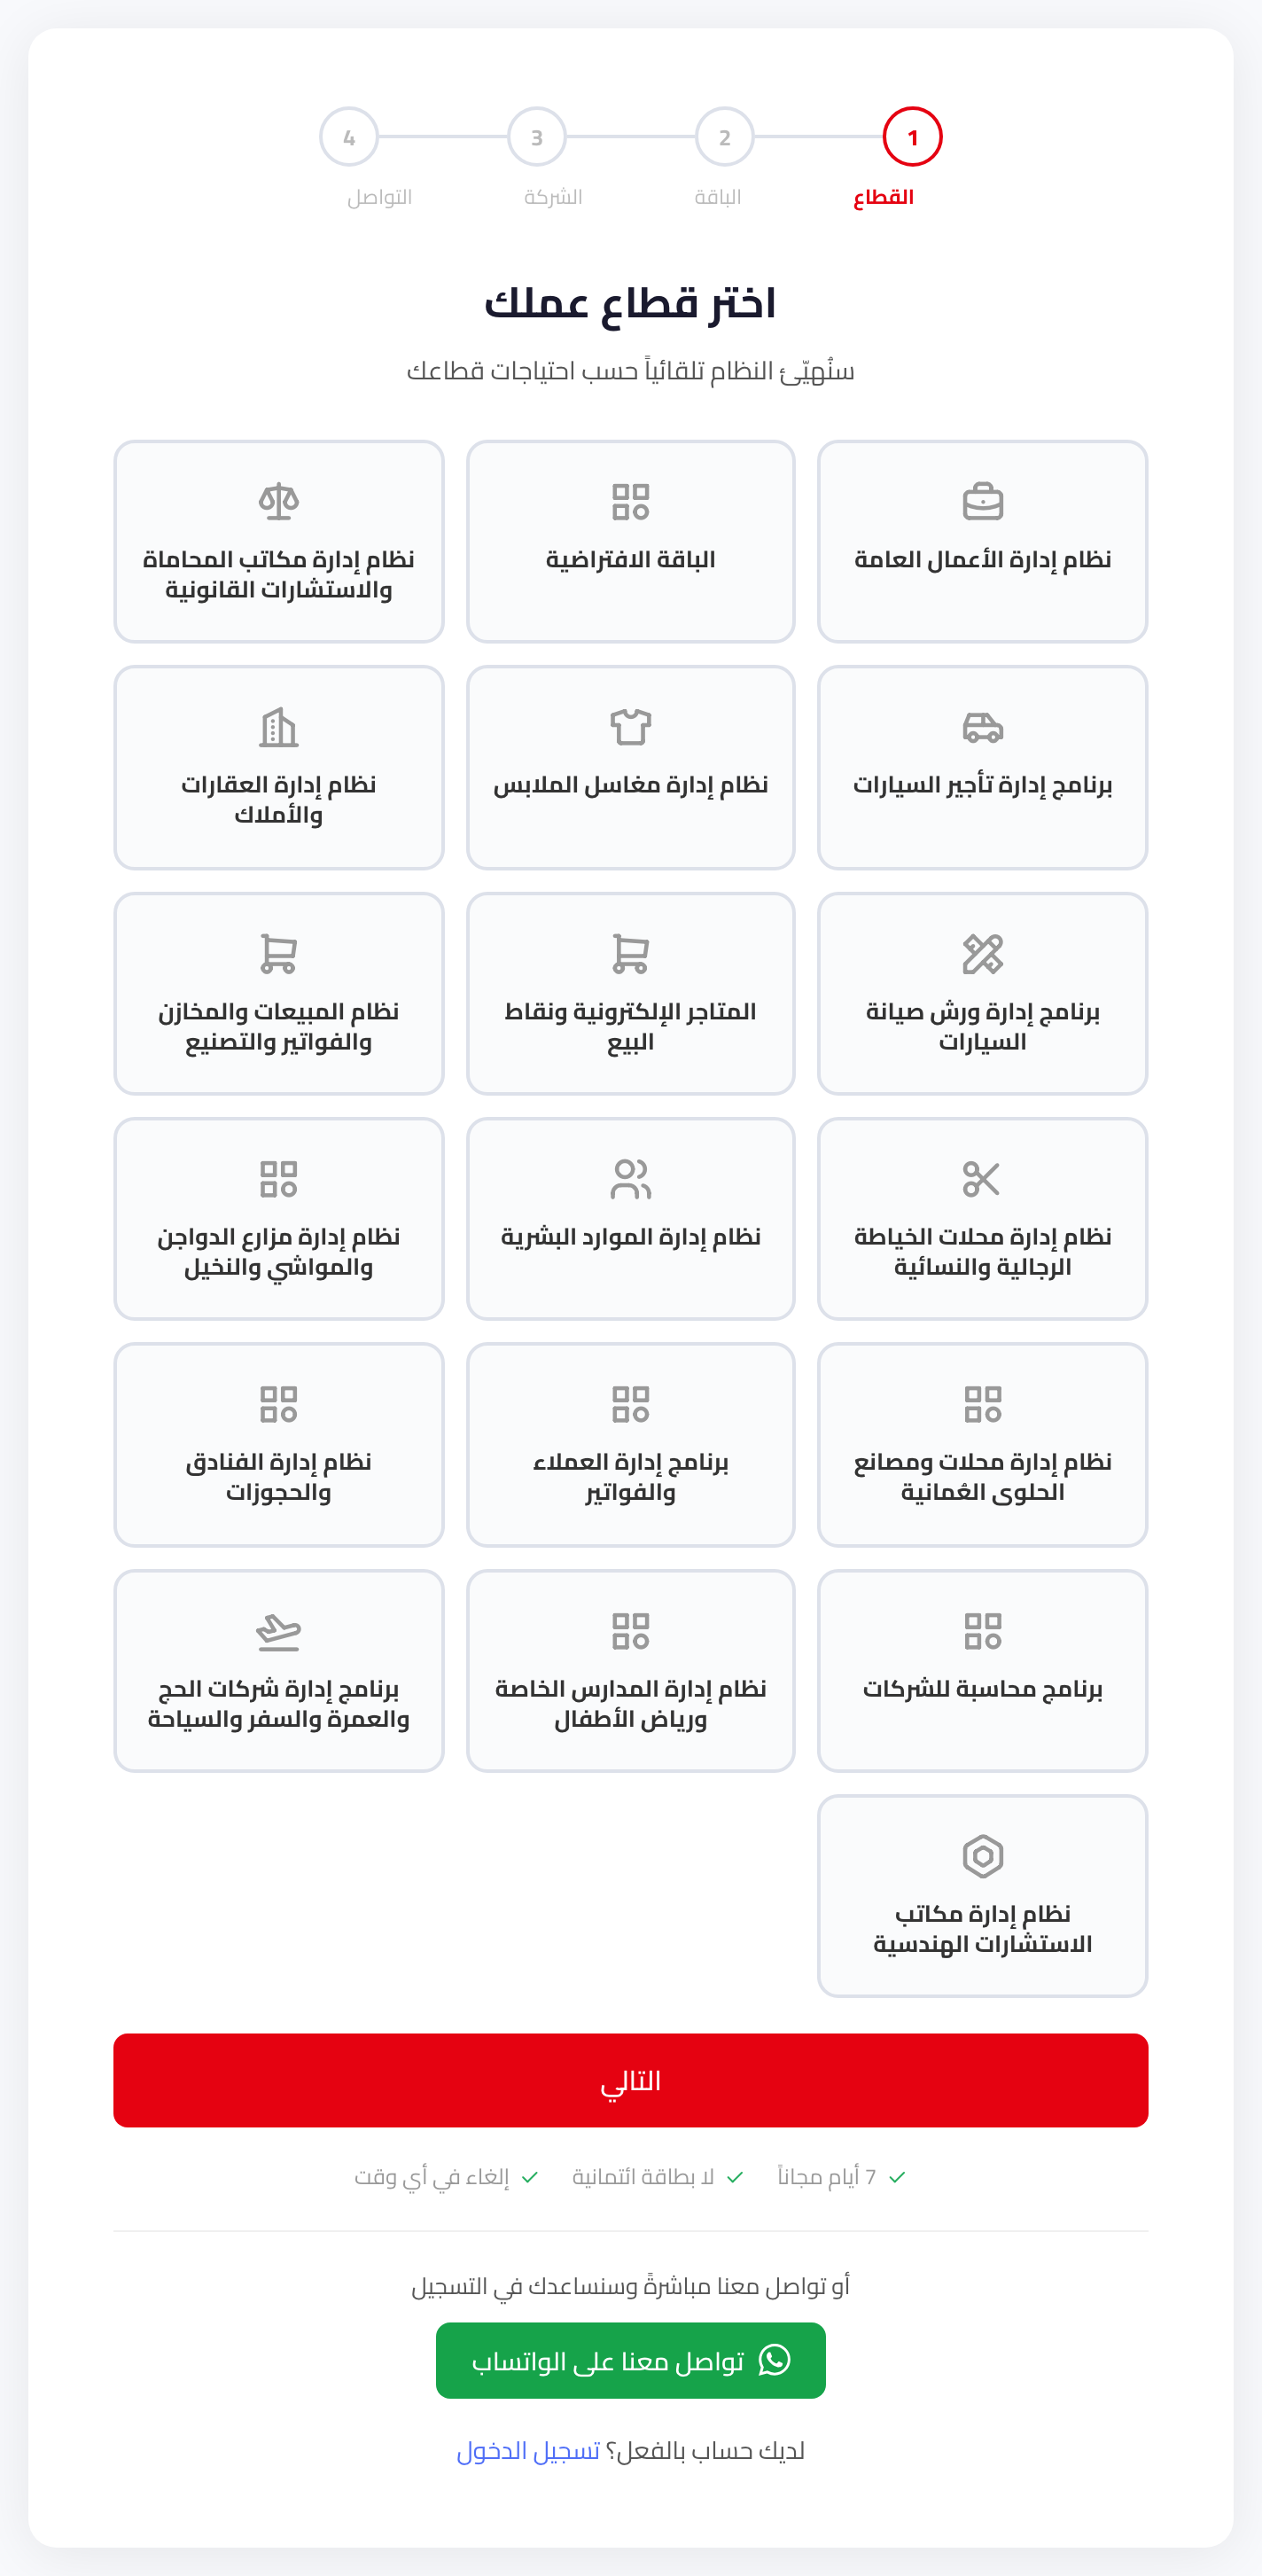
Open the sign-up page at mazoonerp.com/en/register-trial. The available sectors appear as in Figure 1.
Pick the sector closest to what your company does — the system configures itself for that sector's needs. Selecting a sector moves the wizard straight to the next step.
Step 2: Choose a plan
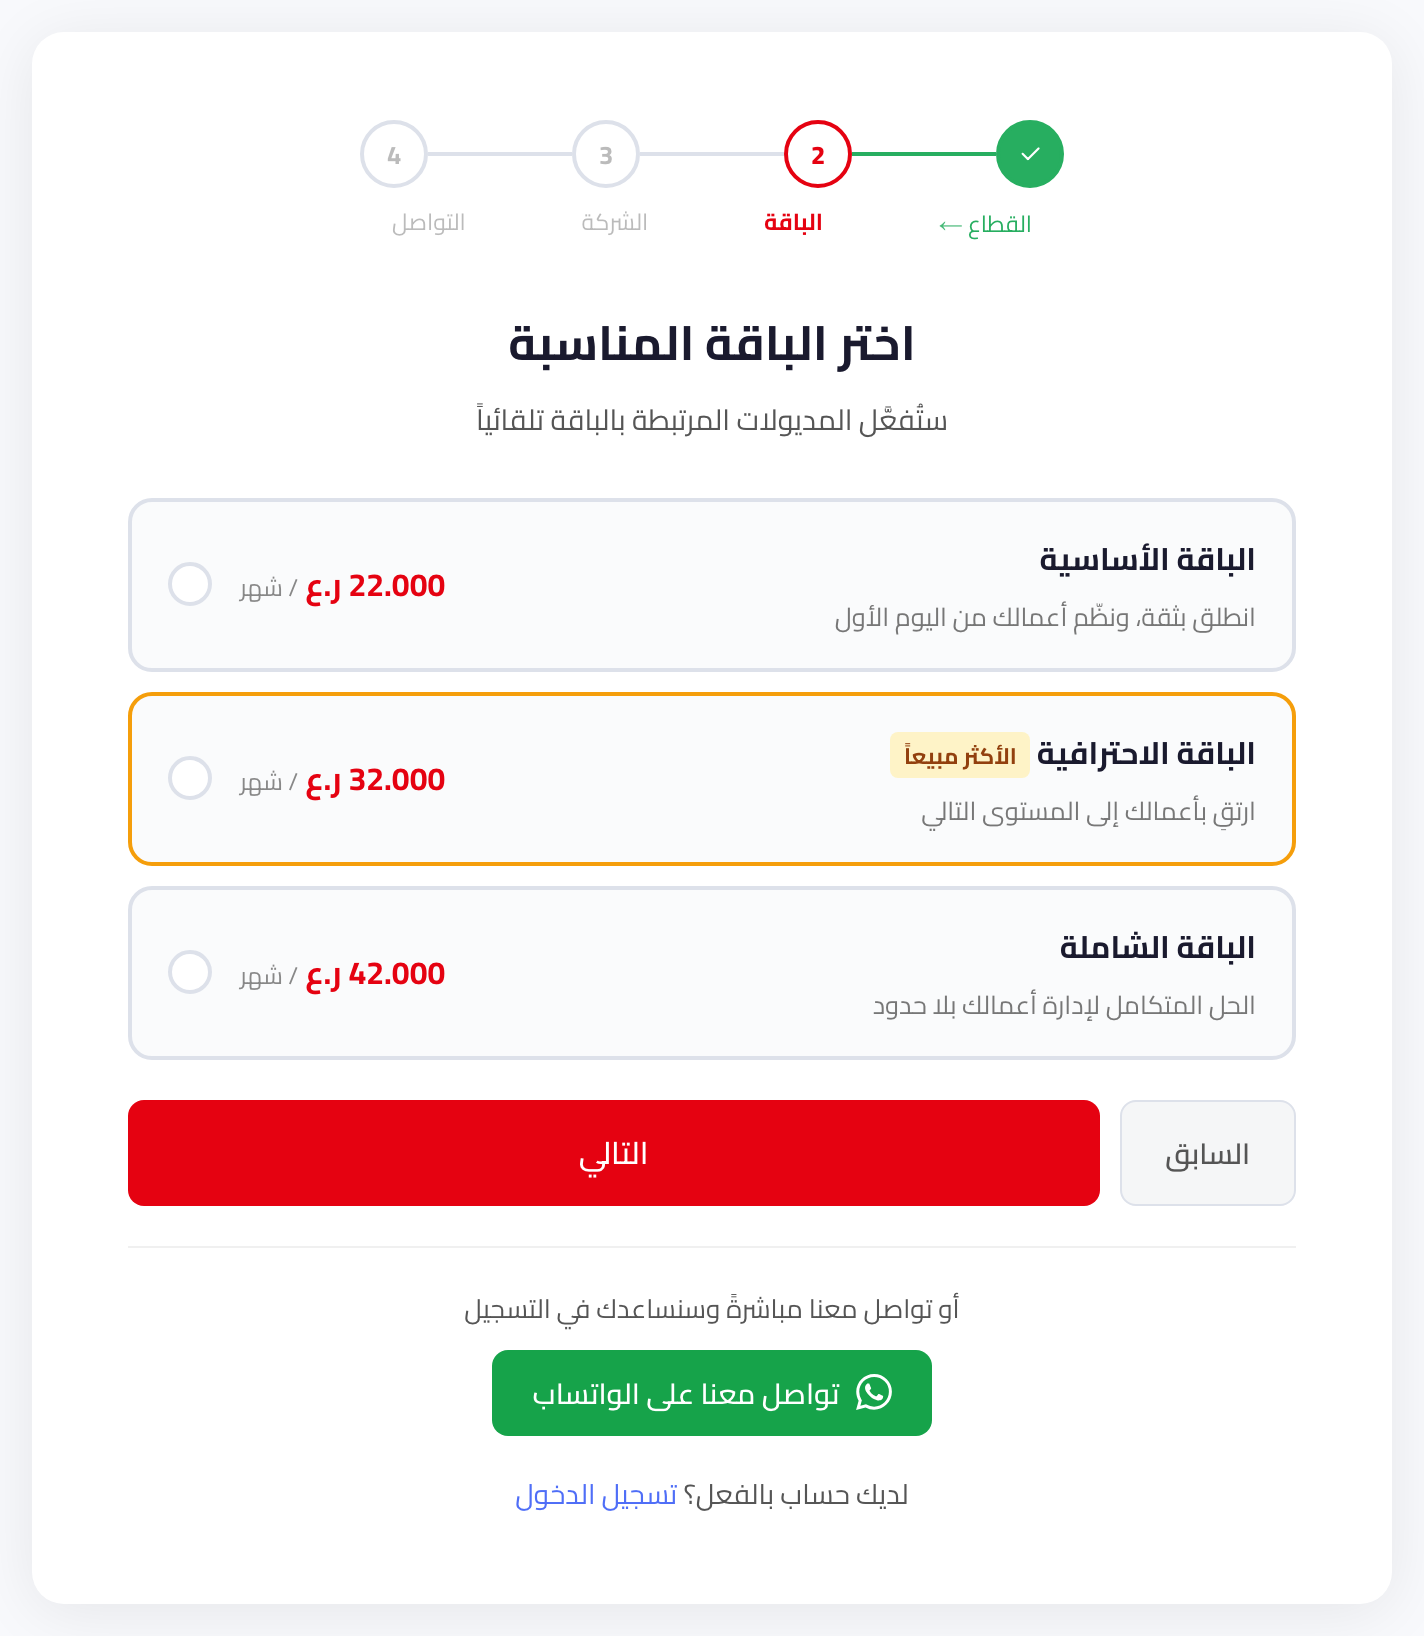
The plans for your chosen sector appear with their monthly price, as in Figure 2. The one tagged "Most Popular" suits most companies.
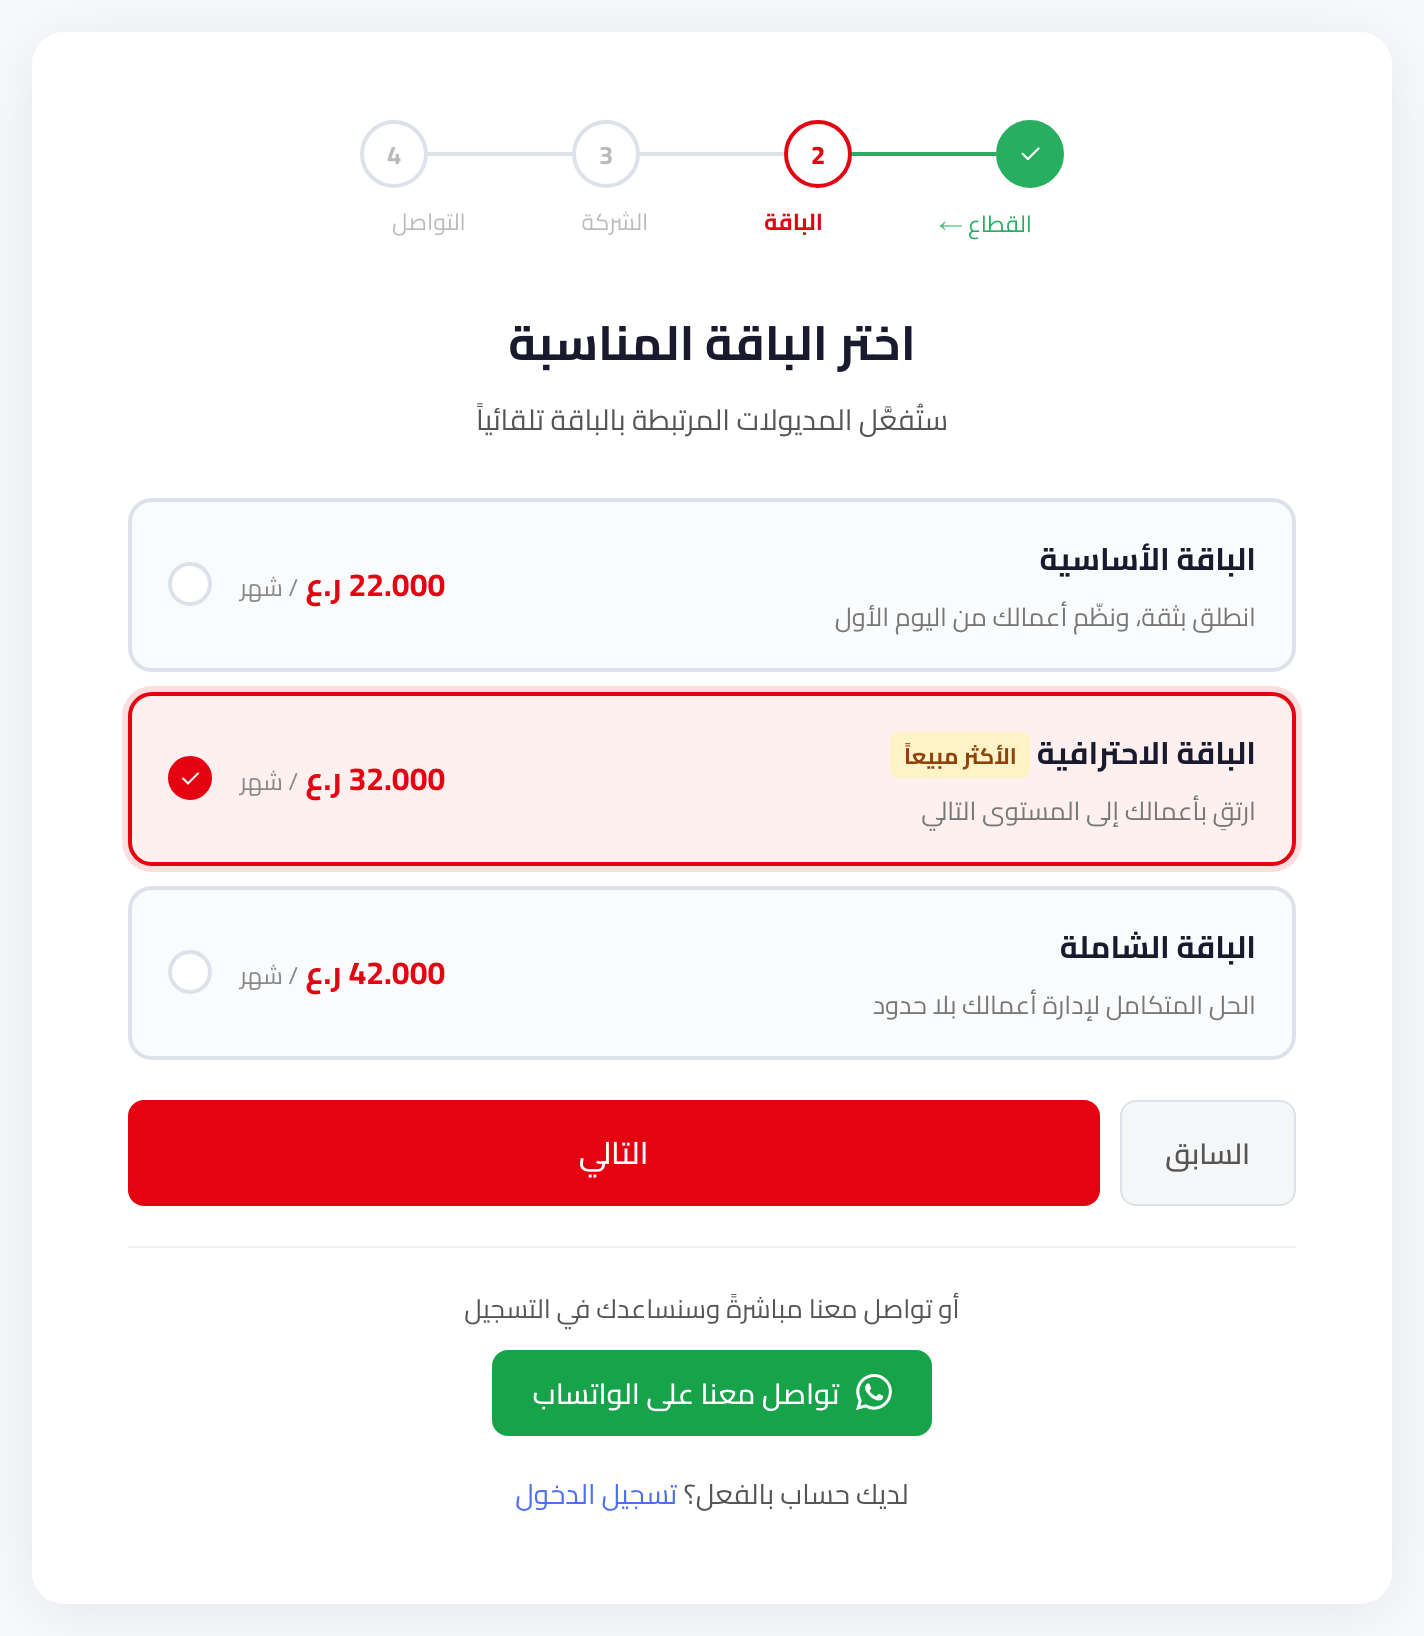
Click a plan to select it — its border changes as in Figure 3 — then click Next.
The modules tied to the plan are enabled automatically, and you can upgrade later.
Step 3: Company details and your own link
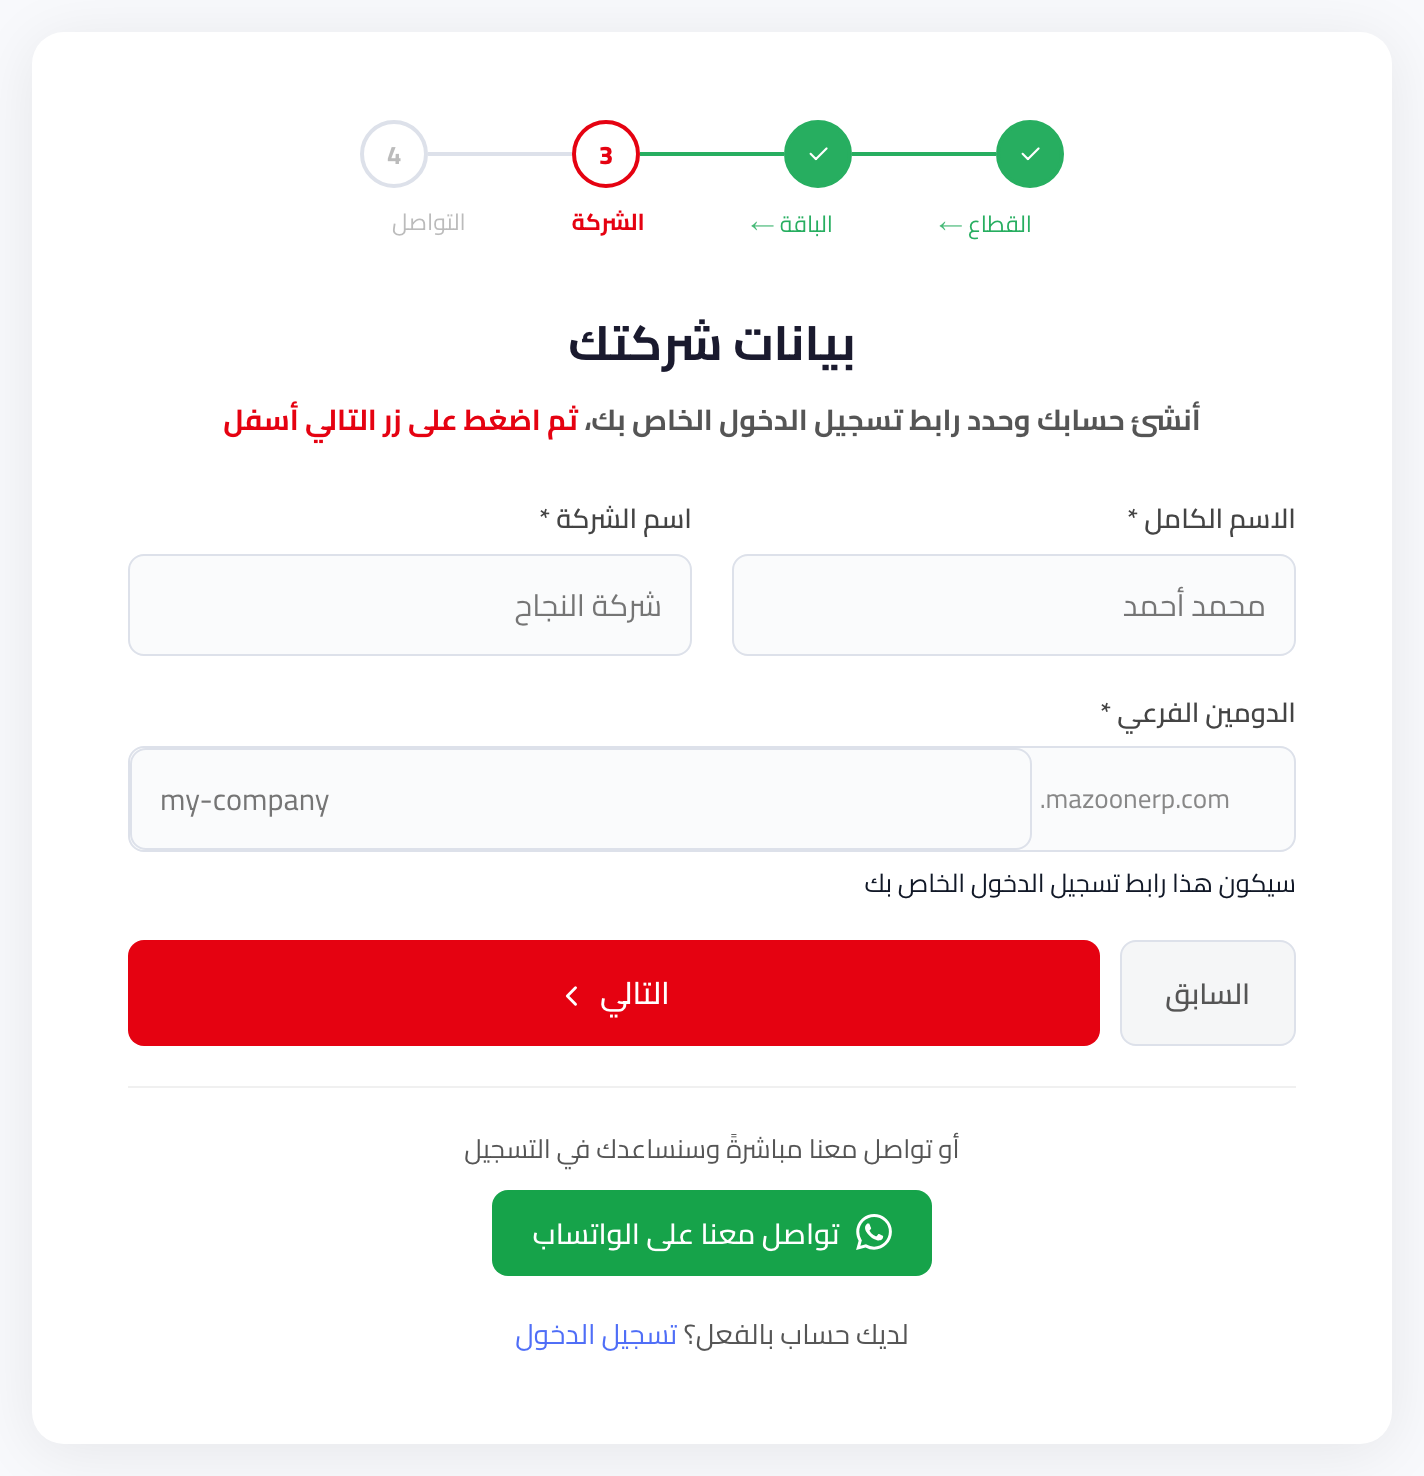
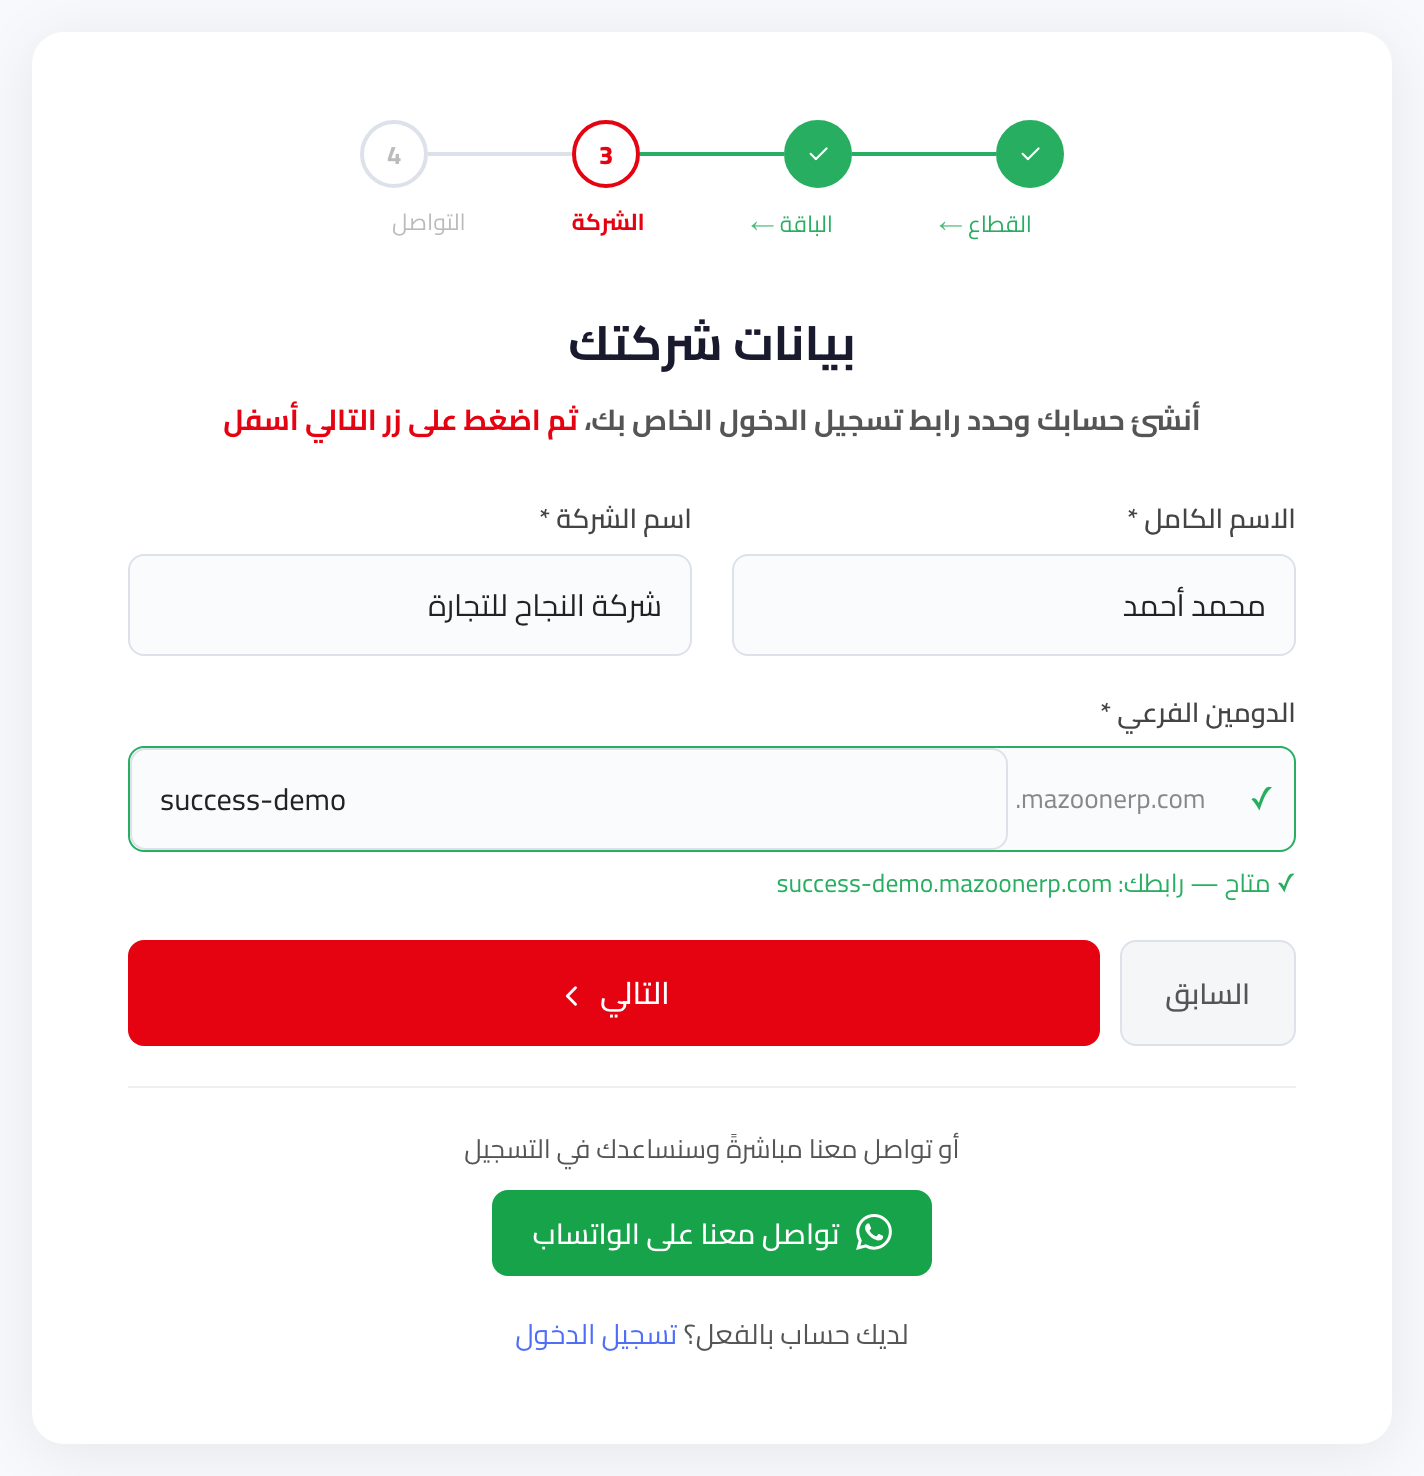
Enter your full name and company name, then choose your subdomain — the part that comes before .mazoonerp.com in your login link. The empty fields are shown in Figure 4.
As you type, the system checks availability instantly and shows the result below the field: a green tick and your full link when the name is free, as in Figure 5.
Pick something short and clear in English (at least 3 characters) — this stays your company's permanent link.
Step 4: Contact details
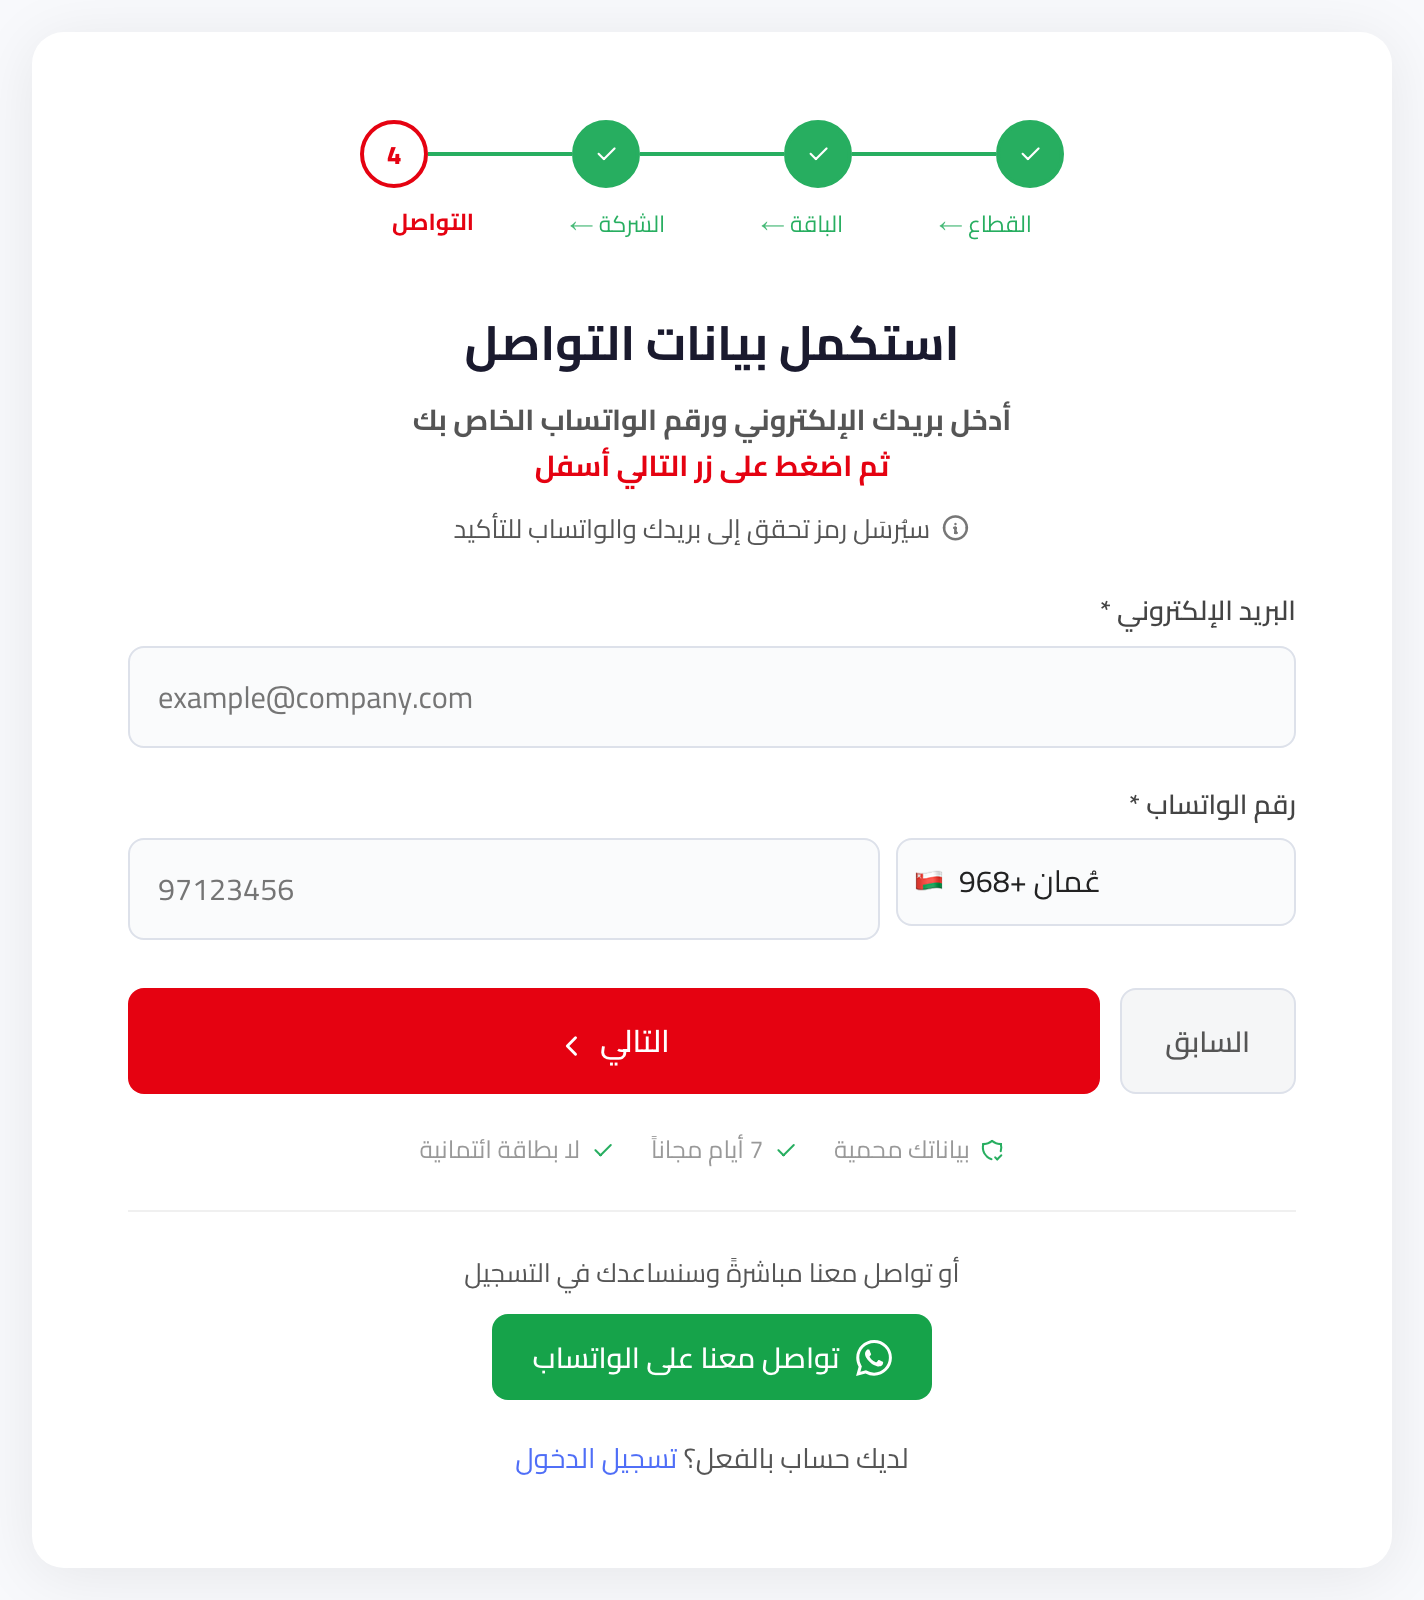
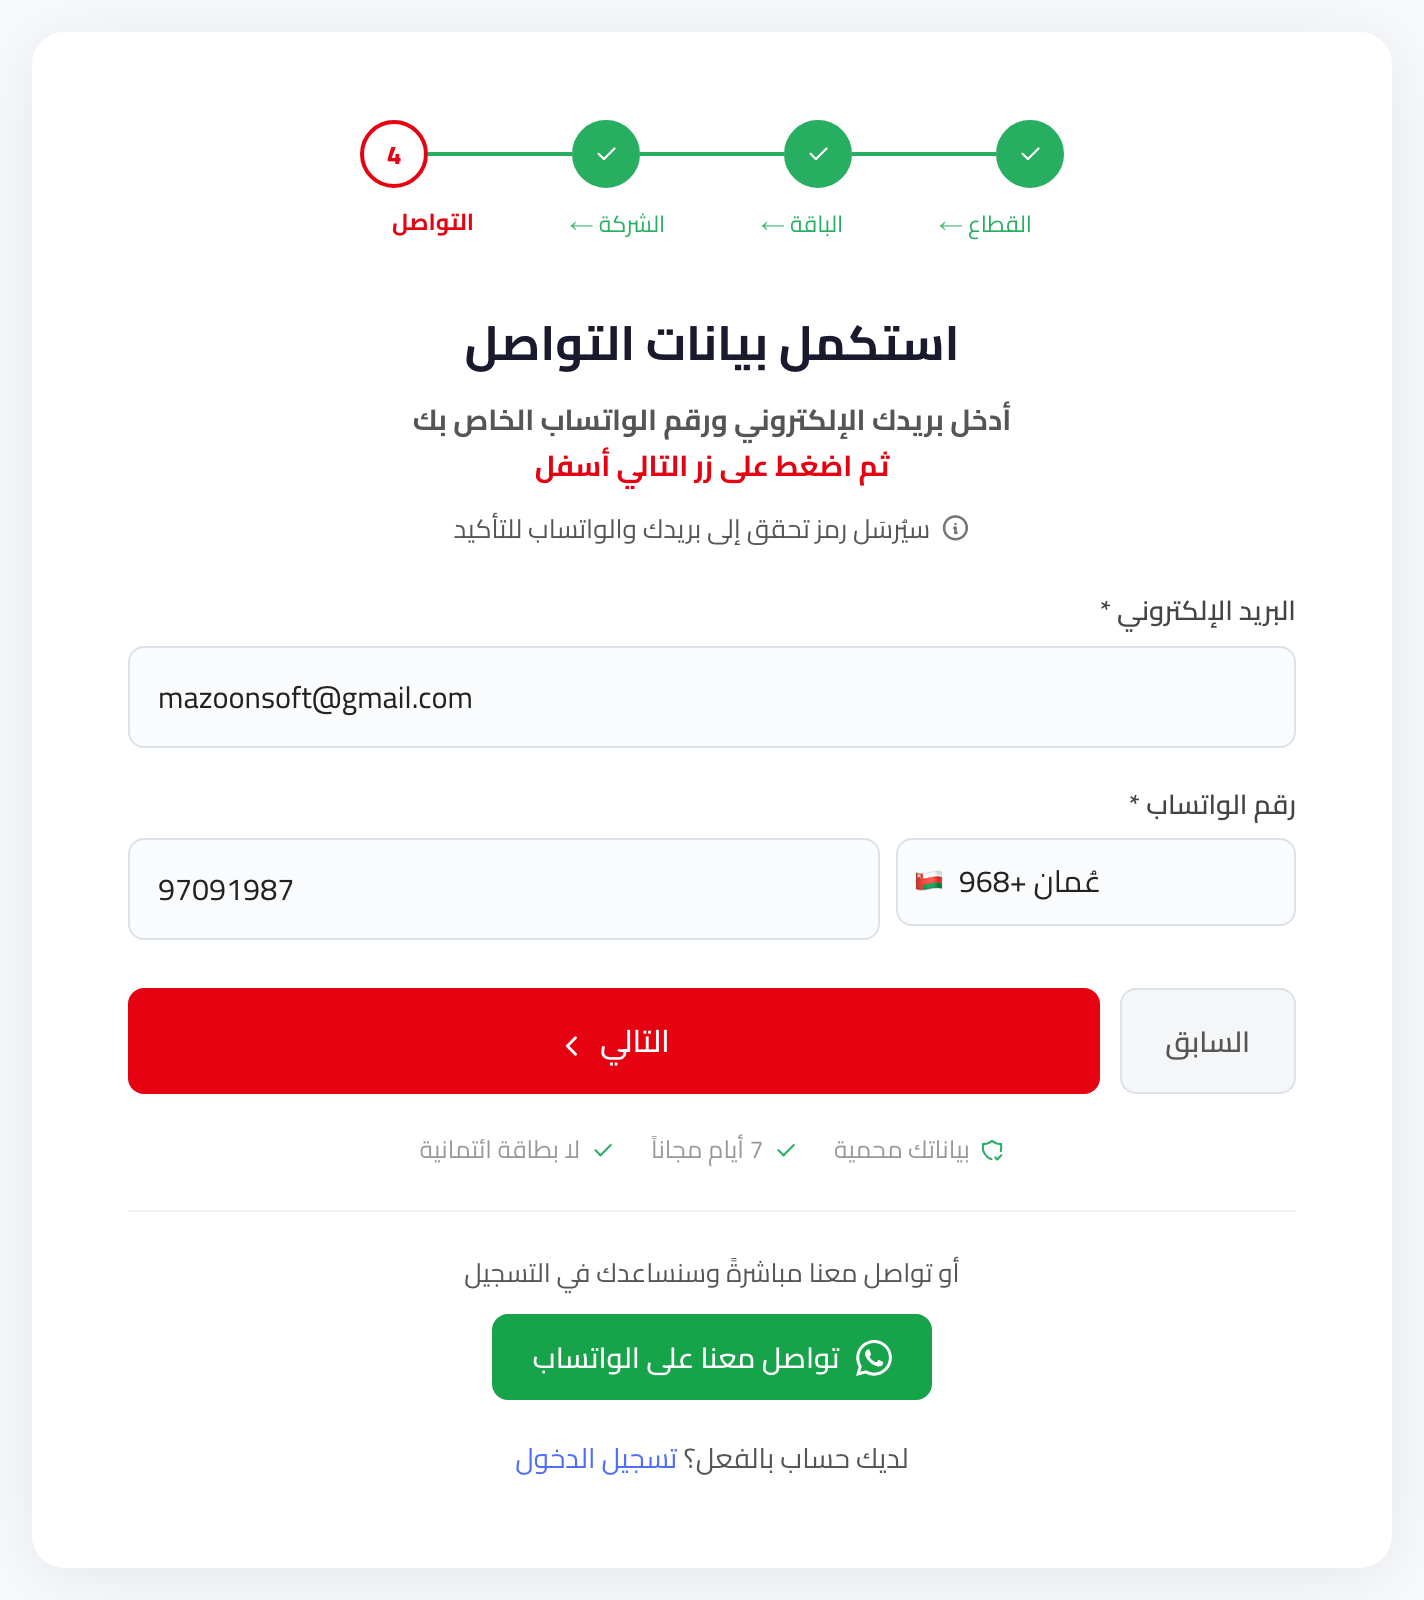
Enter your email address and WhatsApp number, choosing your country code, as in Figure 6 and Figure 7.
Check both carefully — your verification codes are sent to them in the next step. Then click Next.
Step 5: Verify your identity
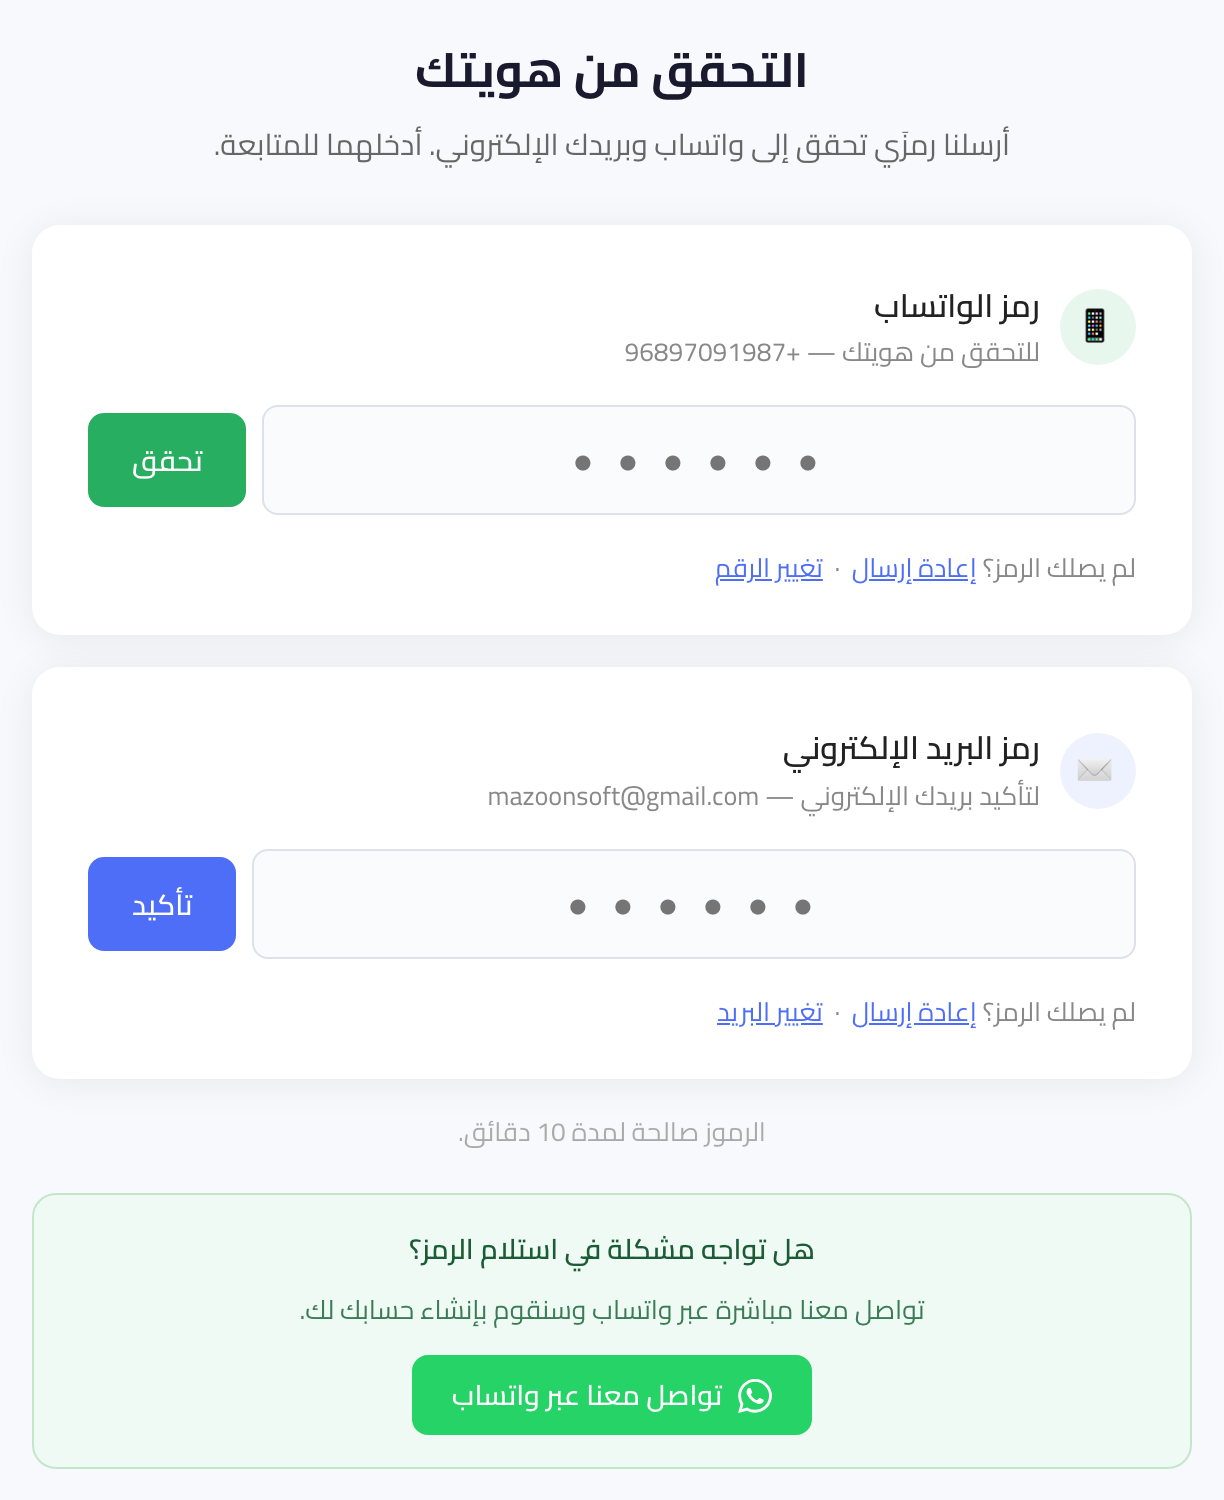
The system sends two 6-digit codes: one to WhatsApp and one to your email, as in Figure 8.
- Enter the WhatsApp code and click Verify.
- Enter the email code and click Confirm.
Both codes are valid for 10 minutes. If one does not arrive, use Resend, or Change number / Change email if you mistyped. If the problem persists, message us on WhatsApp using the button at the bottom of the page and we will create the account for you.
Step 6: Your account is being prepared
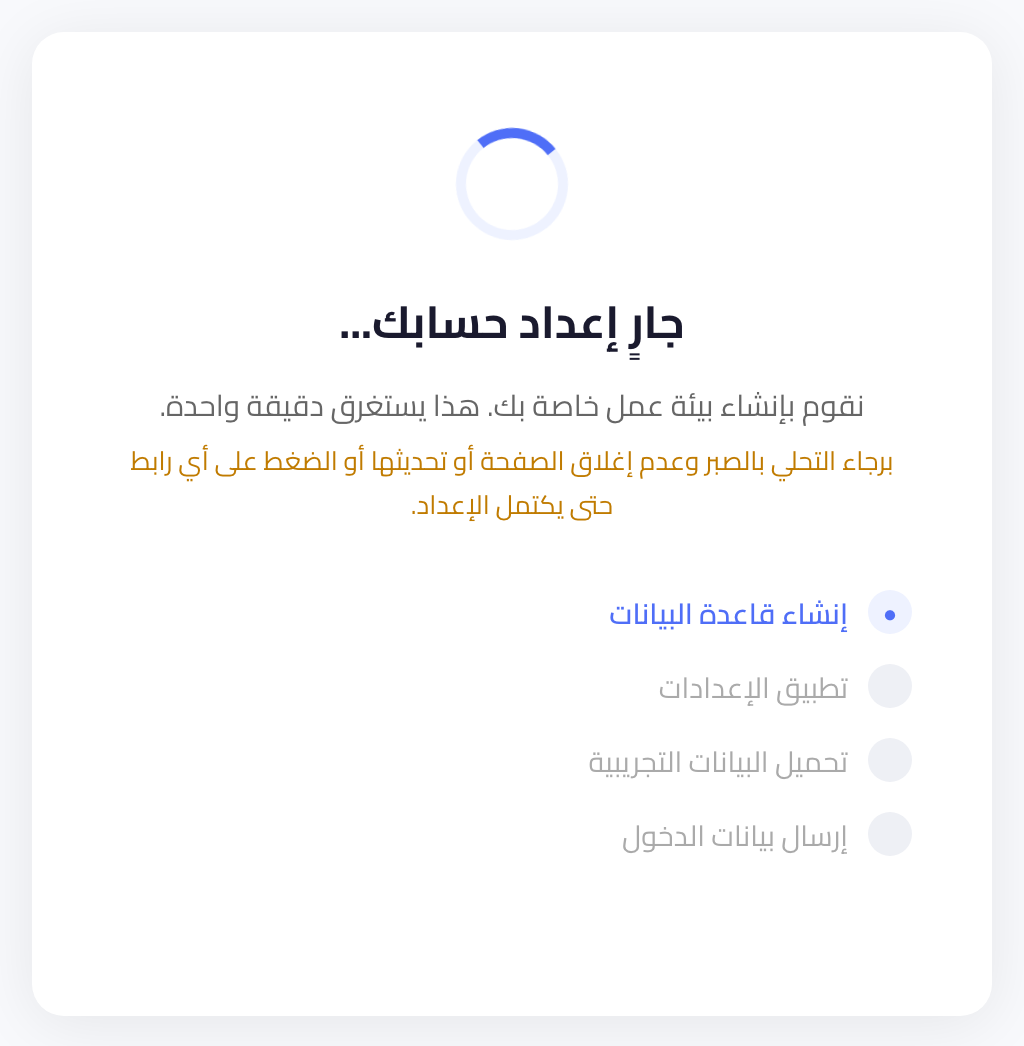
Once verified, the system builds a separate workspace for your company. The progress screen appears as in Figure 9, with four stages: creating the database, applying settings, loading sample data, and sending your login details.
Important: do not close or refresh the page, and do not click any link, until setup finishes — it takes about a minute.
Step 7: Your account is ready
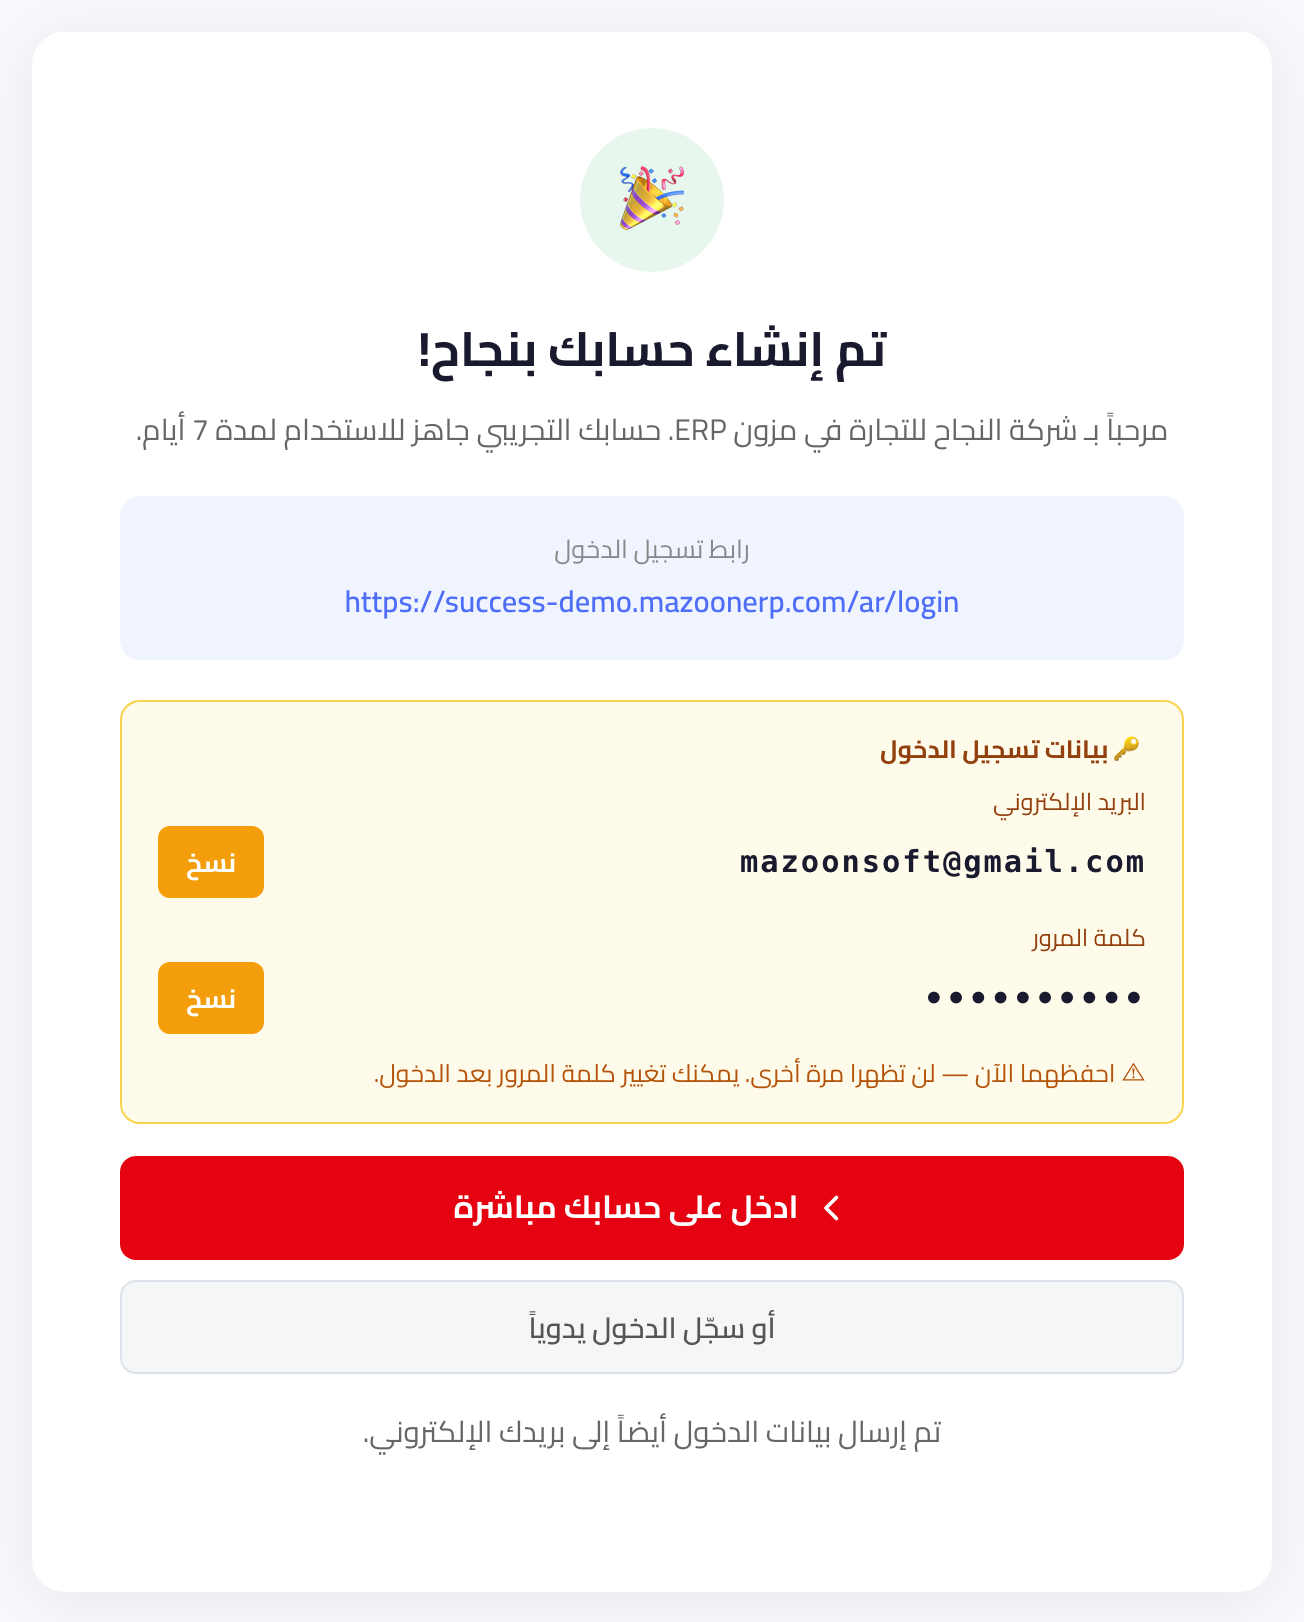
The confirmation screen appears as in Figure 10, showing:
- Your company's login link.
- Your login details: your email and a temporary password, each with a copy button.
- A Go straight to your account button that signs you in with one click.
Save the password now — it is not shown on this screen again. It is also emailed to you, and you can change it after signing in.
What next?
Head to "Signing in and navigating the dashboard" to learn the interface and how to move between modules.
Screenshots
Try what you just read on your own data
Open a free 7-day trial — no credit card, with your own company link in minutes.