
How do I upload the venue photos and videos?
Customers choose a venue by eye before they ever ask the price. In this sector the photos are not a cosmetic detail — they are your strongest selling tool.
Steps
- Open Venues → Edit on the venue — Figure 1.
- In the images section upload your files; you can upload several at once.
- The first image is the one shown on the venue card on the booking site, so give it your best shot.
- In the videos section add a short clip of the venue if you have one.
- Remove any image with the delete button beneath it, then save.
- Check the result on the venue page of the public site — Figure 2.
Notes
- Photograph the venue set up for an event rather than empty; the customer is buying the scene, not the walls.
- Include one night shot and one daytime shot; most questions are about the lighting.
- Do not upload huge uncompressed images; a slow page loses the visitor before they see the venue.
- Refresh the photos after any refurbishment or change of furniture; an old photo means a surprised customer on viewing day.
Screenshots
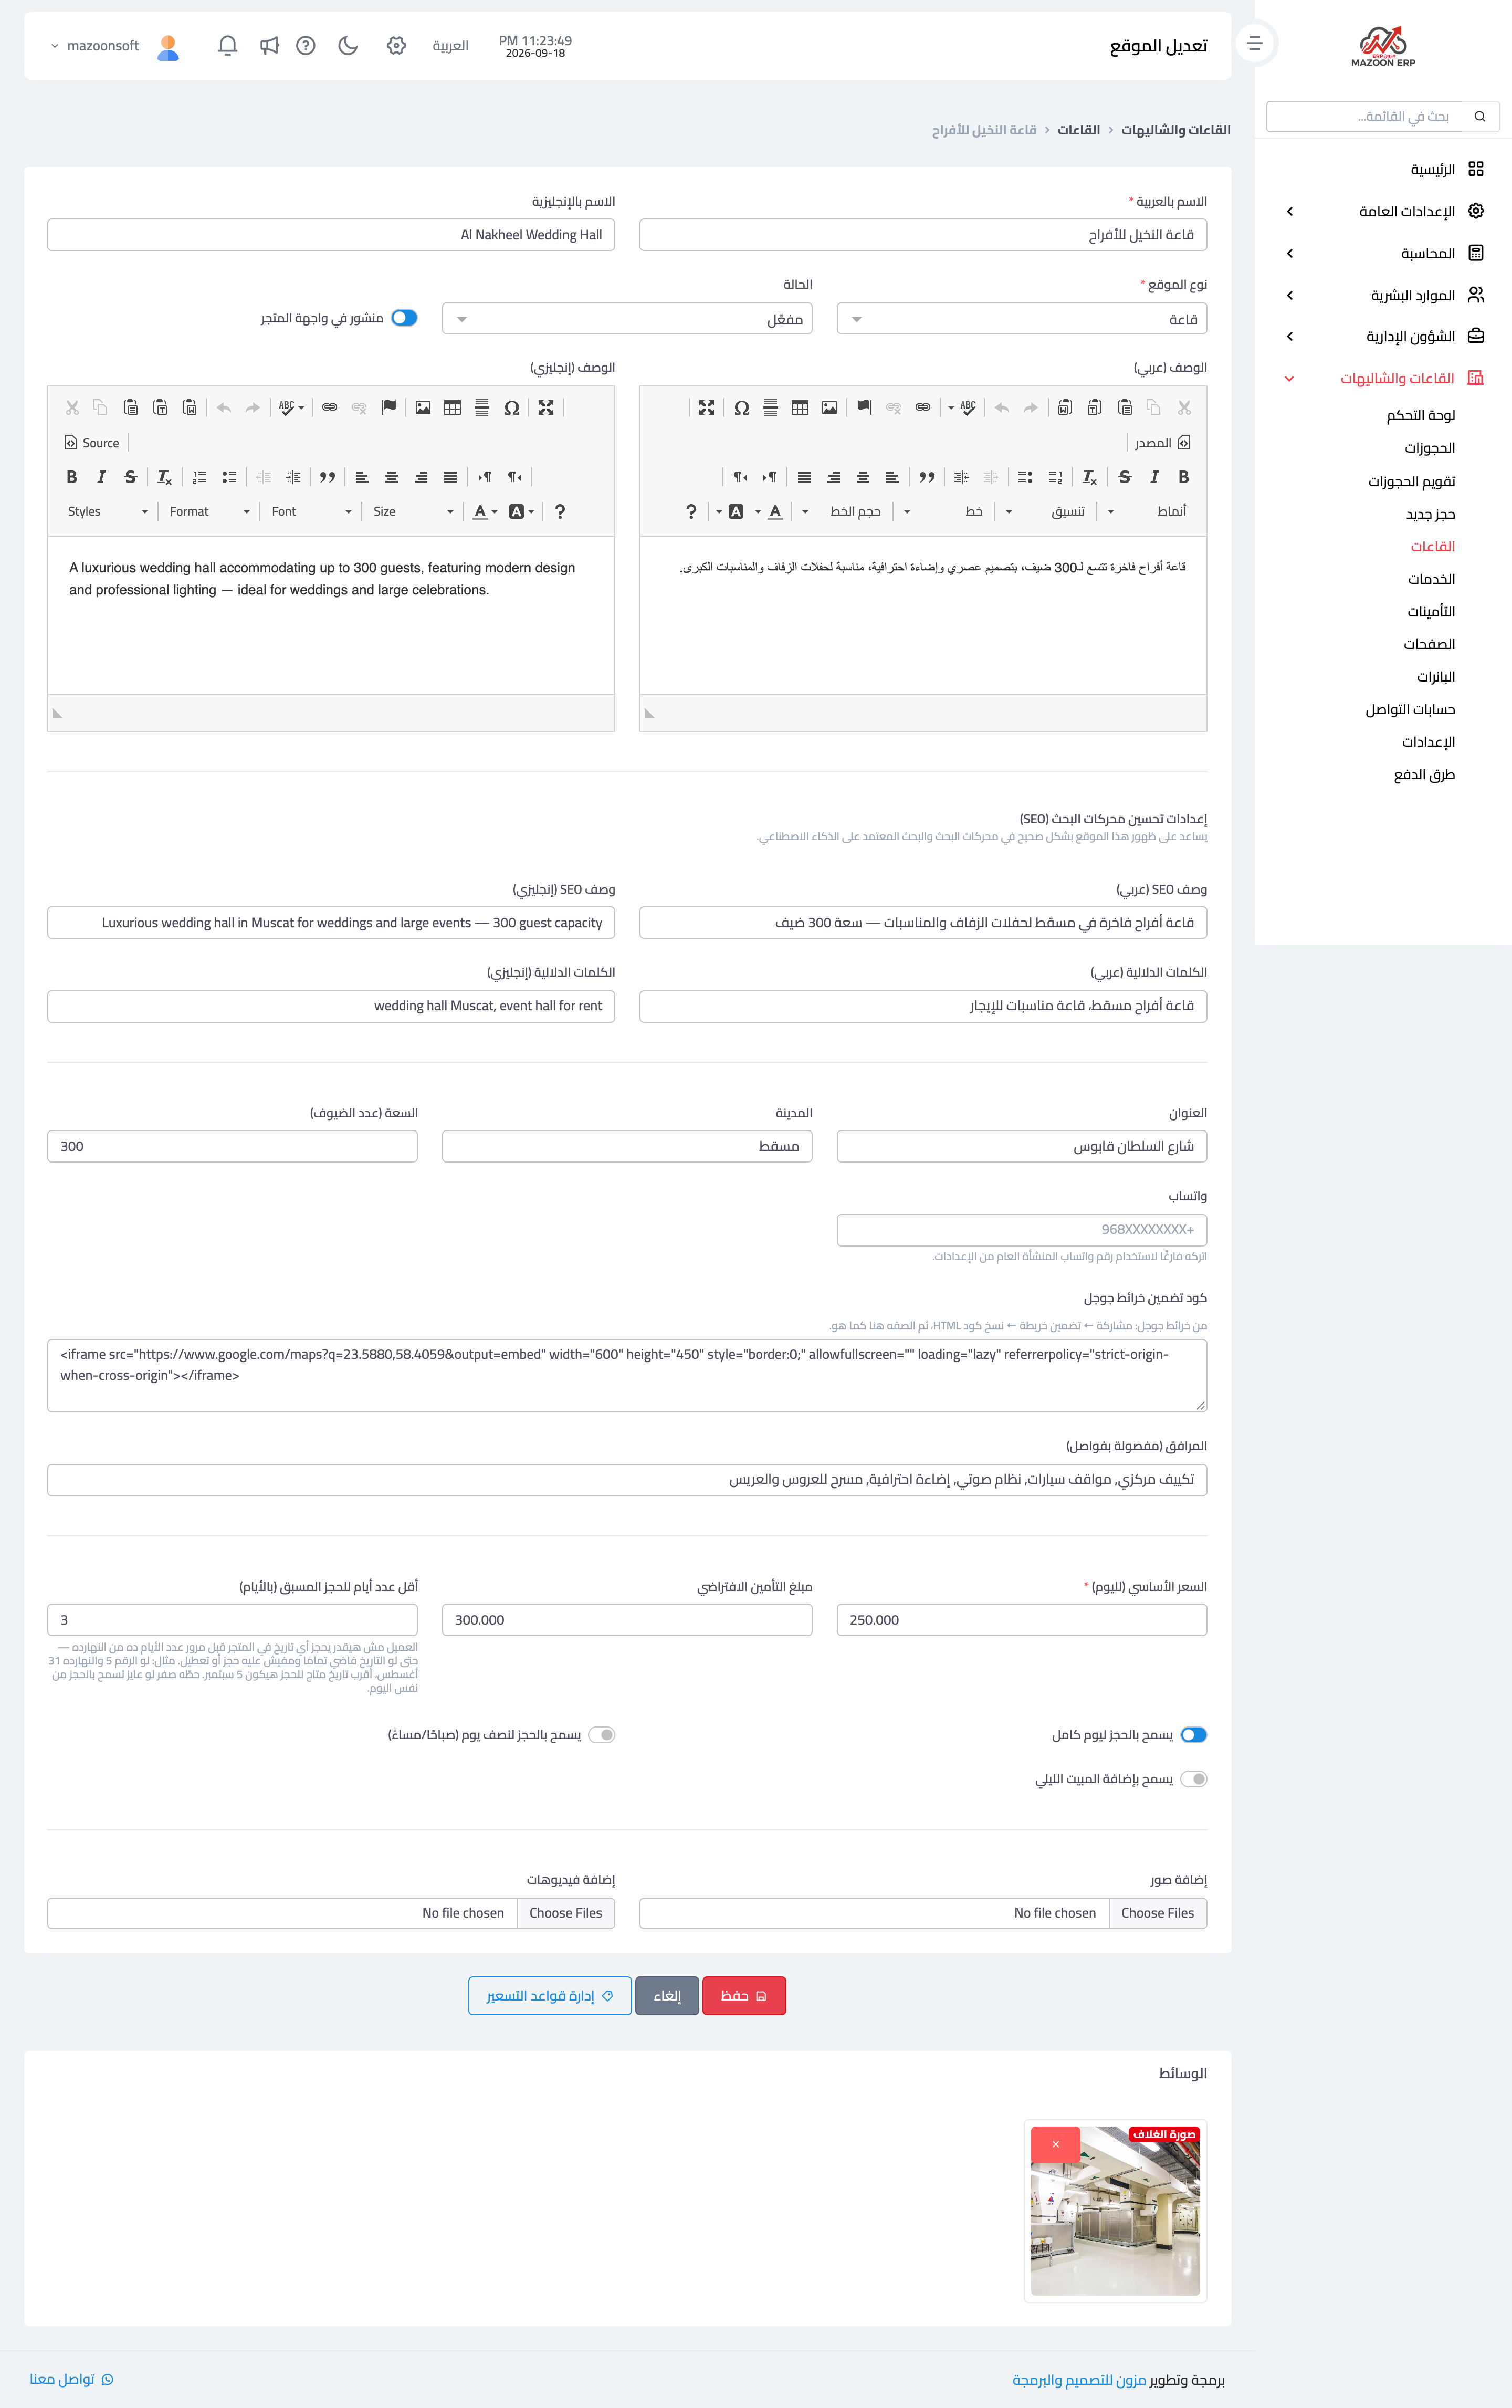
Figure 1
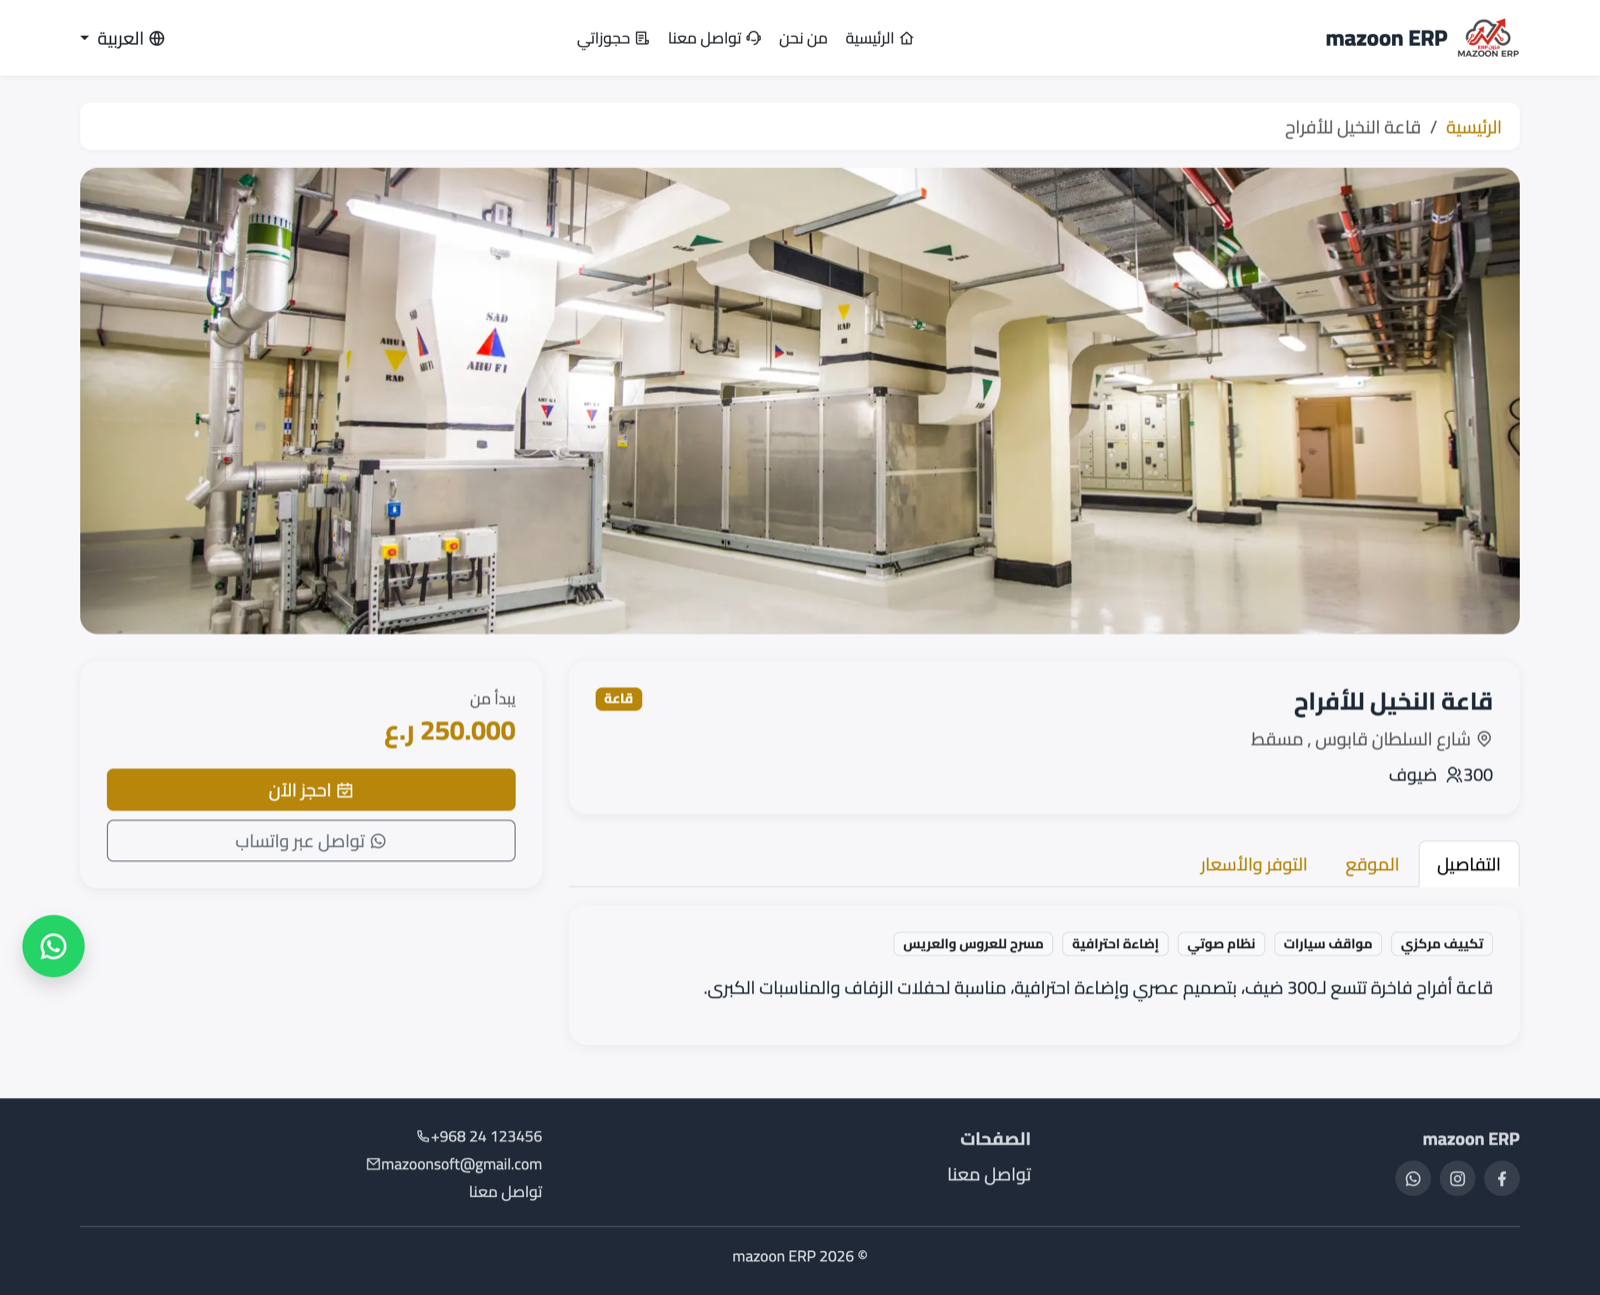
Figure 2
Try what you just read on your own data
Open a free 7-day trial — no credit card, with your own company link in minutes.