
The point of sale and recording a laundry order
The point of sale is the screen a counter clerk spends the whole day in, so it is designed for touch and keyboard together, with as few clicks as possible.
The point of sale screen
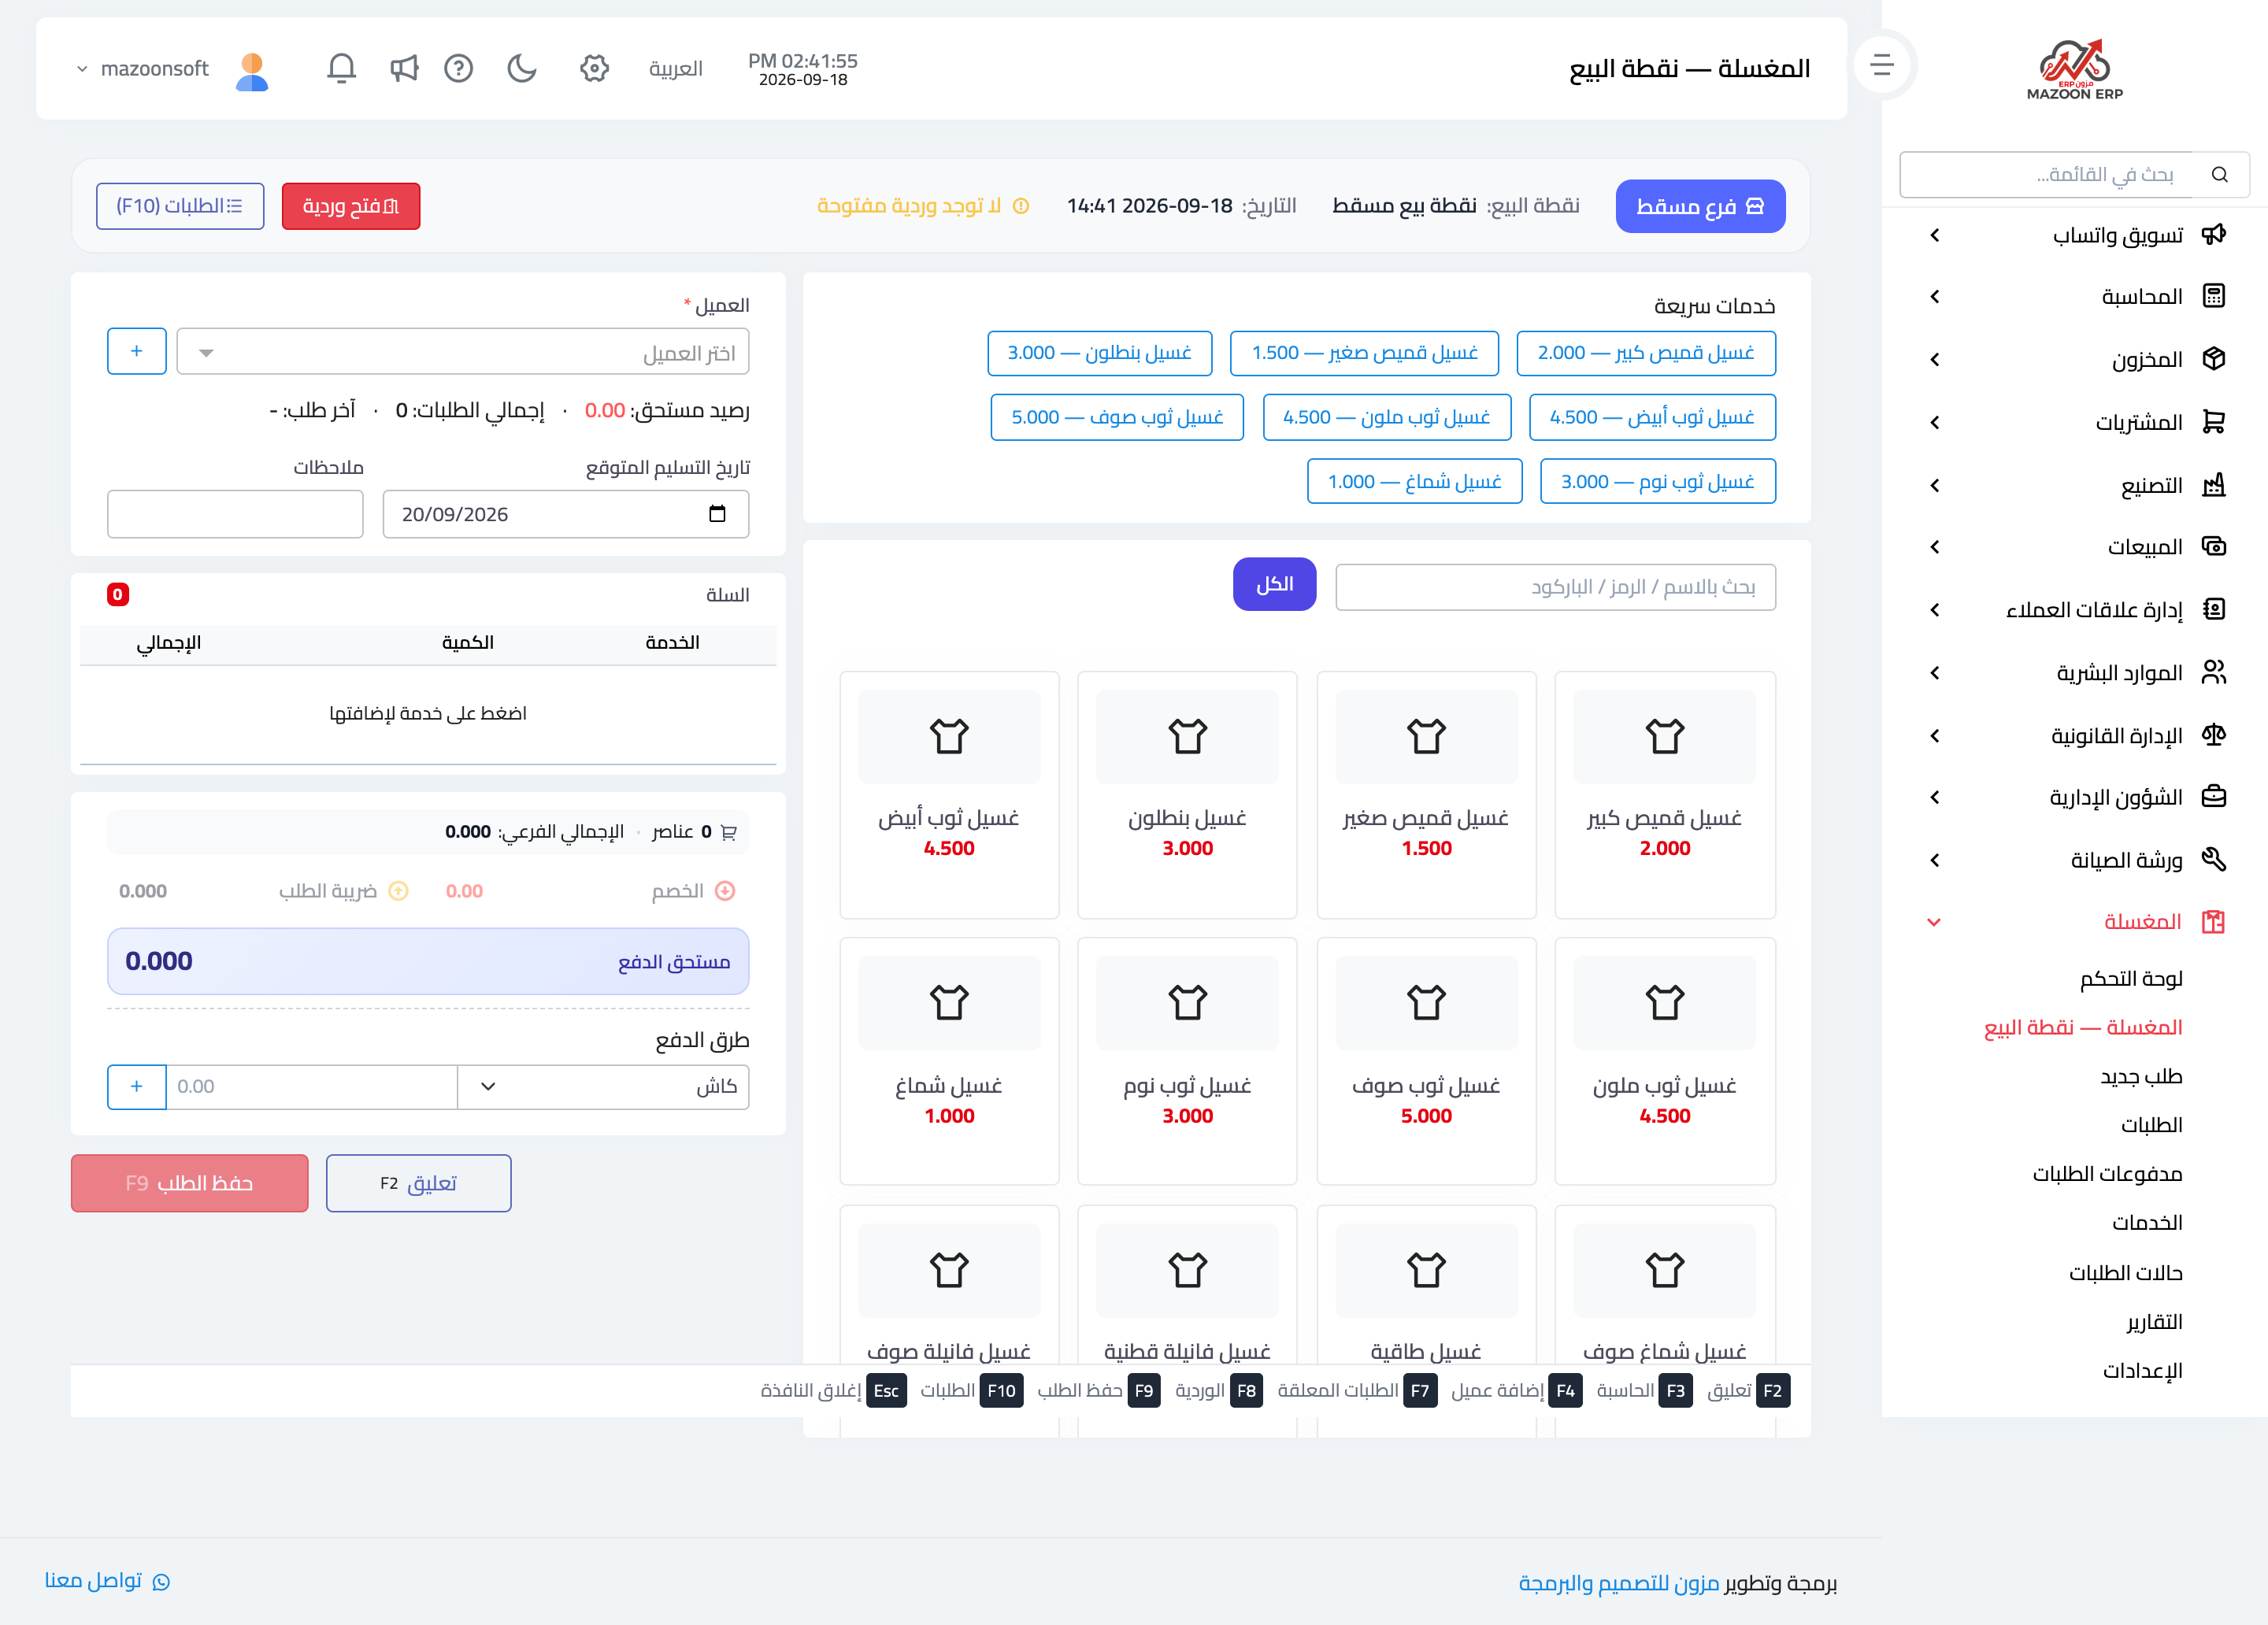
Open Laundry → Point of sale, as in Figure 1. It is split in two: the customer, the basket, and payment on one side, the services on the other.
A bar across the top shows the branch, the terminal, and the date, plus an Open shift button. A shift separates each clerk’s takings from the others, so at close of day it is clear how much was collected and how much should be in the drawer.
The order, step by step
- Pick the customer — search by name or phone, or use the + button to add a new customer without leaving the screen. As soon as they are selected, their outstanding balance, total orders, and last order appear — which warns you about arrears before you take in another order.
- Set the expected delivery date — what you are promising the customer, and what prints on the receipt.
- Add the services — from the quick services row, from the card grid, or by searching name, SKU, or barcode. Each click adds one to the quantity.
- Review the basket — service, quantity, and total, with the quantity editable and the line removable.
- Discount and tax — then the amount due is shown in large type.
- Payment — choose the method and the amount. The customer does not have to pay it all now: leave it at zero and collect on collection.
- Save the order — or hold it if the customer gets distracted and someone else steps up; the basket is set aside and resumed when they return.
Keyboard shortcuts
A shortcut bar sits at the bottom of the screen, and learning it saves real time at the rush: F2 hold order, F3 calculator, F4 add customer, F7 held orders, F8 shift, F9 save order, F10 orders, and Esc close modal.
The orders screen
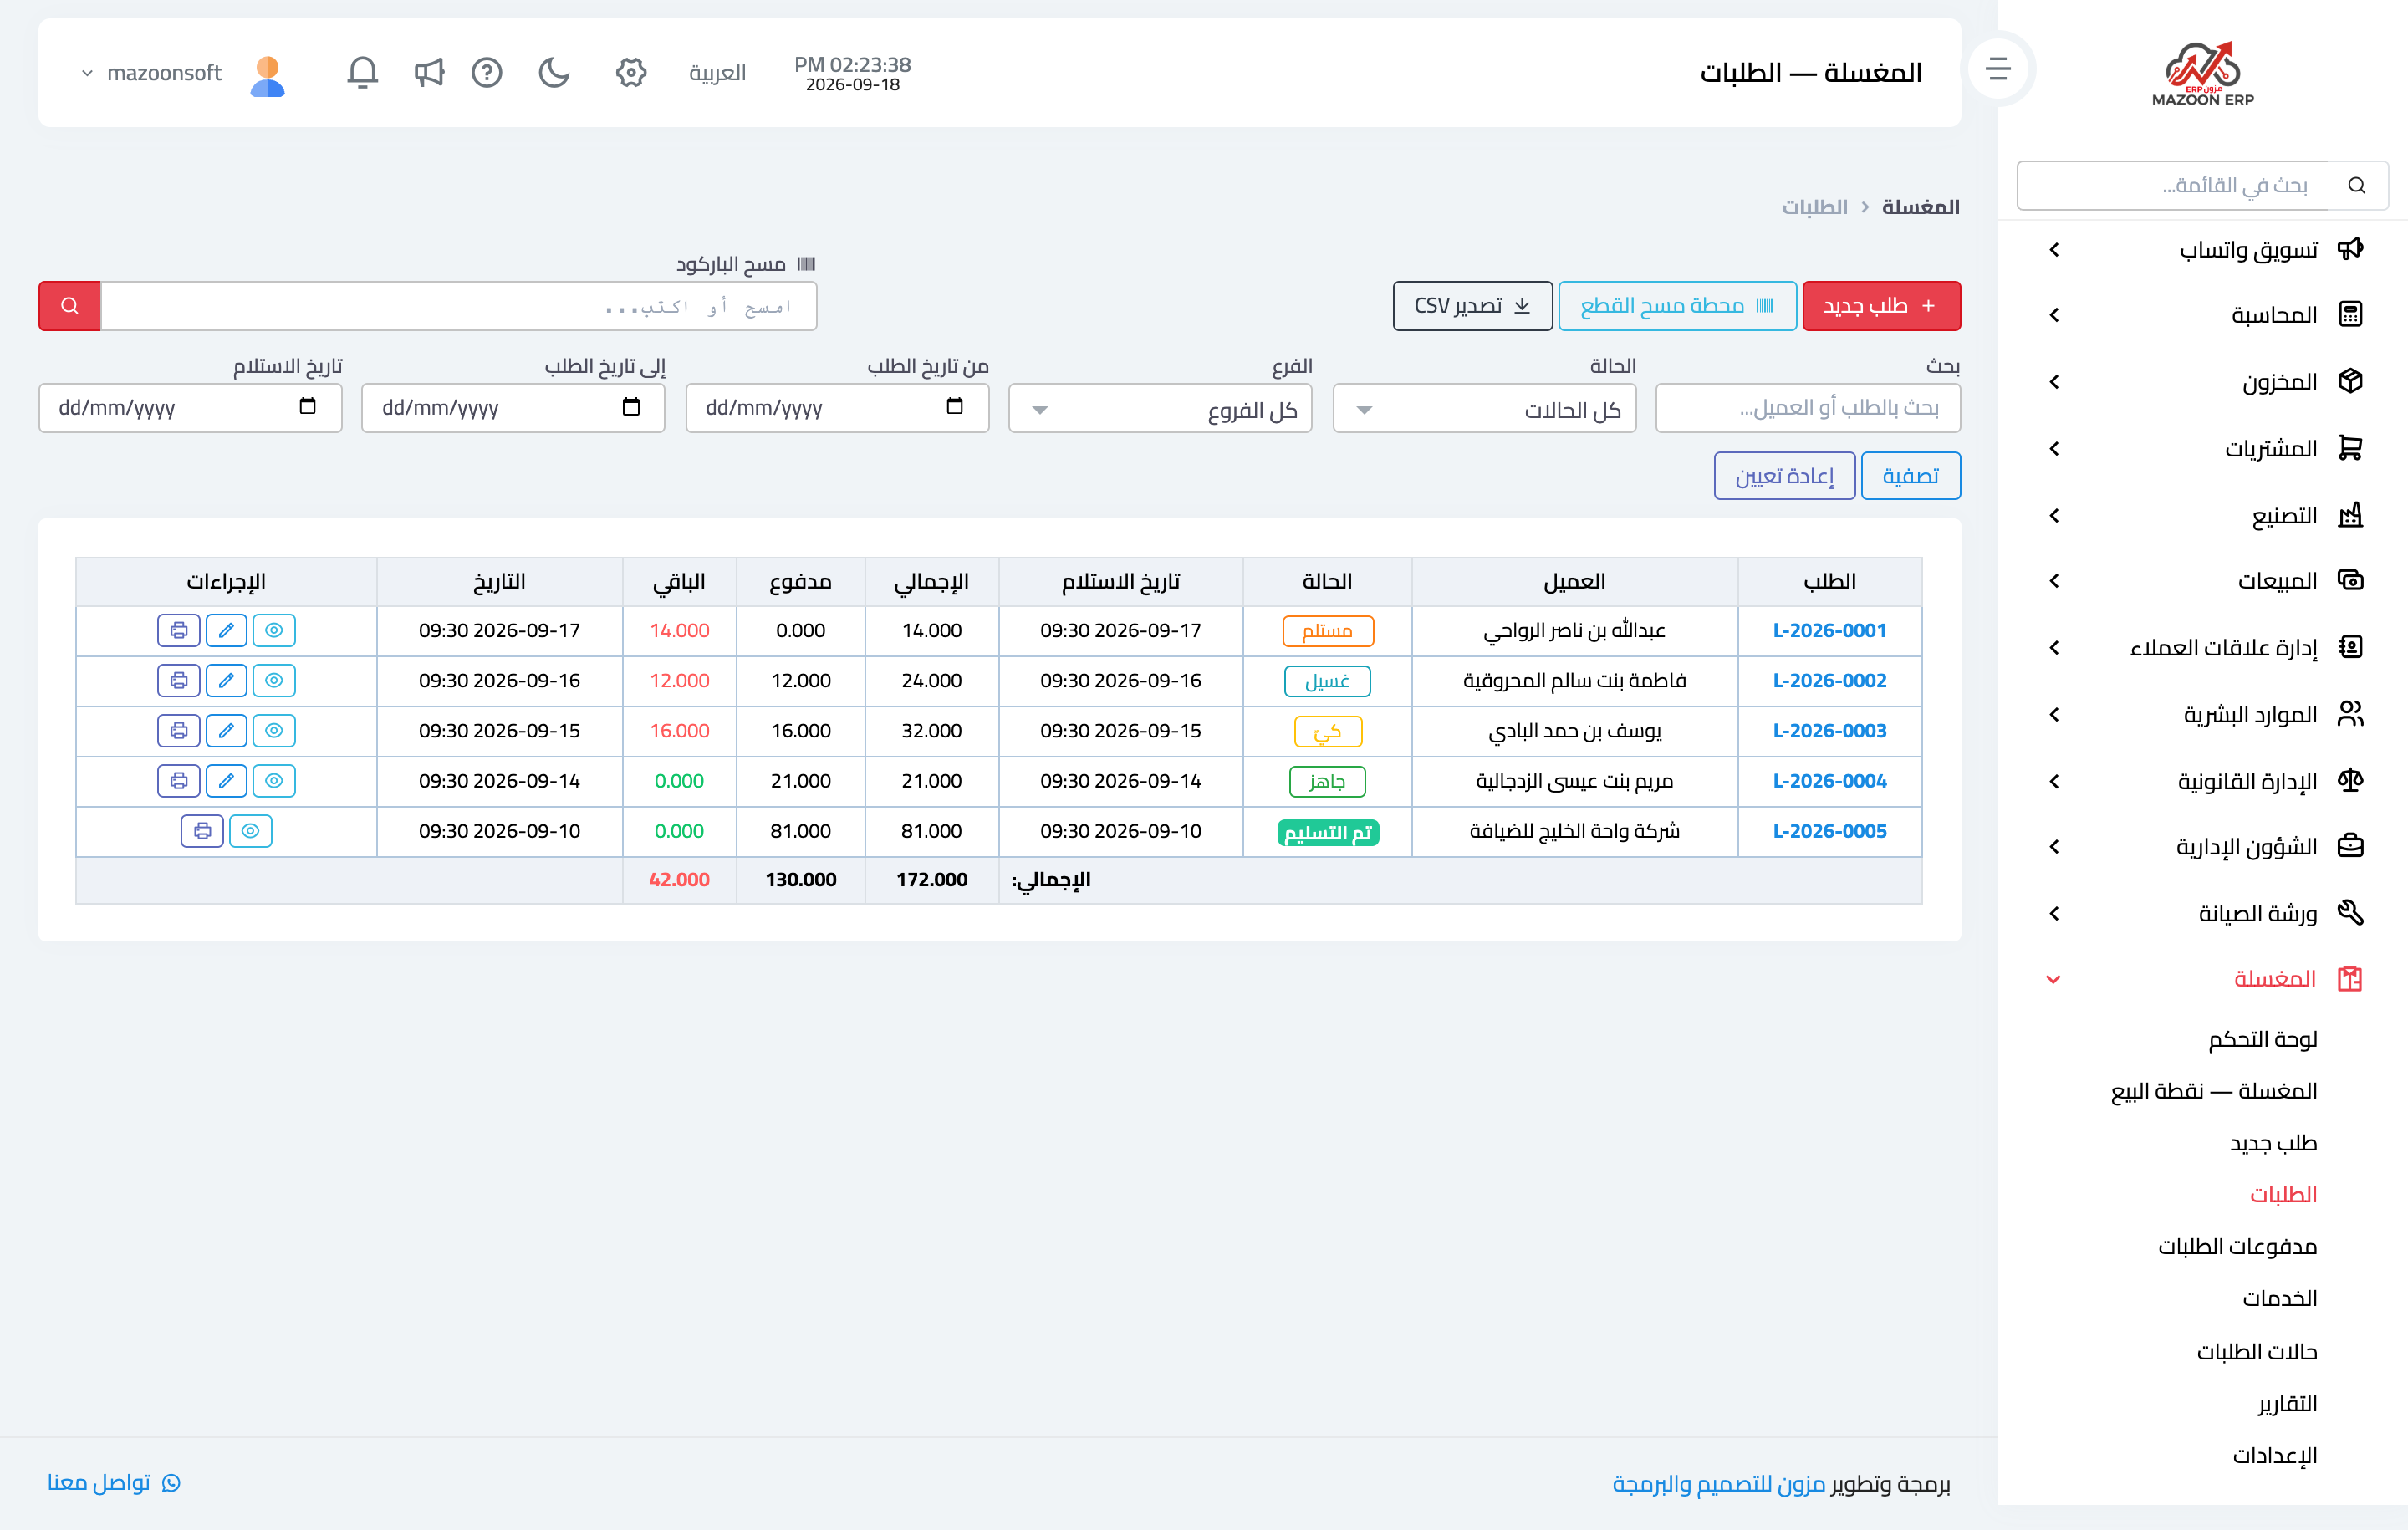
Orders — Figure 2 — shows everything in the shop: order number, customer, colour-coded status, received date, and the total, paid, and balance, with a totals row underneath that tells you at once what customers owe.
Above the table is barcode scan: scan the receipt barcode and the order opens directly, with no searching. That is the natural path at collection time.
The order page
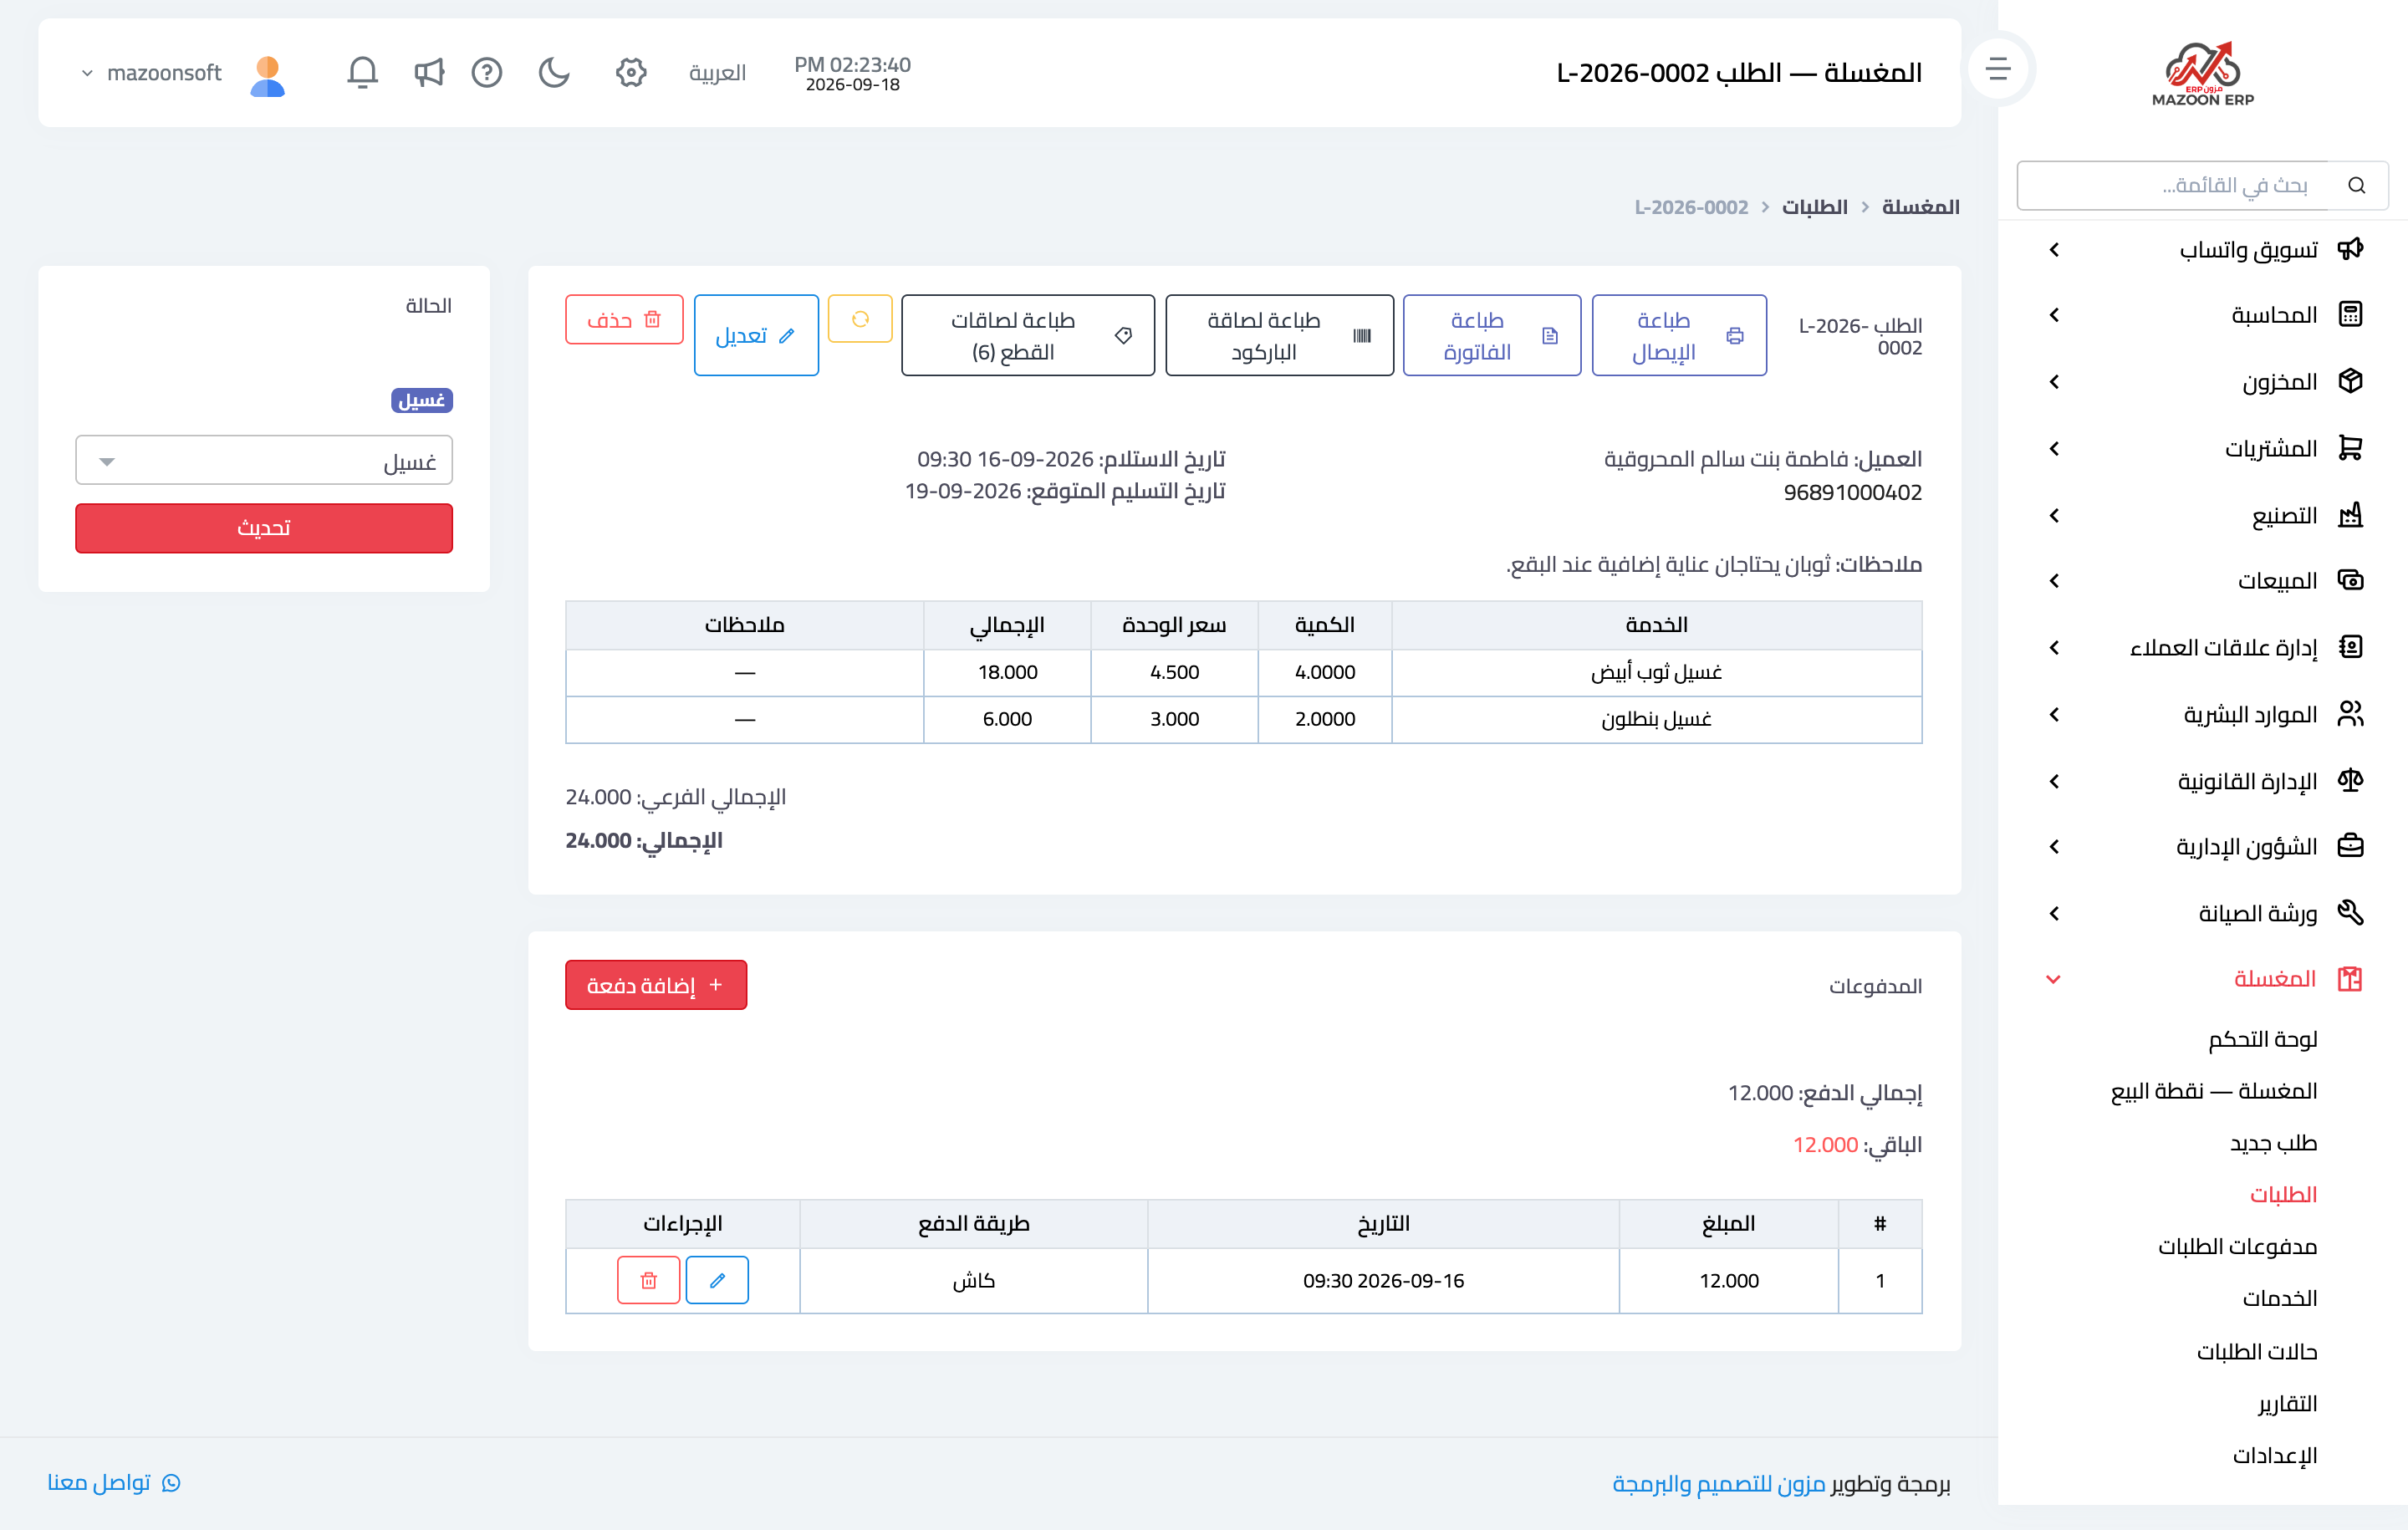
The order page — Figure 3 — shows the customer details, the received and expected delivery dates, the notes, the order lines, and the payments with an Add payment button.
On the side sits the status box: pick the new status and press Update, and the order moves through the stages of the work.
Four print buttons sit at the top, each for a different purpose:
- Print receipt — for the customer, sized for a roll printer.
- Print invoice — A4, for a customer who wants a formal invoice.
- Print barcode tag — one tag for the whole order.
- Print piece tags — one tag per piece, the most important of the four, and the subject of its own article.
Notes
- Open the shift at the start of the day; collecting without one turns the end-of-day cash count into guesswork.
- Check the outstanding balance shown when you pick the customer; it is the natural moment to collect what is overdue.
- Hold (F2) is for an order not yet finished, not for one whose clothes you have already taken in.
Screenshots
Try what you just read on your own data
Open a free 7-day trial — no credit card, with your own company link in minutes.