
Linking accounts to accounting events
When you issue an invoice or record an expense, the system creates the journal entry automatically. To know which account each side of the entry posts to, it consults the account linking table: each event has keys, and each key has an account.
This page is what lets you change the revenue account or the tax account yourself from the interface, with no code change.
The table
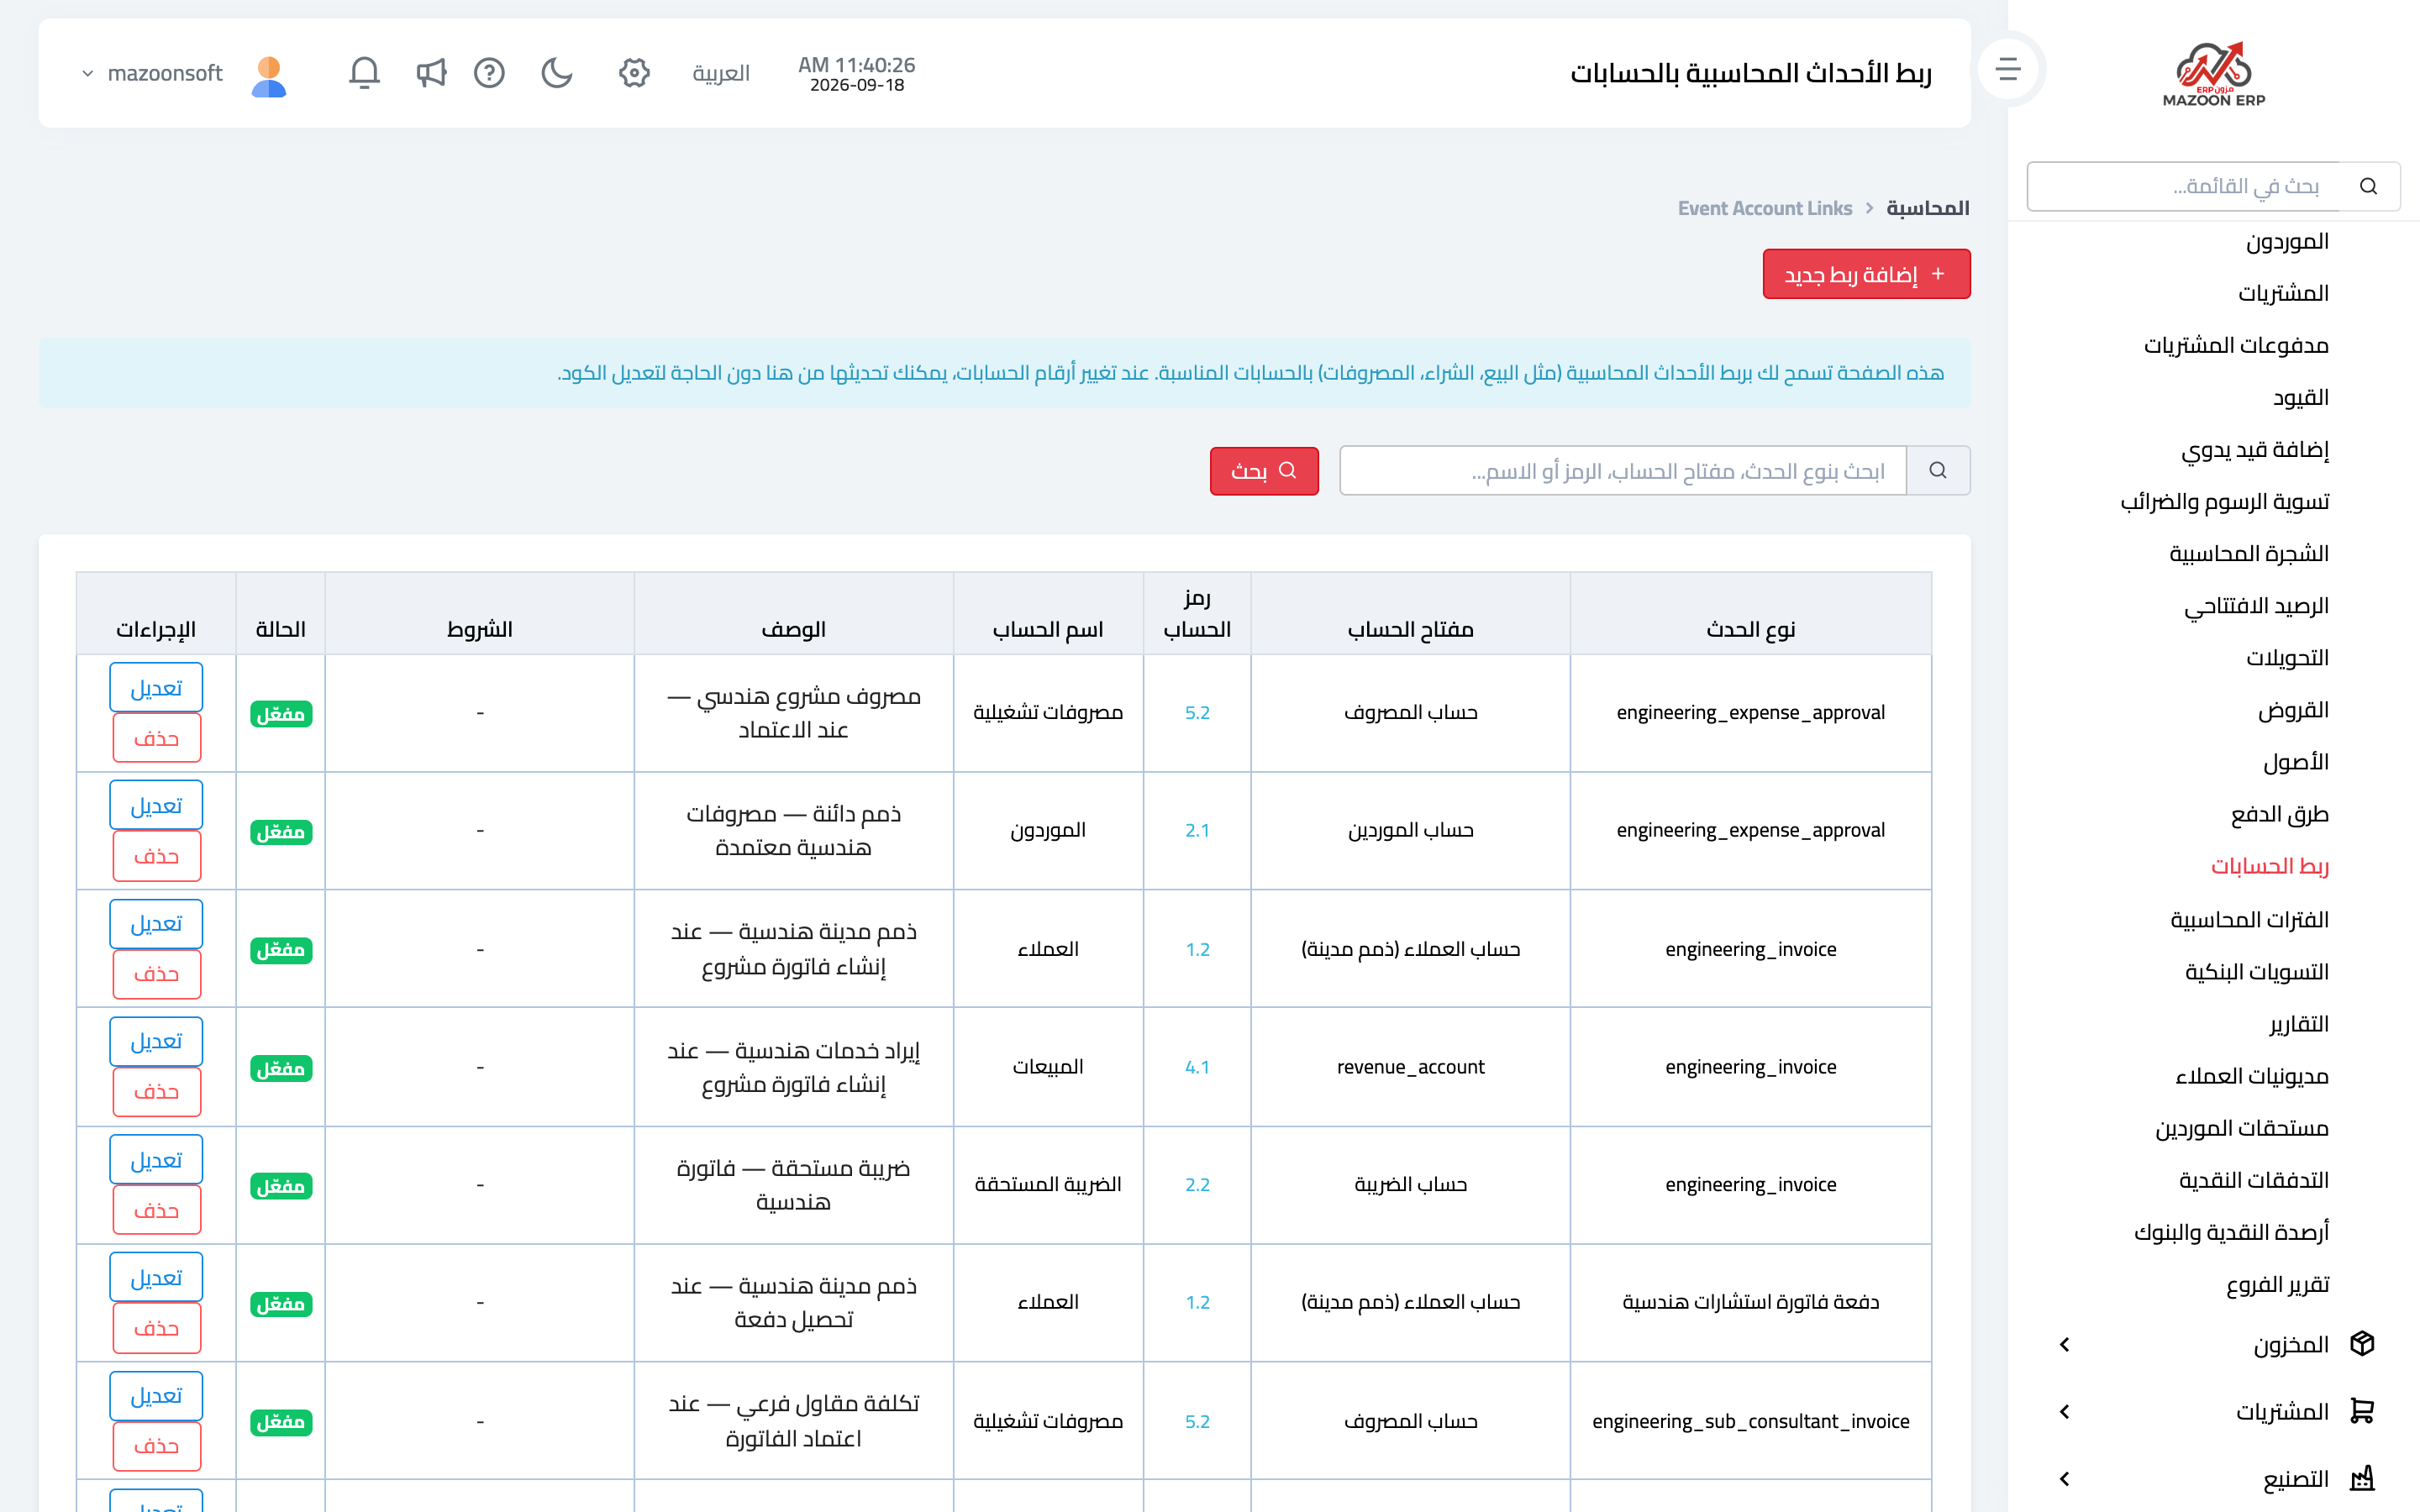
From the Accounting panel open the Account Linking card. The table appears as in image 1, with one row per link:
- Event type — the transaction that creates the entry, such as creating an invoice, collecting a payment or approving an expense.
- Account key — the side of the entry within that event: the customers (receivables) account, the revenue account, the tax account, the expense account, the suppliers account.
- Account code and account name — the account this key posts to.
- Description — a short note on what the row is for.
- Conditions — an extra restriction that makes the row apply in one specific case.
- Status — active or inactive.
The search box above the table searches by event type, account key, or account code and name.
Adding or changing a link
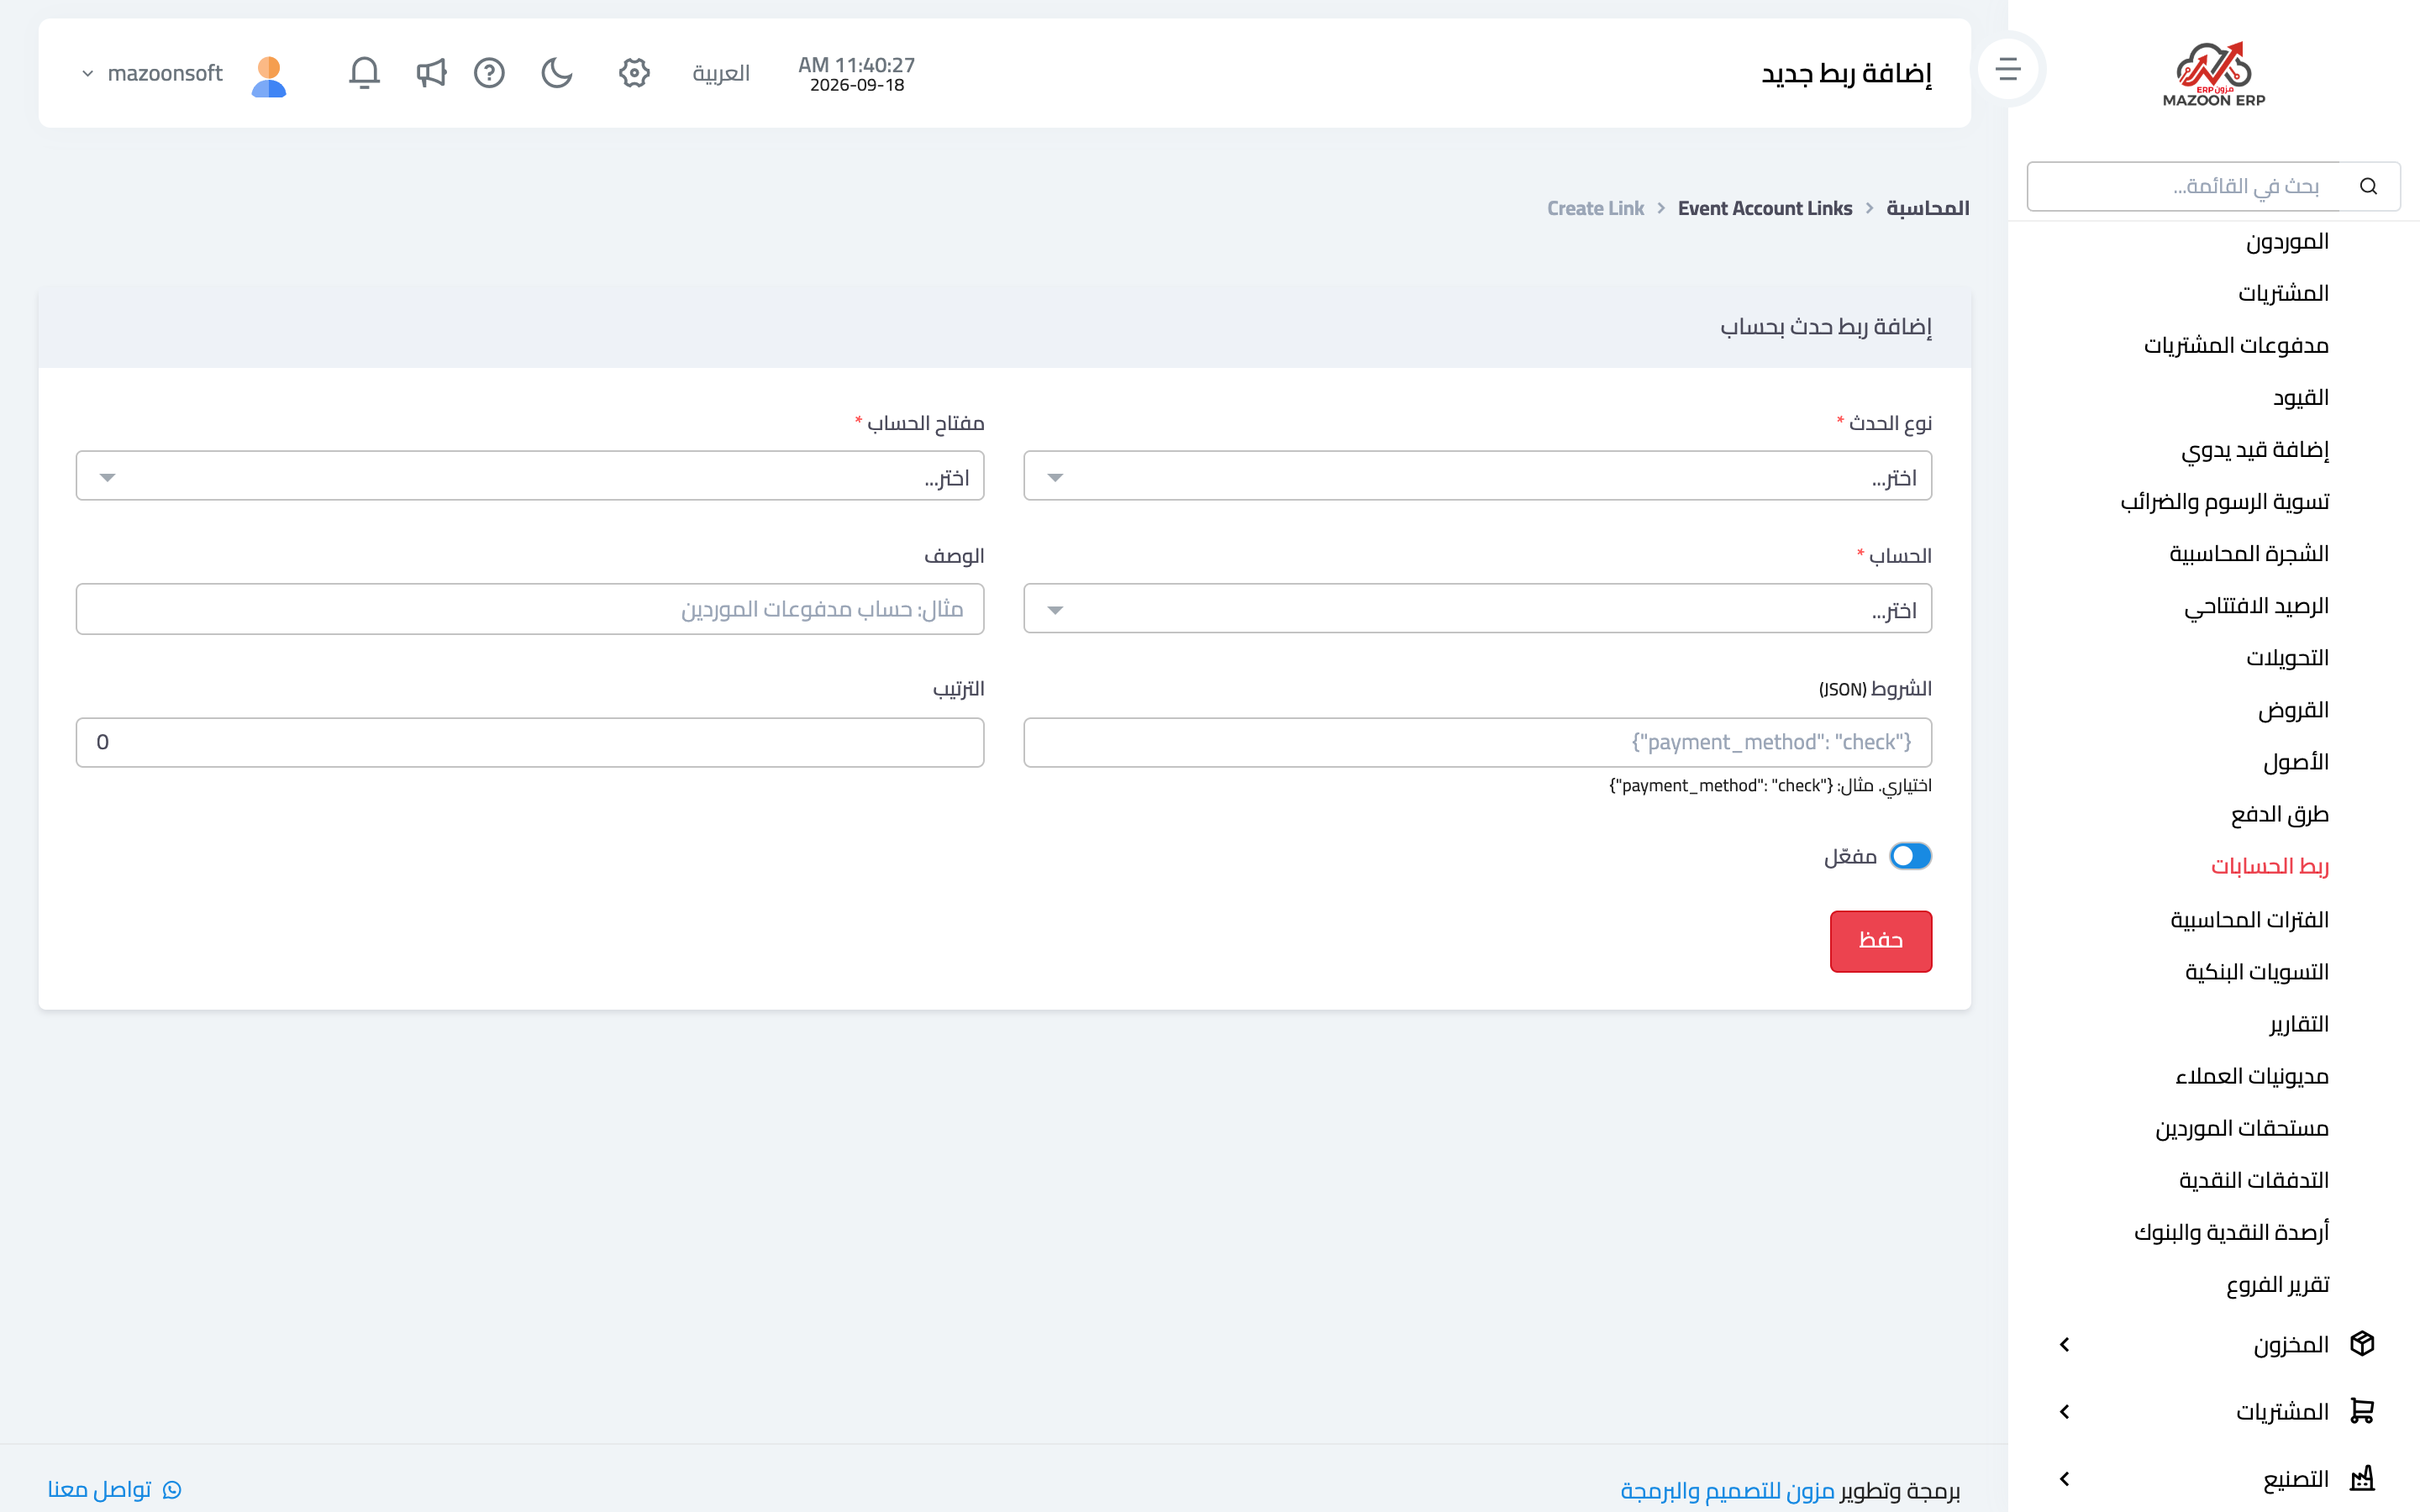
Press Add New Link to open the page in image 2: choose the event type, then the account key, then the account from the chart, and add a description explaining its purpose.
The conditions field is optional and written as JSON. It routes the same event to different accounts depending on the case — for example {"payment_method": "check"} so the row applies to cheques only. Leave it empty unless you genuinely need that distinction.
To change an existing account, use Edit on the row rather than adding a second row for the same key.
When you need this page
- You reorganised the chart of accounts and created new revenue or expense accounts.
- You noticed entries from a particular transaction posting to the wrong account.
- You enabled a new module with its own events and want them routed to your accounts.
Before you change anything
A change applies to new entries only; existing entries stay on their old account. So if you are correcting a mis-routing that ran for a while, two things are needed: fix the link here, then deal with the earlier entries through an adjusting entry — talk to us before doing that.
Screenshots
Try what you just read on your own data
Open a free 7-day trial — no credit card, with your own company link in minutes.