
How do I annotate the garment drawing and attach photos?
Some details cannot be written as numbers: “the pocket a little higher”, “the opening on this side”. That is why a measurement carries a drawing you place numbered markers on.
Annotating the drawing
- Open the measurement from Customer measurements — Figure 1.
- In the middle of the page is the template image attached to the measurement type.
- From the edit measurement screen — Figure 2 — click the spot on the drawing and a numbered marker appears.
- Write your note against the marker number, and repeat for each detail.
- Save; the markers and their notes appear on the measurement page for the tailor to read.
Field images
- On the measurement page there is an upload image section: choose the field, pick the file and upload.
- This is useful for a fabric the customer chose, a garment they want copied, or a detail that is hard to describe.
Notes
- A marker with no note is useless; always write what is wanted at that point.
- A photo of a garment the customer wants copied ends half the discussion, and it beats ten lines of description.
- These notes are what the tailor actually reads, so write them in your workshop’s language, not the office’s.
- Go through the notes with the customer at delivery; they are your reference if they object.
Screenshots
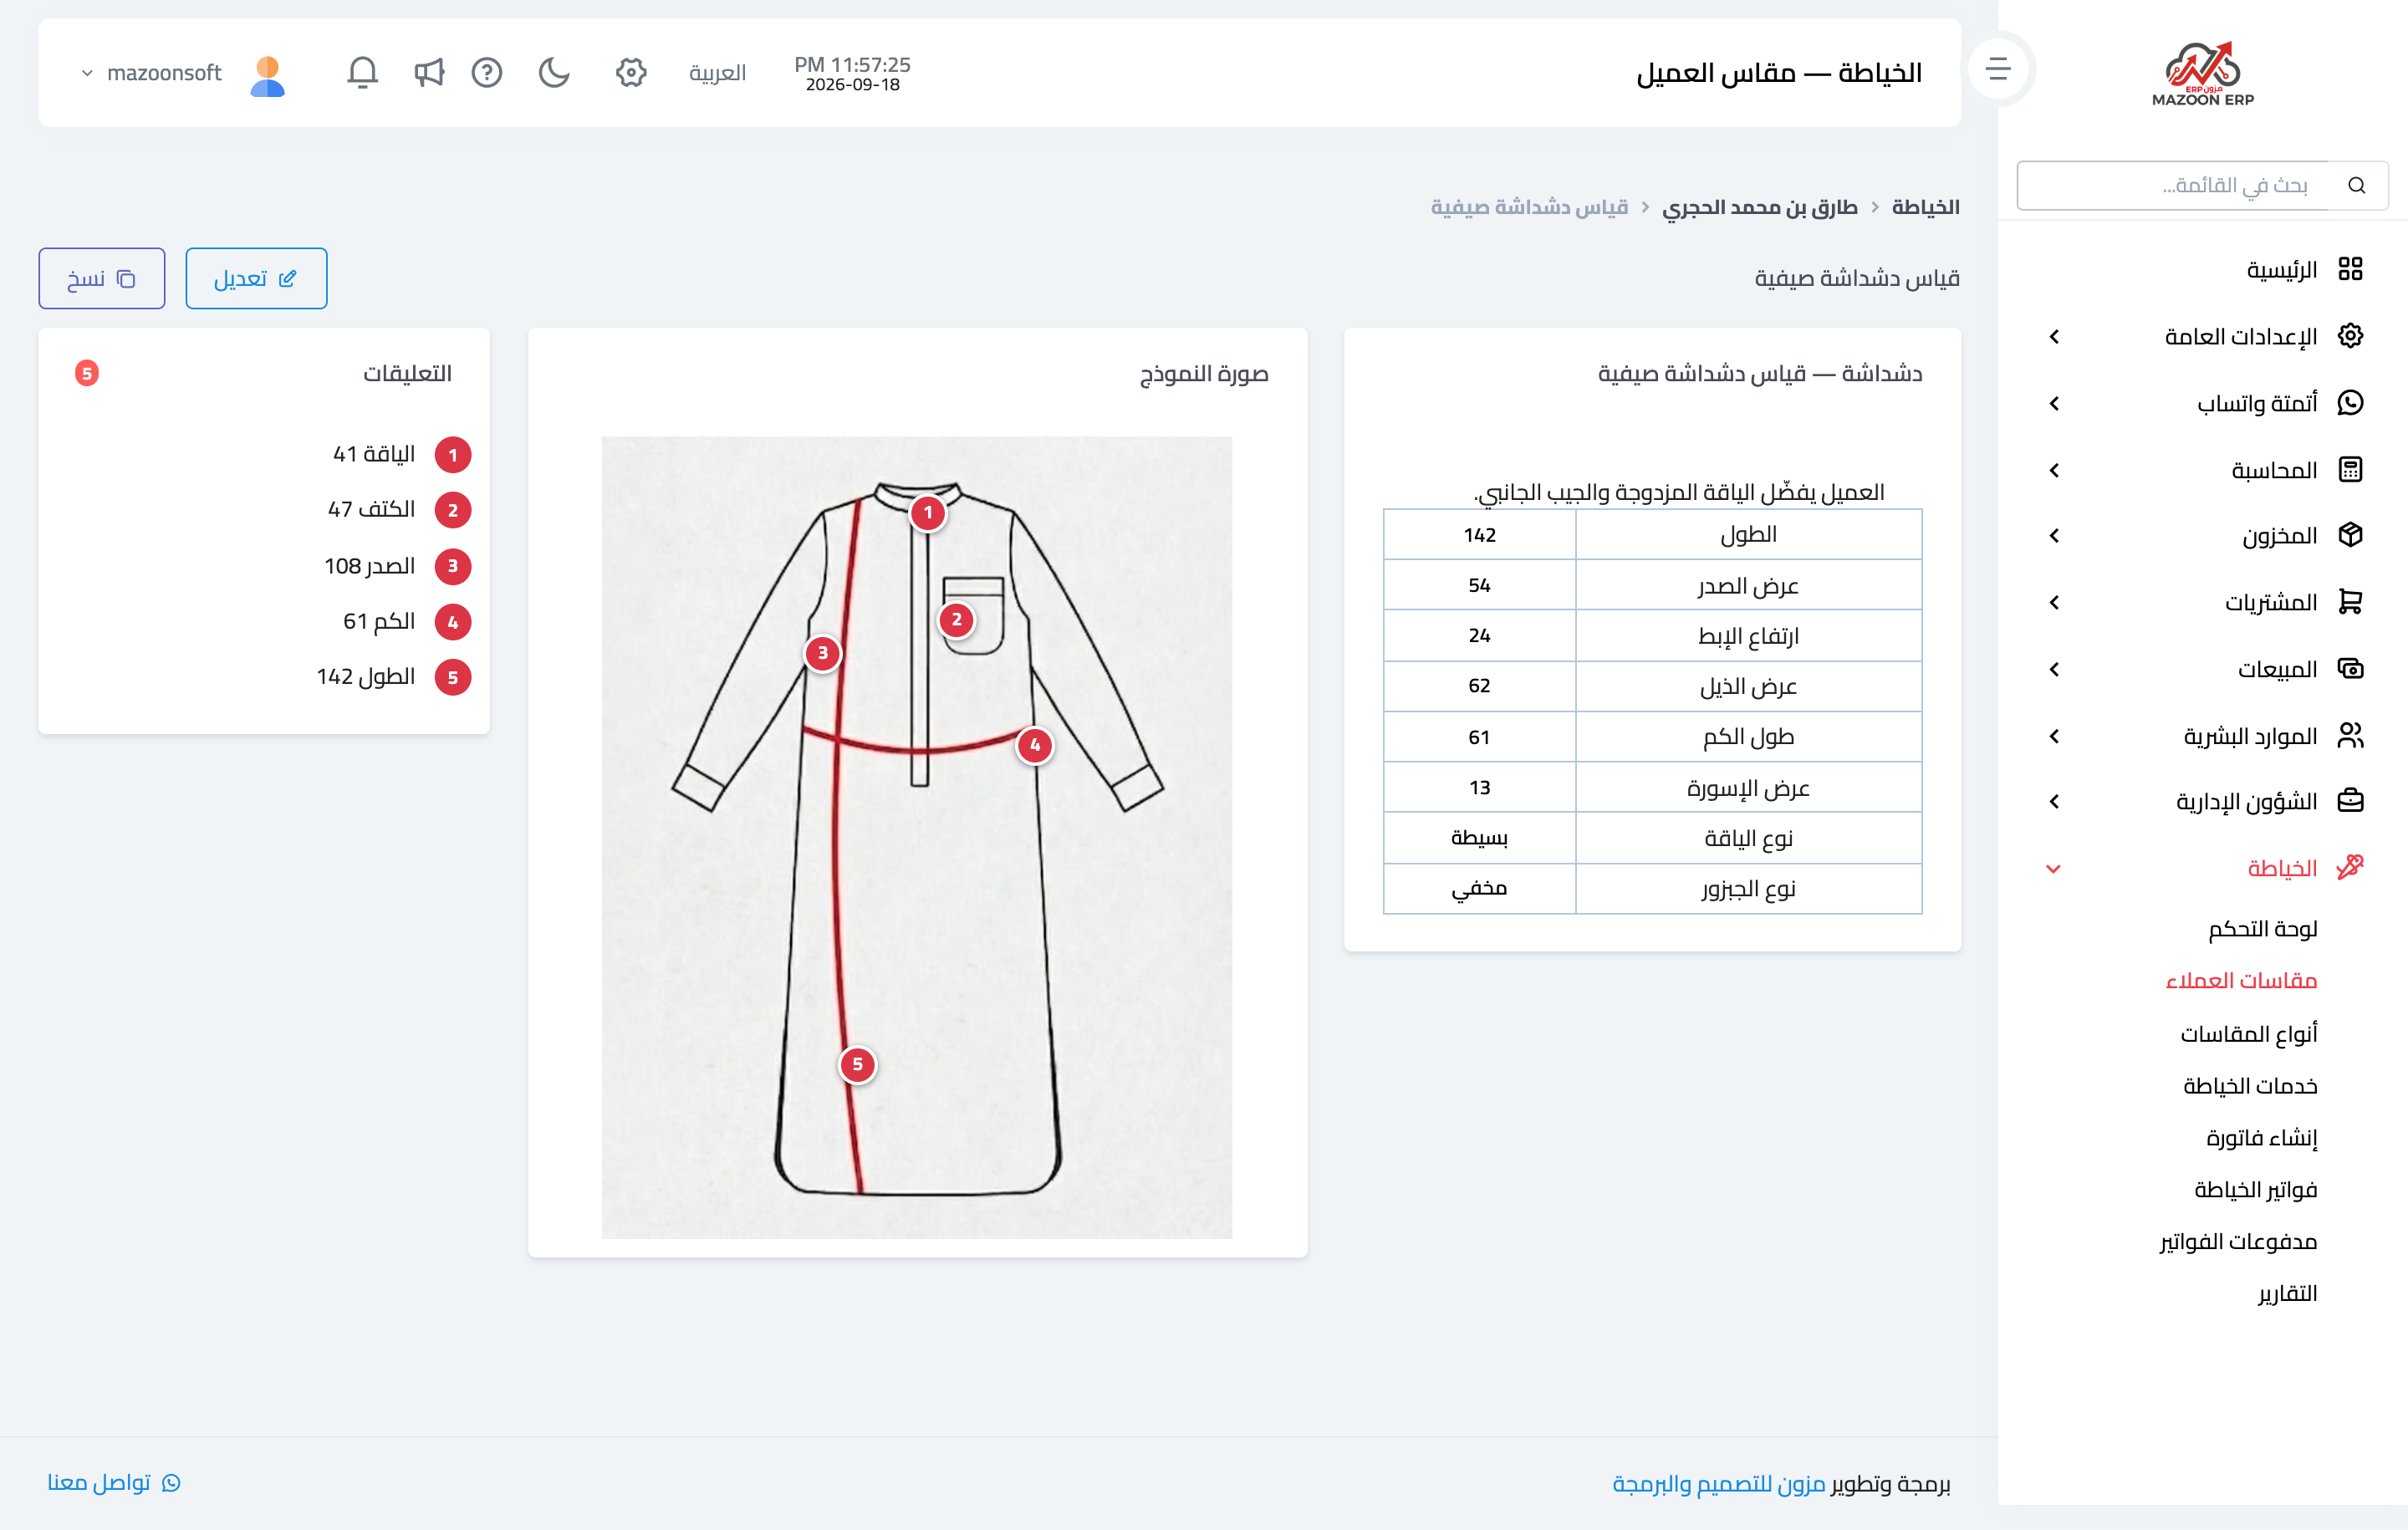
Figure 1
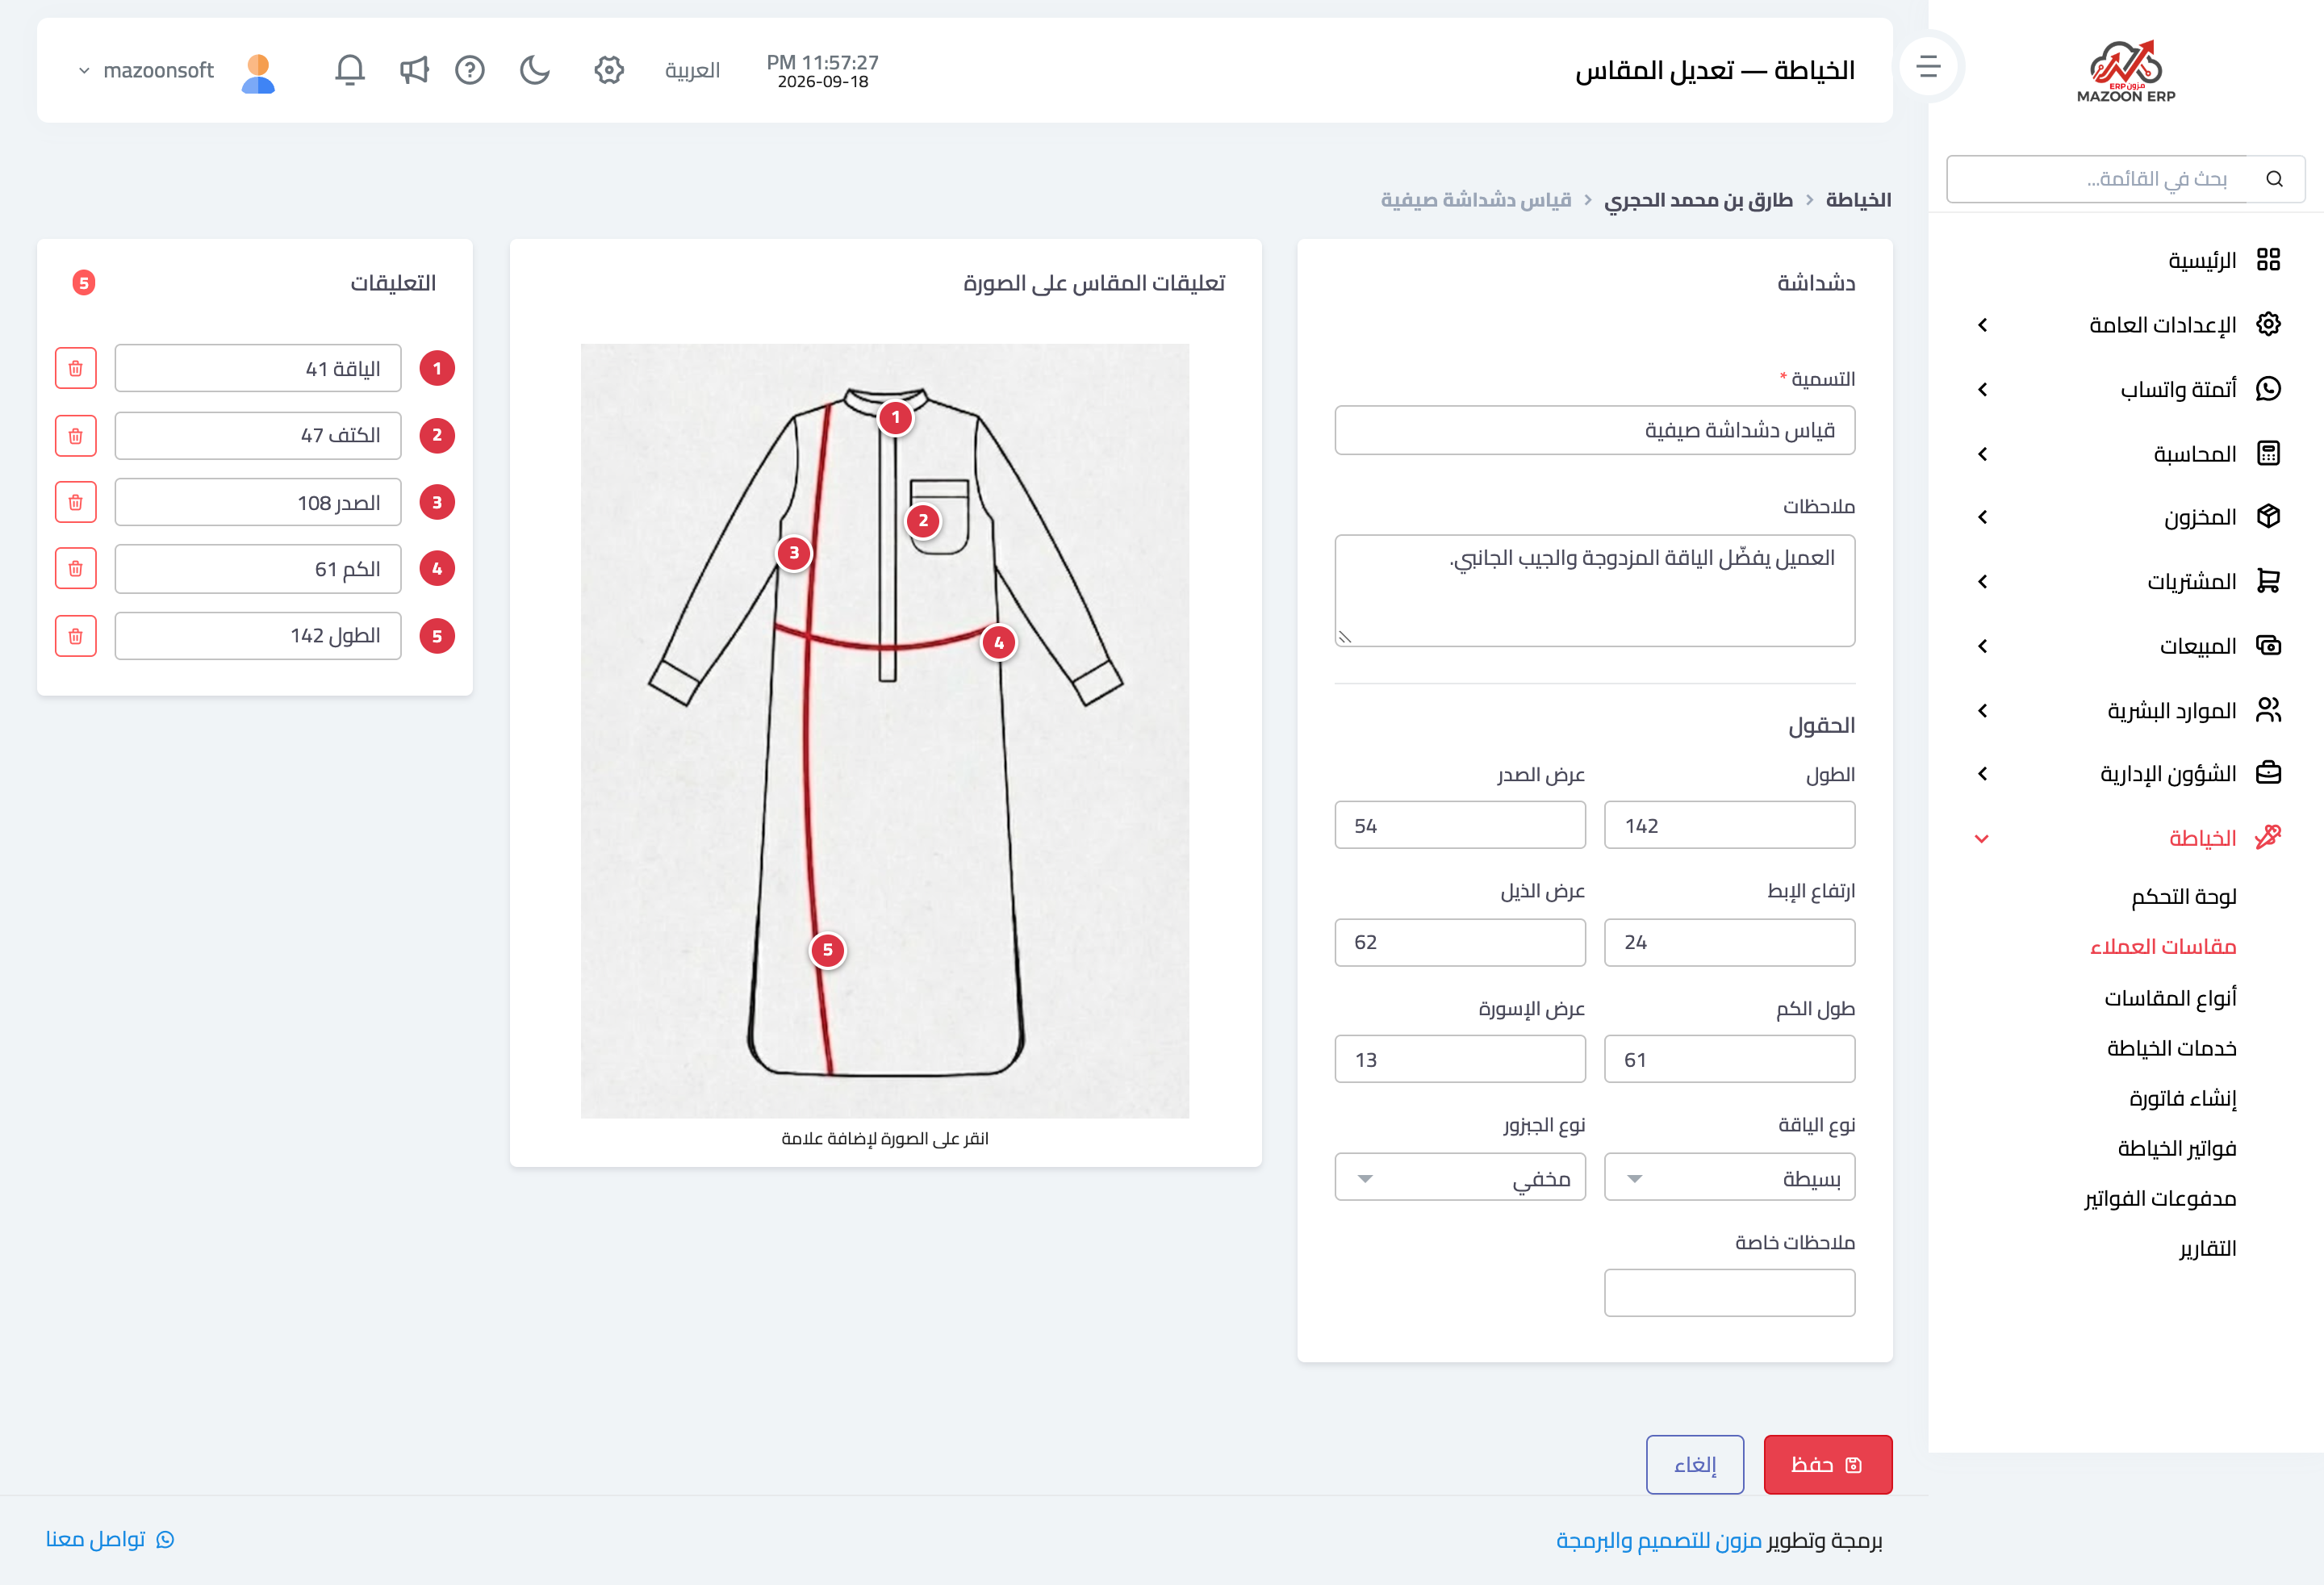
Figure 2
Try what you just read on your own data
Open a free 7-day trial — no credit card, with your own company link in minutes.