
How do I create a tailoring invoice and attach a measurement to its line?
A tailoring invoice is not an ordinary sales invoice: each line is tied to a measurement and a colour, and that is what the tailor works from.
Steps
- Open Tailoring → Create invoice — Figure 1.
- Pick the customer and the branch, and set the invoice date and the delivery date.
- Enter the paper invoice number if you run a paper book alongside the system.
- Add the lines: choose the service and its price appears, then the quantity and the colour.
- Attach the line to the customer’s measurement from the list — Figure 2 — the single most important step on the whole invoice.
- Write line notes if this particular garment has a special request.
- Add the discount and the tax rate, and check the financial summary.
- Record the advance payment from the same form if you took one, then save.
Notes
- A line with no measurement attached means a tailor asking and a clerk searching; it is the biggest source of delay in a shop.
- The fabric colour on the line prevents mixing up two garments for the same customer in the same order.
- The delivery date is not a courtesy; overdue tracking and customer trust both rest on it.
- If the customer has several measurements, check the label before attaching.
Screenshots
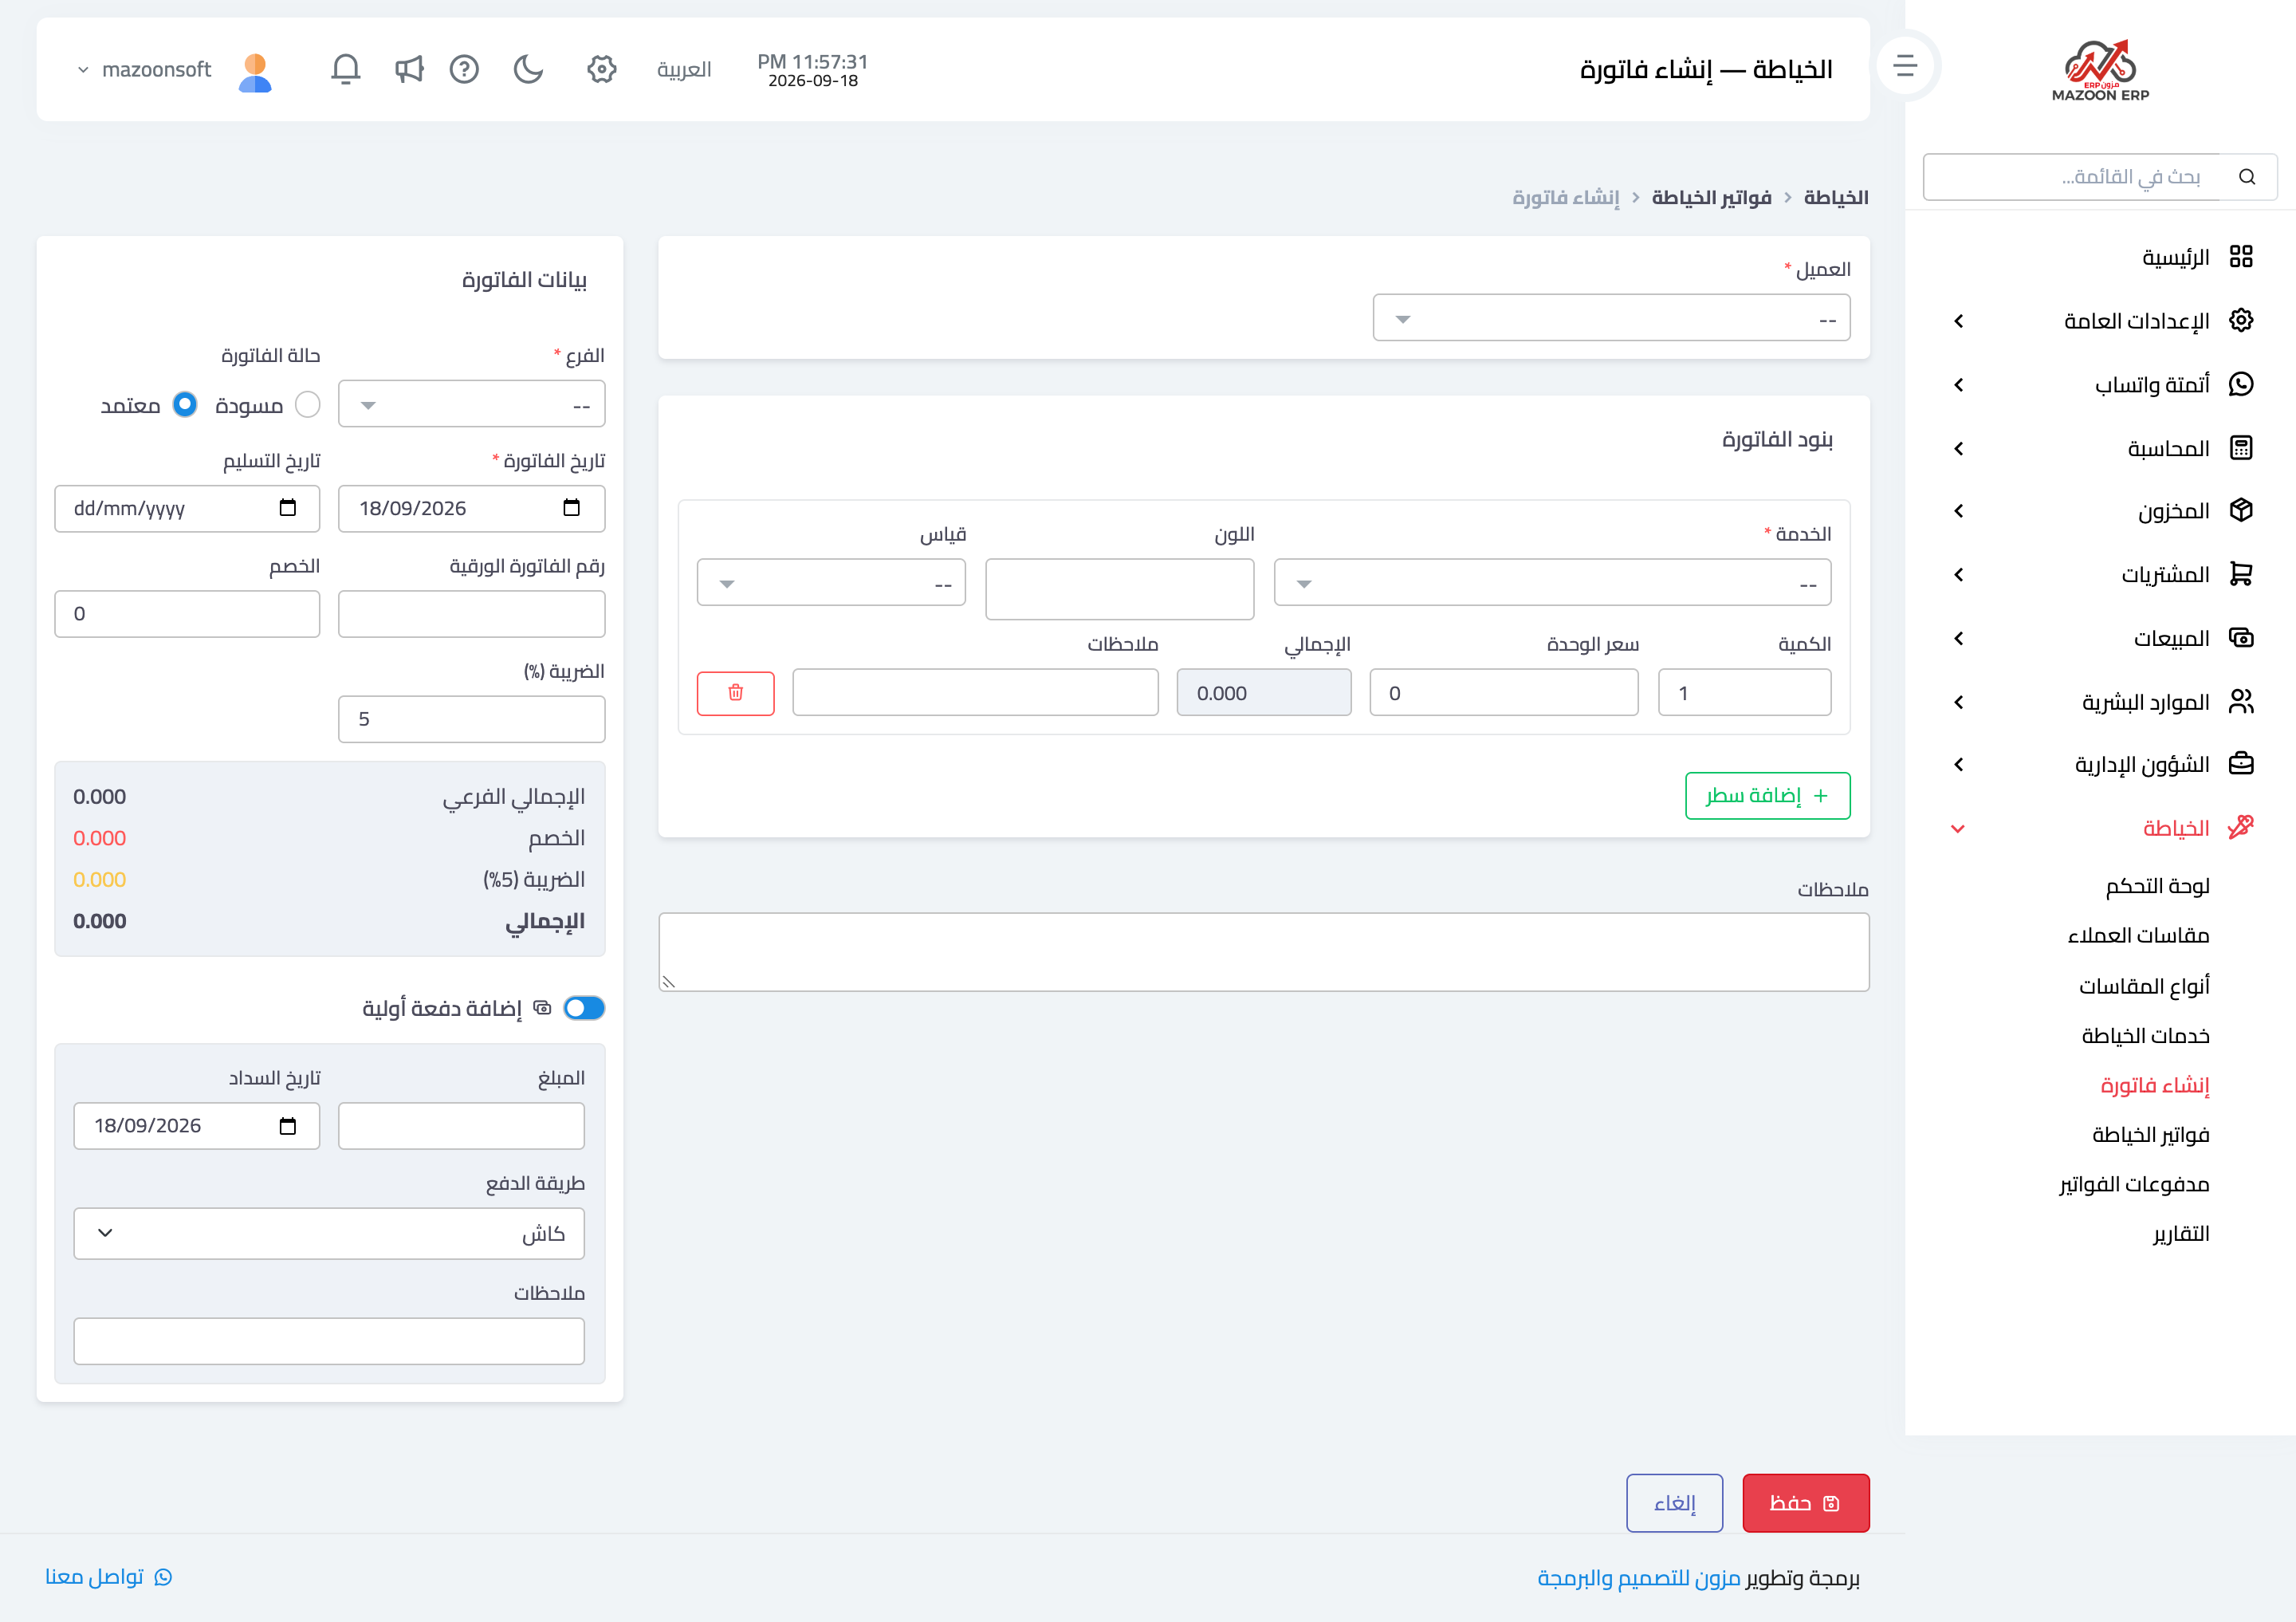
Figure 1
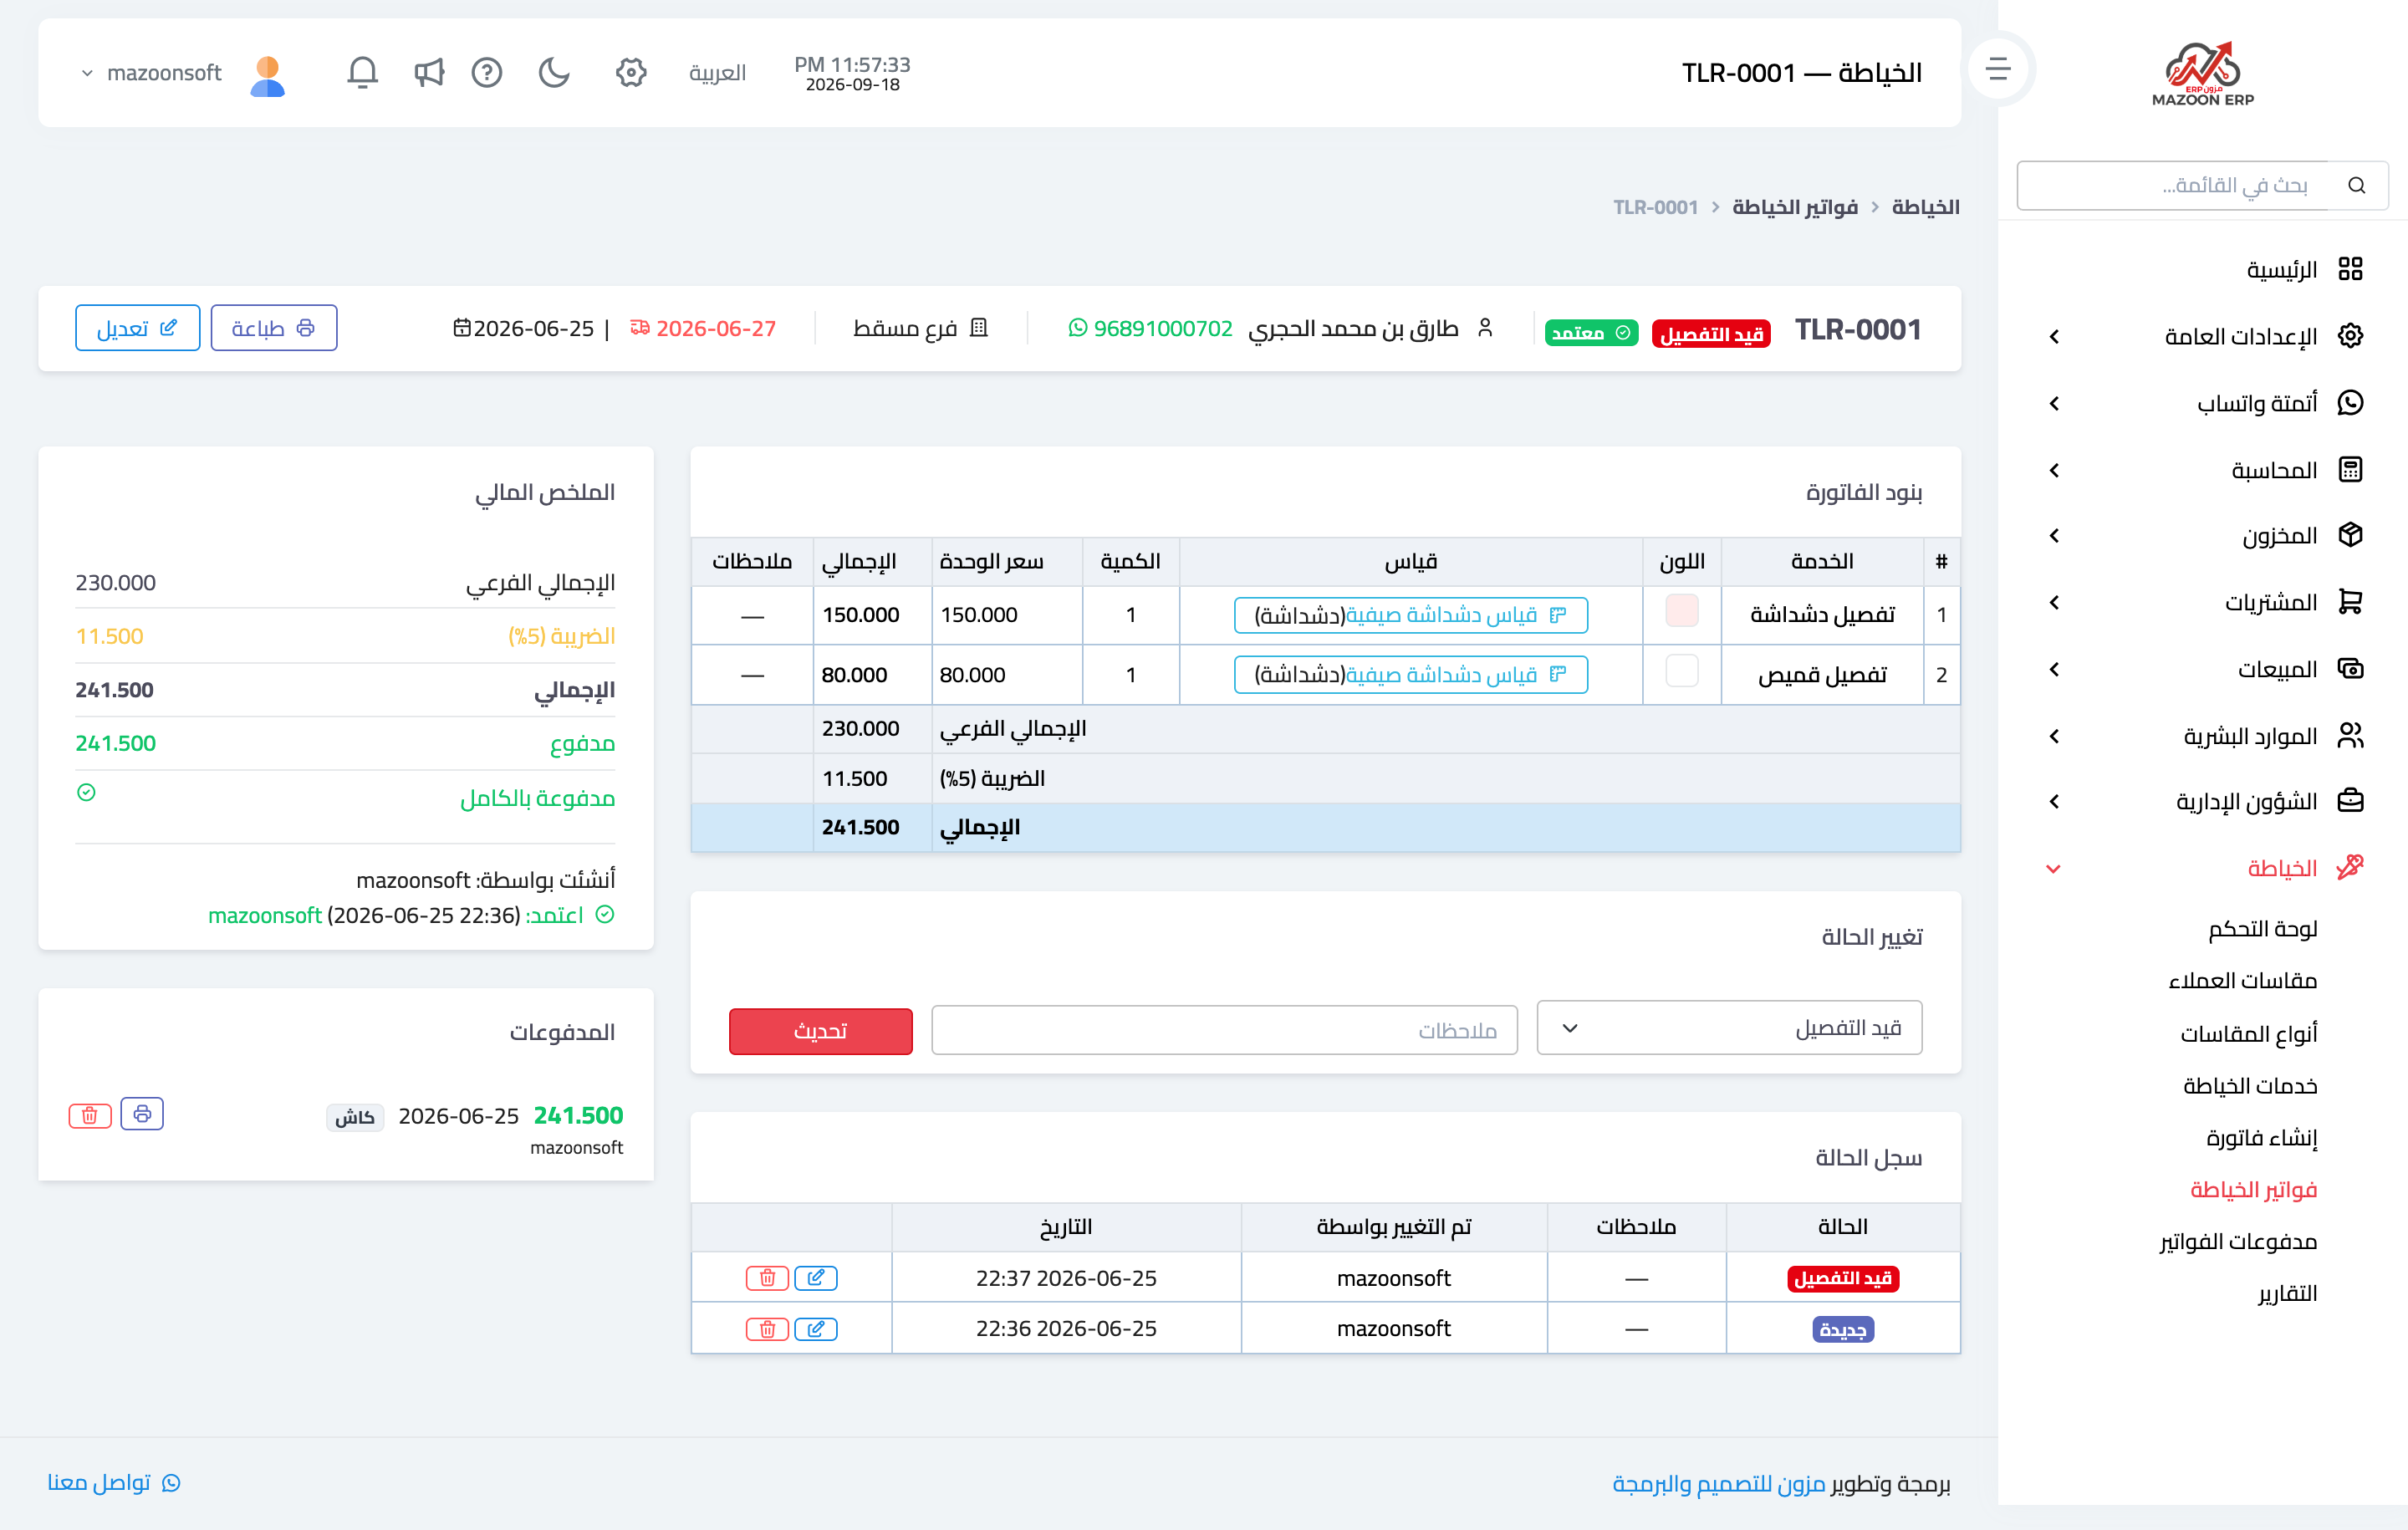
Figure 2
Try what you just read on your own data
Open a free 7-day trial — no credit card, with your own company link in minutes.