
How do I create a trip and set up its statuses?
A trip is the group that holds the travellers, the invoices and the expenses in one file, and it is how you learn what you made from it.
Creating a trip
- Open Travel → Trips — Figure 1 — and press the add button — Figure 2.
- Enter the trip name and choose the type: Hajj, Umrah or tourism.
- Set the departure date, the return date, the destination and the capacity (number of seats).
- Use the notes for the itinerary, the route and the mode of transport.
- Choose the status and press Save.
Trip statuses
From Trip Statuses — Figure 3 — you get the ready-made ones: scheduled, running, completed, cancelled. You can add your own with a name, a colour and a sort order.
Notes
- Capacity is not a decorative number; it warns you when the trip is full and stops you overselling.
- Do not delete a finished trip; mark it completed and it stays in the reports.
- Put the itinerary in the notes; it is what your staff will look at when a customer calls to ask.
Screenshots
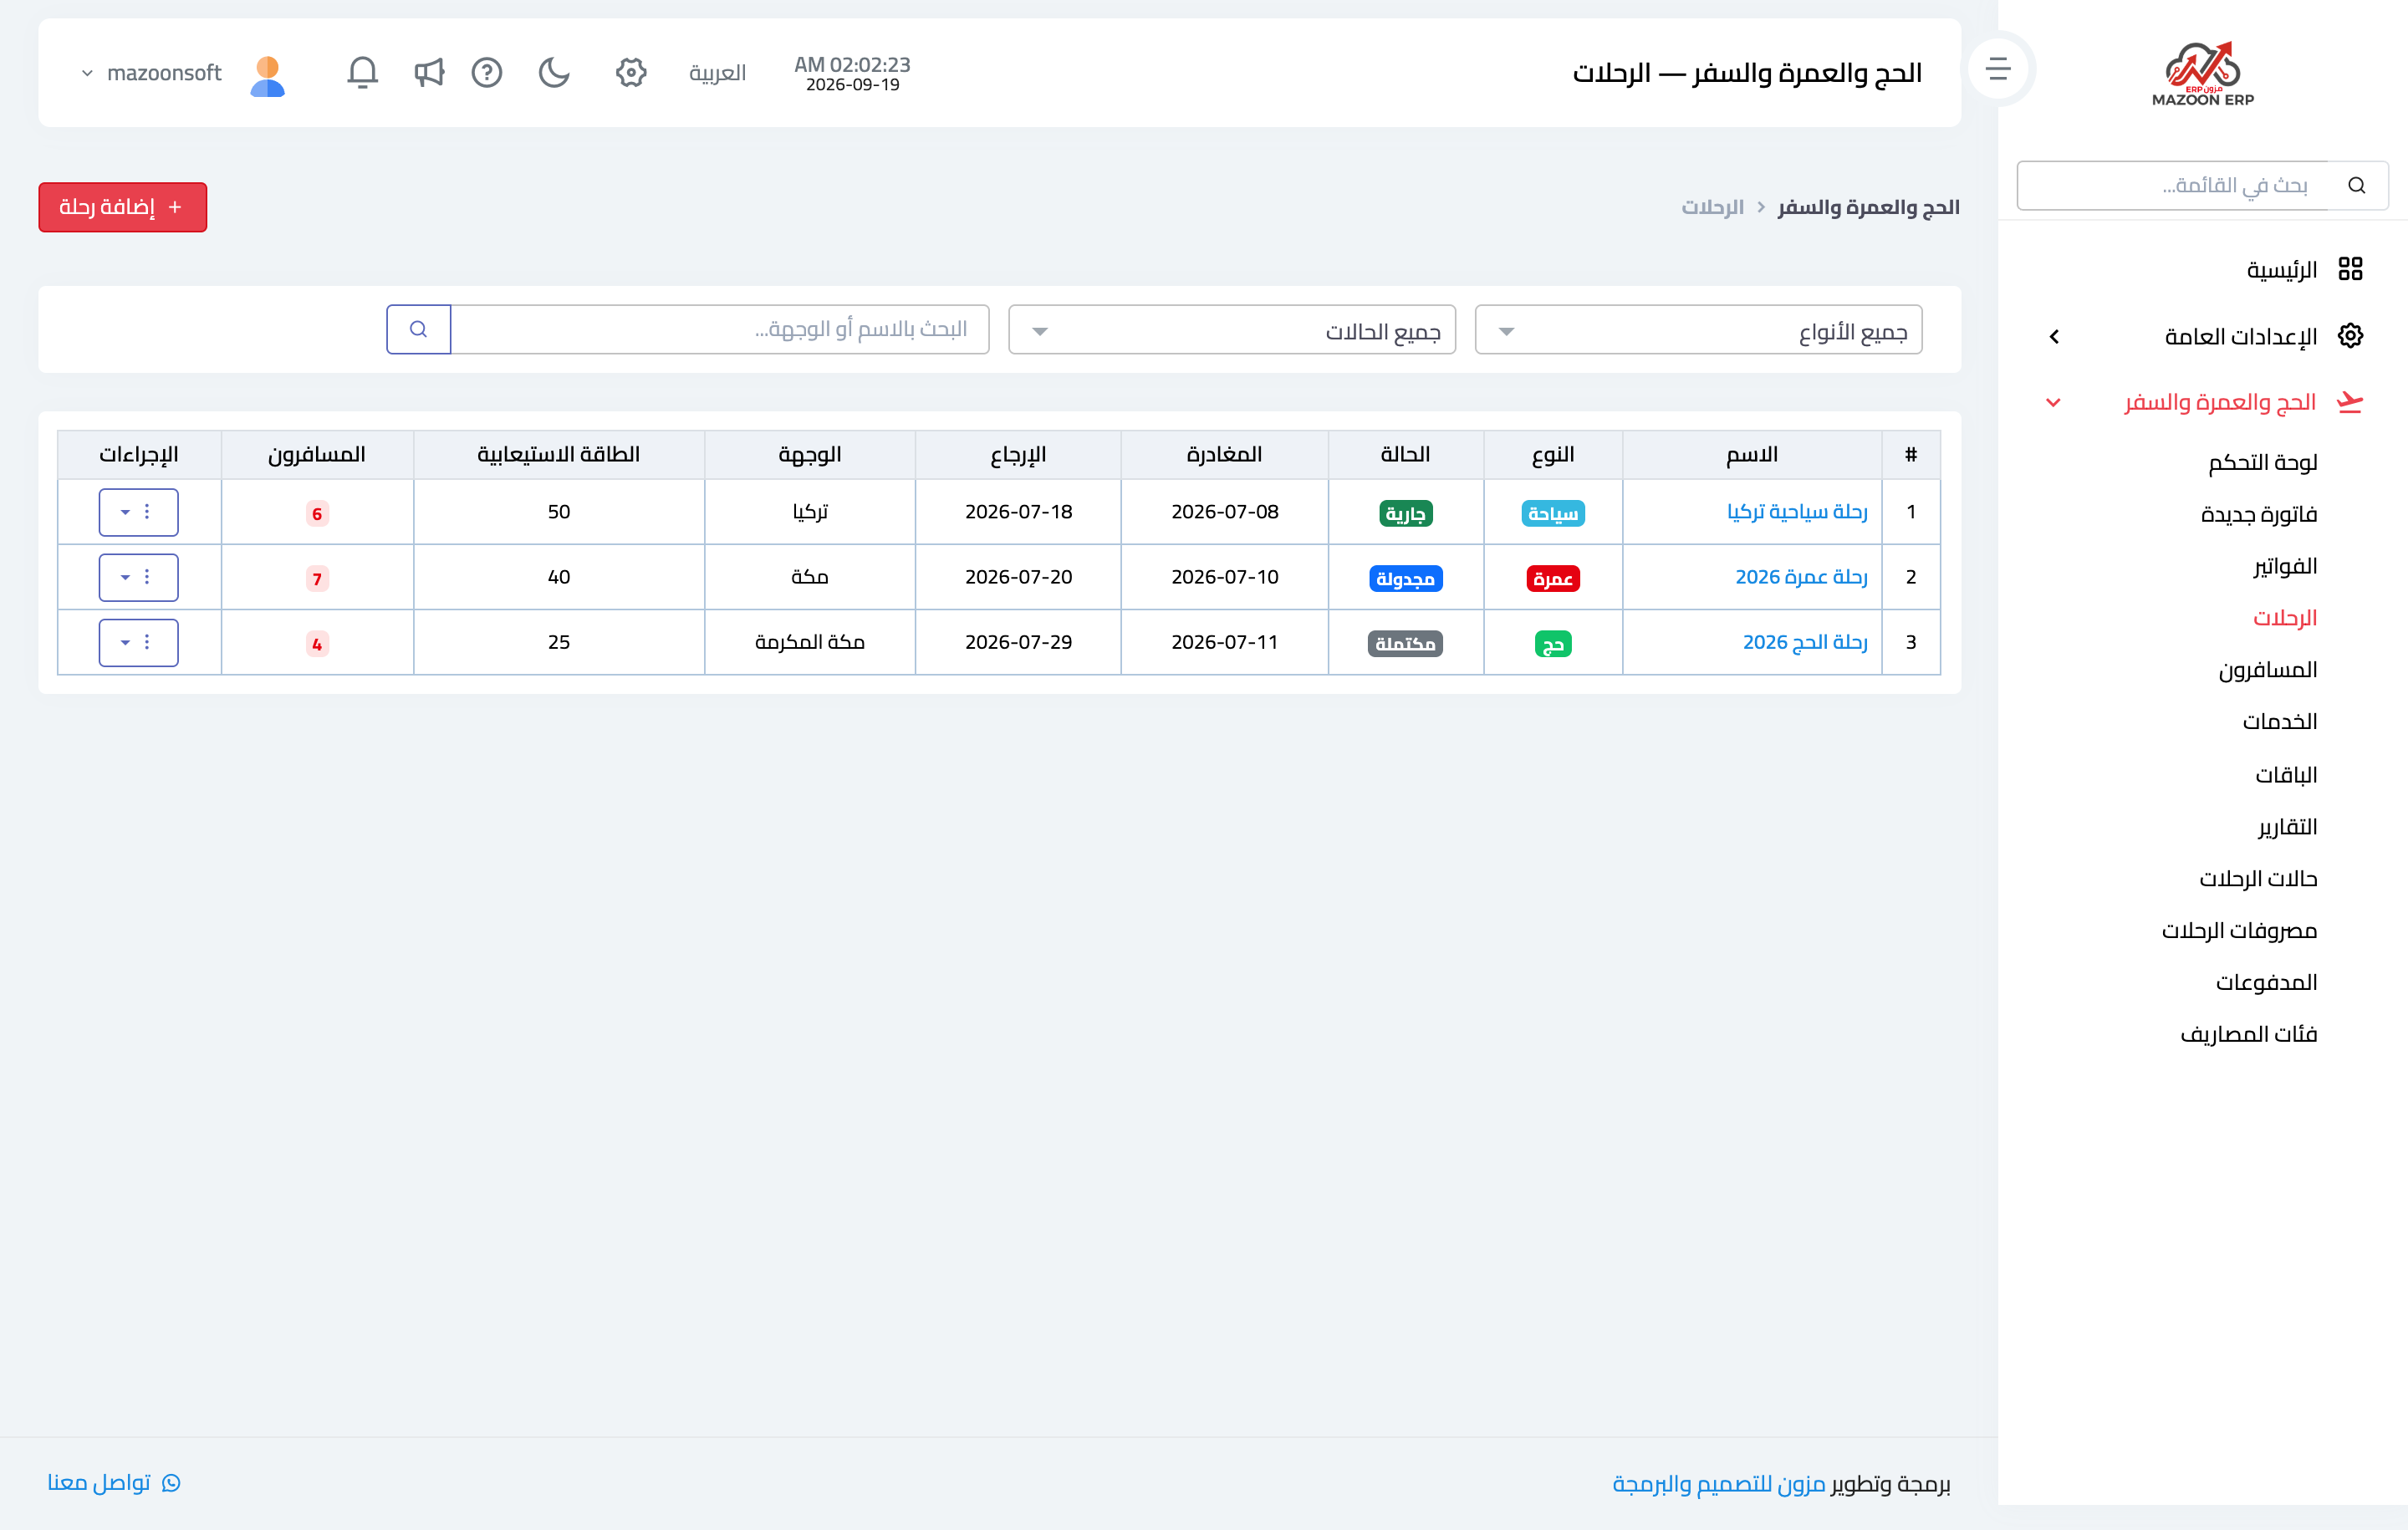
Figure 1
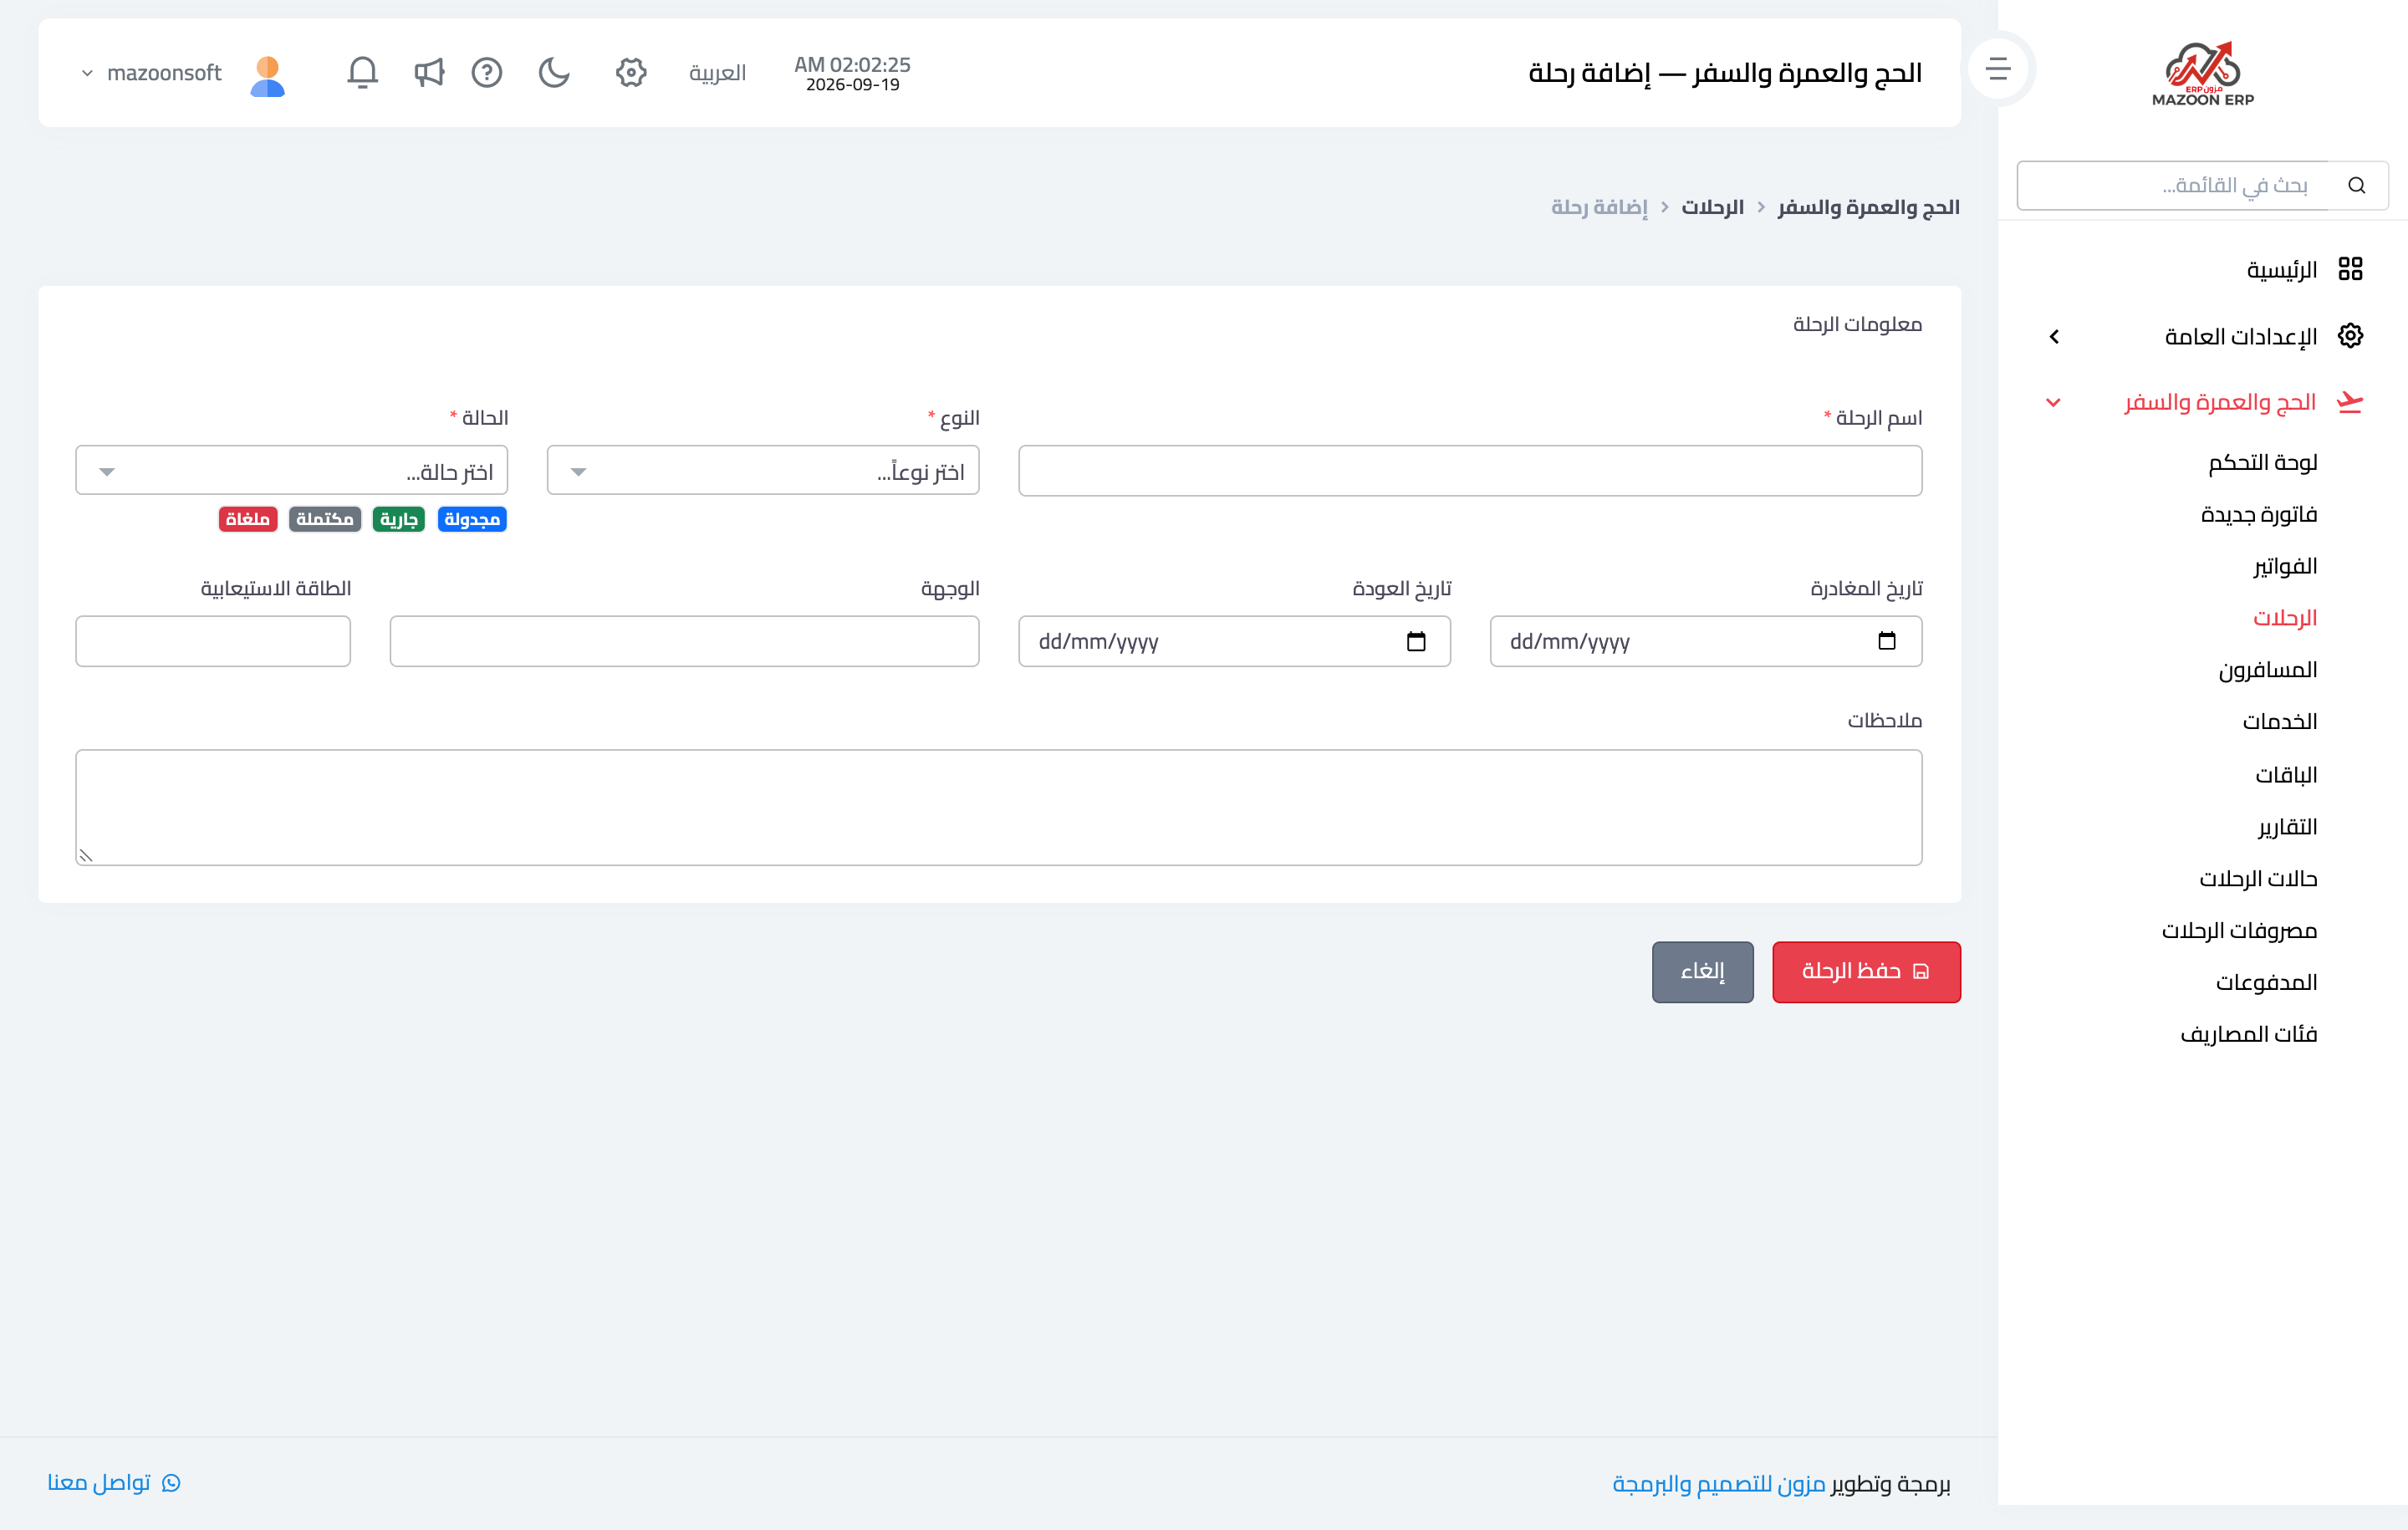
Figure 2
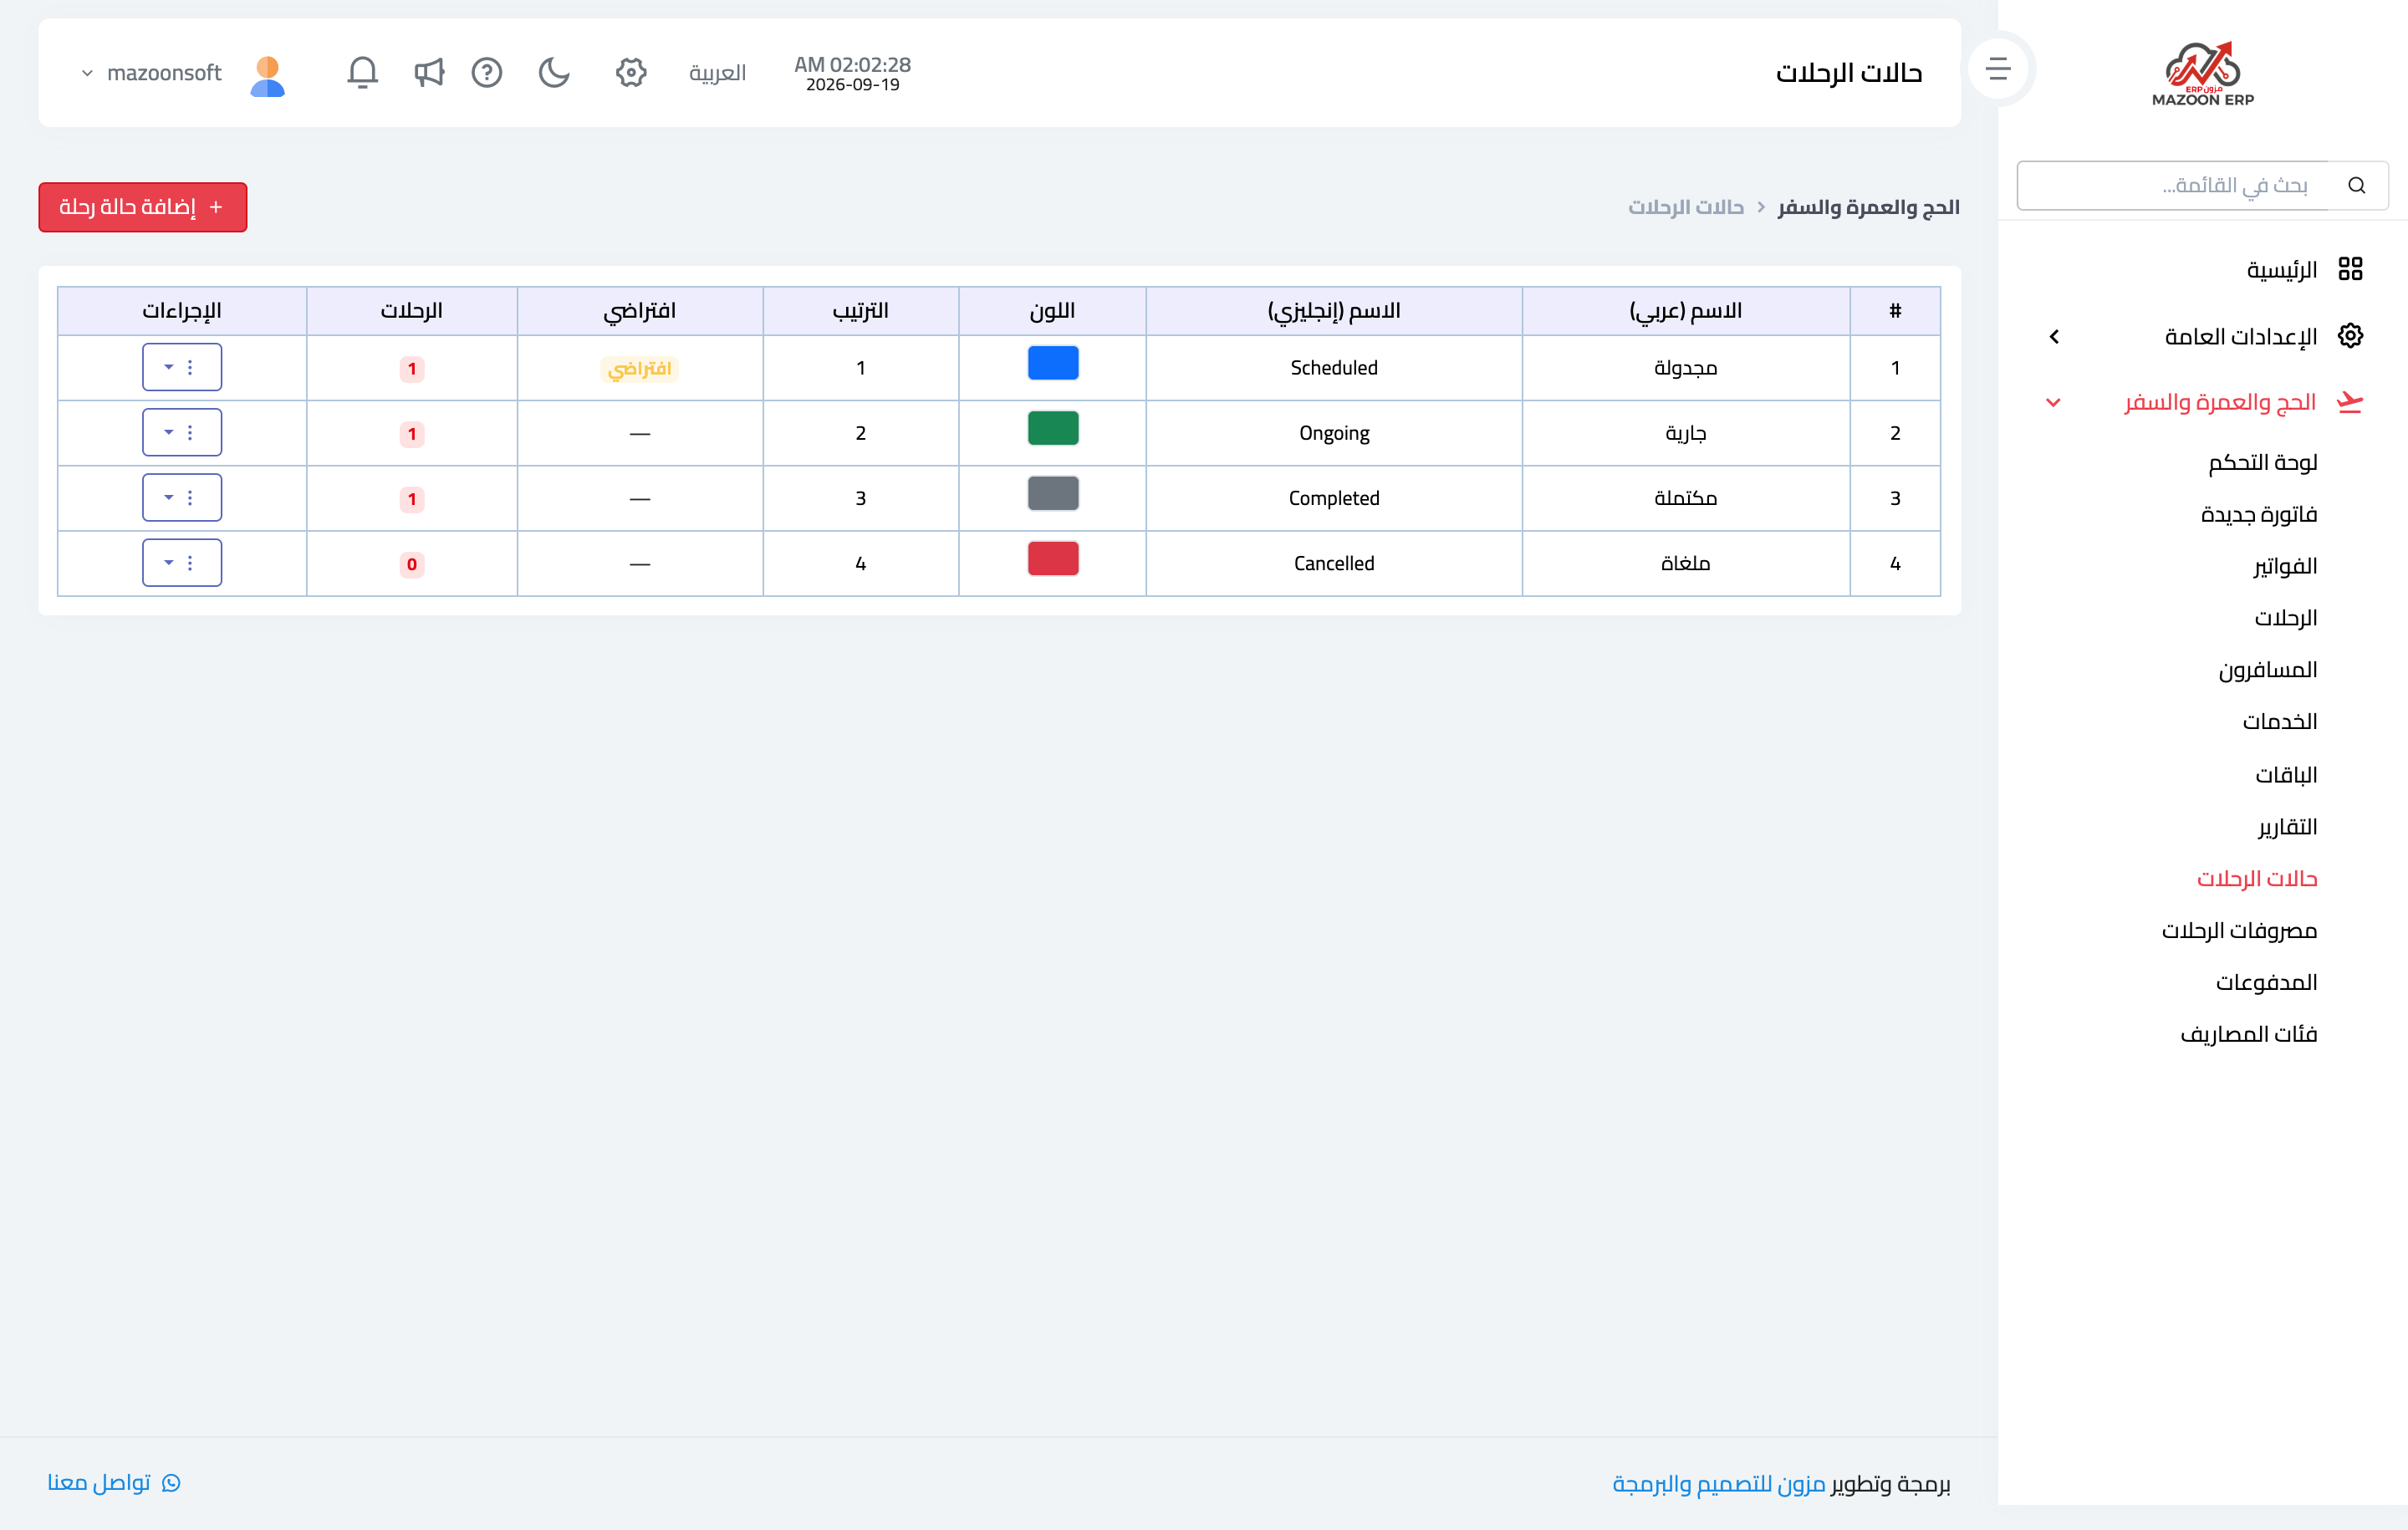
Figure 3
Try what you just read on your own data
Open a free 7-day trial — no credit card, with your own company link in minutes.